
Jump Start Your Garden with Early Spring Flowers
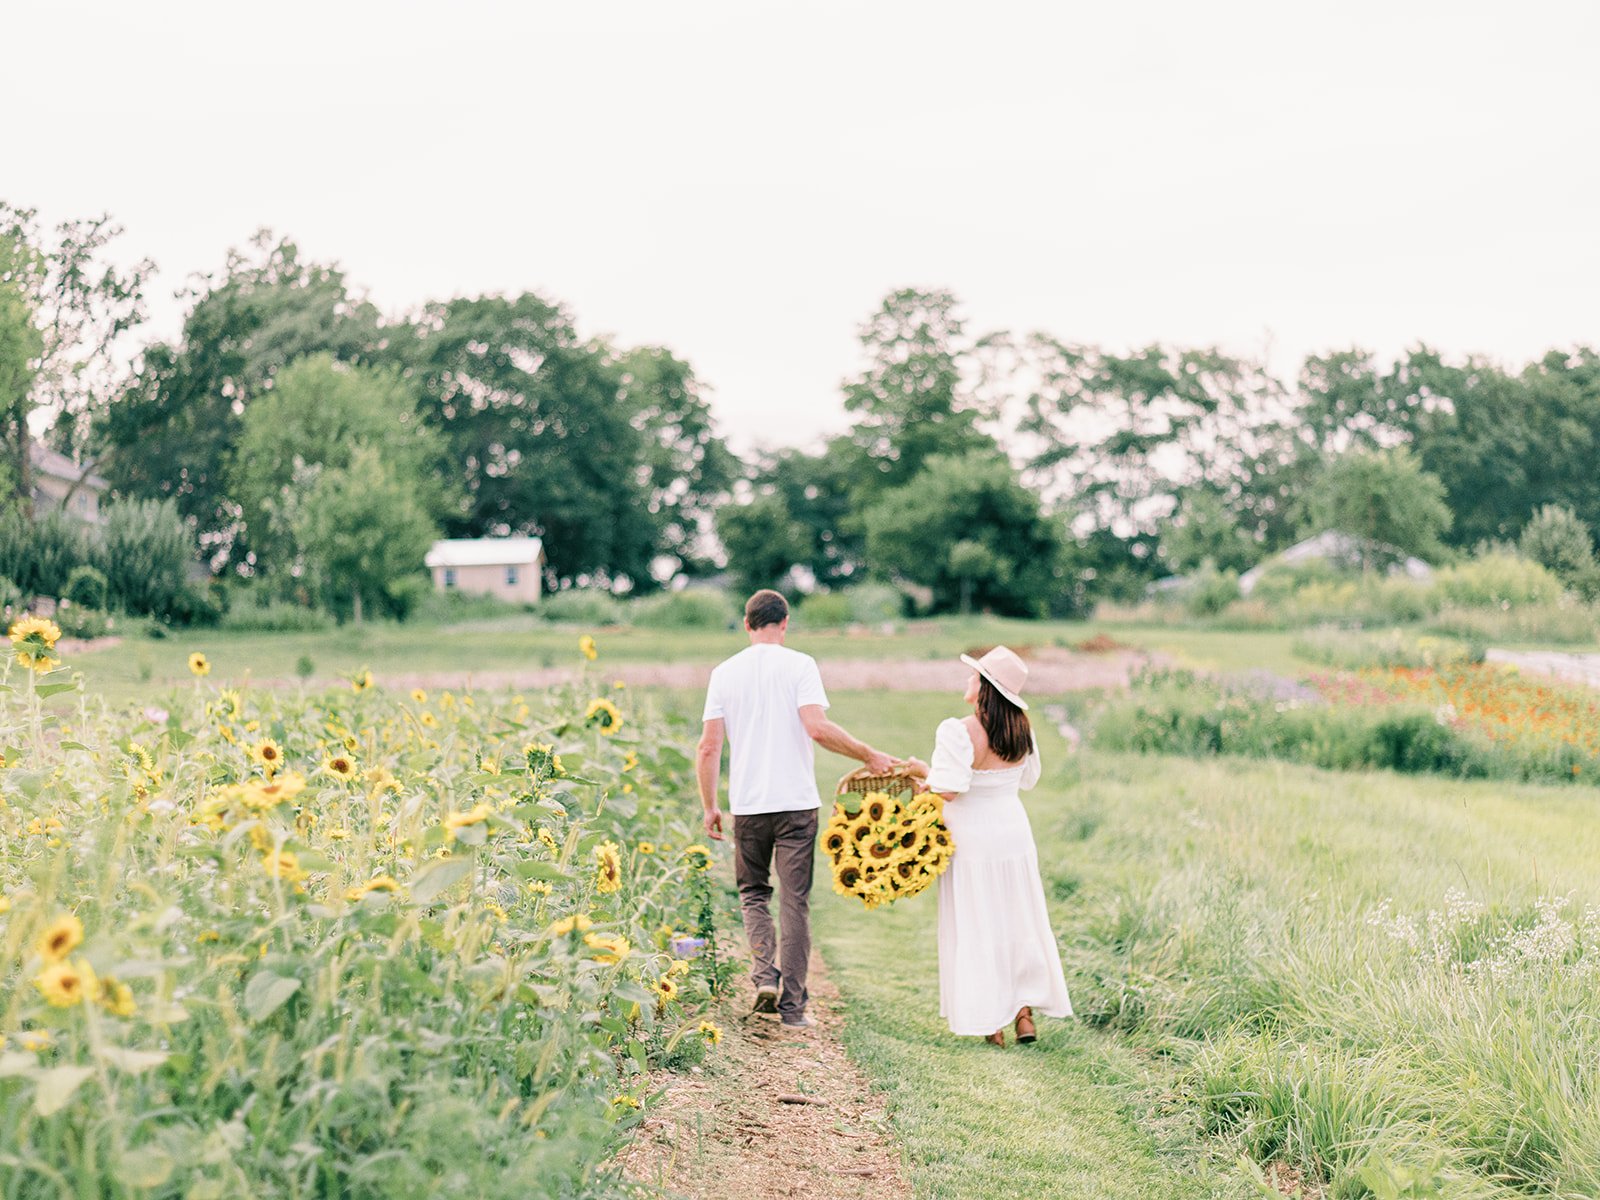
As winter's chill begins to fade, anticipation for spring blooms grows among gardeners. To get a head start on the season and satisfy your green thumb cravings, consider planting cold-tolerant early spring flowers like snapdragons, stock, larkspur, and bupleurum. Starting these beauties in February ensures blooms from late April to mid-June, perfect for vibrant bouquets and garden displays.
Utilizing heated propagation houses and unheated hoop houses, we kickstart our flower seeds to ensure optimal growth. Our favorites include snapdragons for their playful blooms, fragrant stock varieties, and the delicate spikes of larkspur in shades of blue, pink, and white. Don't overlook the subtle elegance of bupleurum or the whimsical charm of Nigella, also known as love-in-a-mist.
For an extra early start, consider starting ranunculus indoors. These rose-like flowers add a stunning burst of color to late spring gardens. And don't forget about the versatile options like Agrostemma, Ammi, and Forget-Me-Not, which offer a diverse range of colors and textures.
With careful attention and proper care, you'll be rewarded with a flourishing garden and an abundance of blooms as the days grow warmer. Stay tuned for more tips and tricks to make your garden thrive!
As winter’s grip stars to slip away, the first little spurts of warm weather tease, the grass shows signs of greening, and gardeners begin to anticipate the start of spring and flowers to come. A great way to get a head start on the season and to fulfill the need for growing a little something is to plant a variety of early blooming flowers that can withstand a bit of the lingering chill. In this blog post, we'll go over a handful of our tried and true early spring flowers – snapdragons, stock, larkspur, and bupleurum – all of which can be started very early. We’ll also provide a few tips on kickstarting ranunculus and planting them before the last frost, so you can have all of these beauties blooming at the same time for bouquets!
Growing flowers in zone 5b, our last frost date is usually around mid May. To jump start our growing season, we start early spring flowers in February to be able to have flowers blooming by late April clear through to mid June. This is a great way to have flowers blooming super early!
All of the seeds we start in February are allowed to grown in a heated propagation house, then we harden them off and plant out into the ground around any time between mid to the end of March. Most of the little seedlings to in a covered hoop house, but many of them will be planted directly into the ground. For those seedlings, planted in the ground, you have to make sure that if the temperatures drop below 25° F that they are covered with a frost cloth temporarily. During the warmer day temperatures, this will need to be removed.
Today, we’re sharing a great list of seeds we’re starting right now to have flowers as early as possible for spring bouquets.
Seeds We’re Starting Now

Agrostemma
Also called Corn Cockle (a terrible name) is a gorgeous early spring flower that adds a decicate airy touch to spring bouquets.
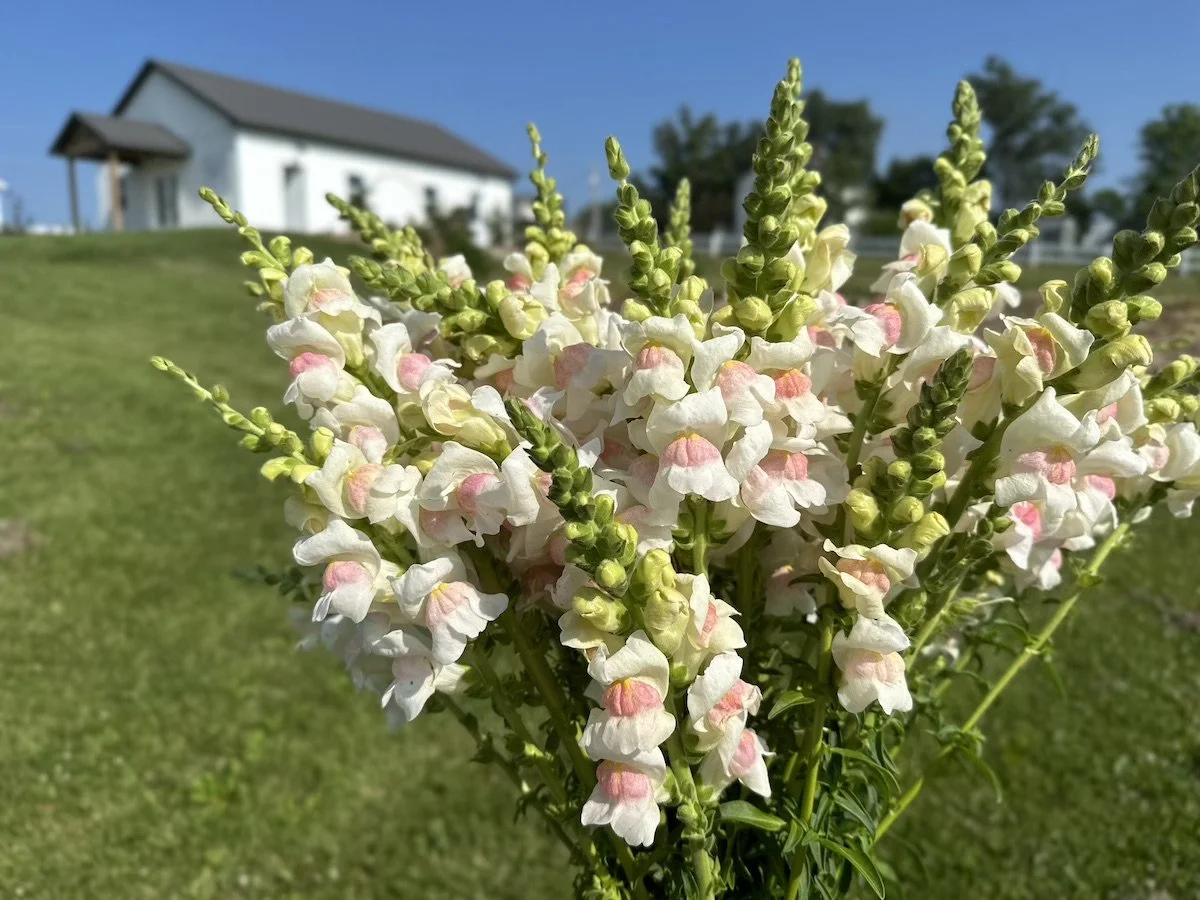
Stock: Stock, with its fragrant, densely packed flowers, is another cold-loving flower that can be started early. These flowers are not only cold-tolerant but also make delightful additions to cut flower arrangements. Pro-tip: these seeds like exposure to the light, so they need the seeds need to be sown closer to the top of the seed starting mix. We grow both the Katz and Iron series.
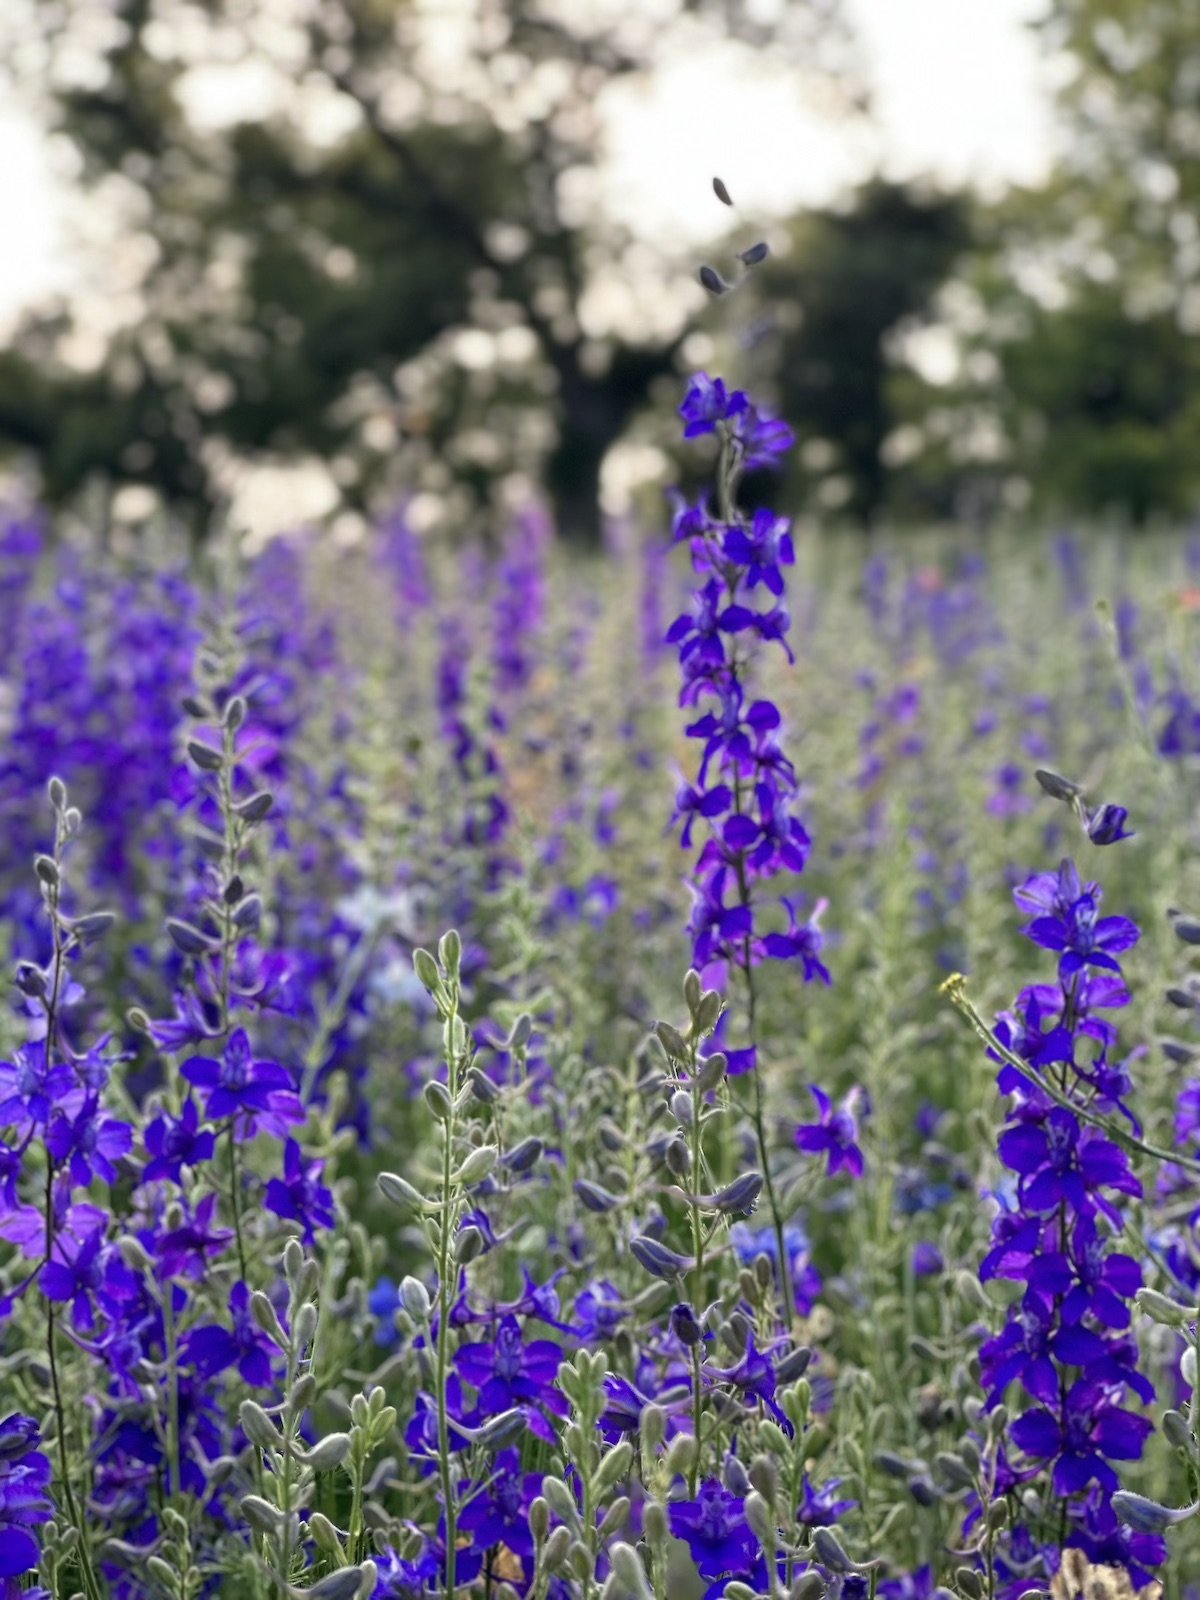
Larkspur: Larkspur, with its tall spikes of delicate blooms, is a charming addition to early spring gardens. Larkspur thrives in cooler temperatures and can endure light frosts, gracing your garden with shades of blue, pink, and white. With larkspur, we sow some directly out into the garden, and we also seed start some in trays to be planted out. Both ways work! For more seed starting directions for this flowers, check out our YouTube video.
Snapdragons
Snapdragons are well known for their fun, snap-like blooms that add a playful and beautiful touch to the garden. Our favorite varieties are any of the Costa series, which can be found on Johnny’s website. We also love Potomac Appleblossum, Maryland shell pink, and absolutely any Madame Butterfly series in the spring. They’re so delicate and perfect for early spring bouquets!
Snapdragons benefit from a very consistent, controlled environment. Because our prop house isn’t air tight, it means that the snapdragons will not thrive and will not germinate like we need them to. That was a learning lesson from last year. It was the first time that we’d grown in the propagation house here, and we saw that they needed a little bit more controlled environment, and they need a warmer environment. The warmer, the better for snapdragons.
Nigella
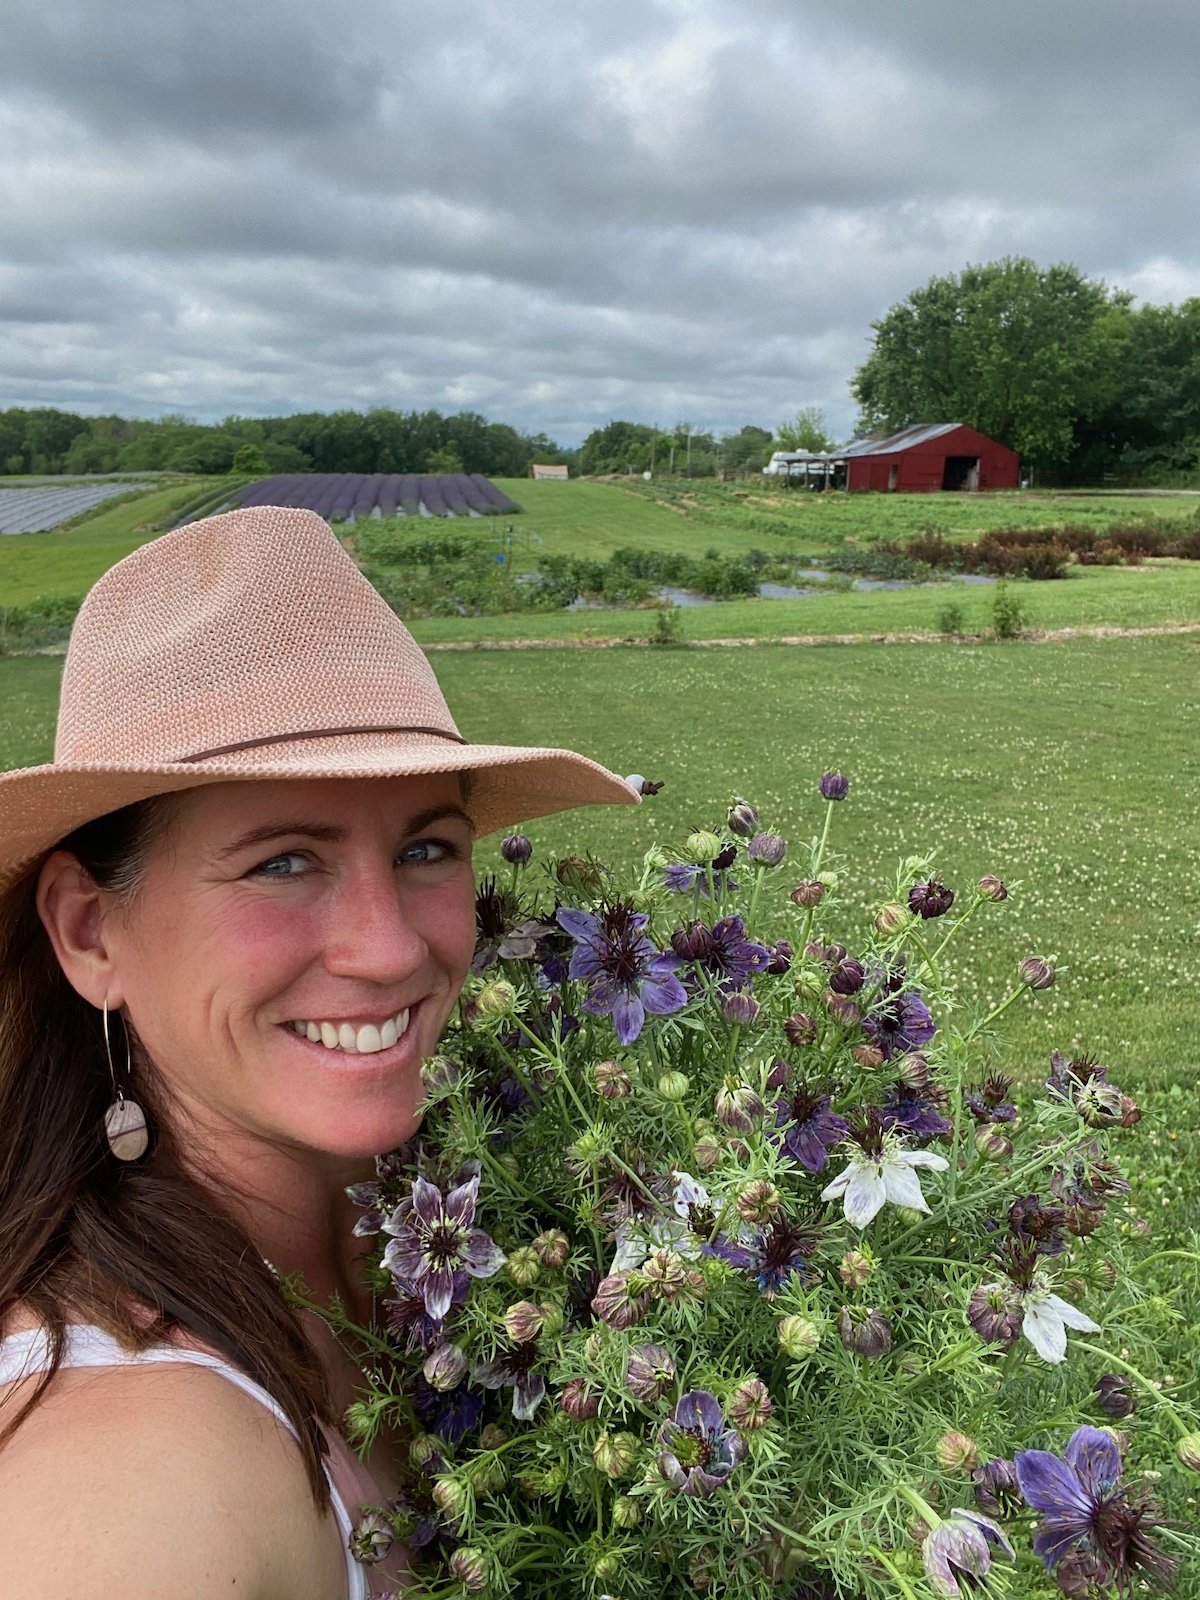
Nigella is also known as love-in-a-mist, is a delicate flower with intricate pastel blooms, perfect for spring bouquets. Its unique foliage and symbolism of love make it versatile and whimsical in various bouquet styles. Whether you use the bloom itself or the cool pod it makes after it blooms, either way is incredible and so fun!
Bupleurum: Bupleurum, an often-overlooked gem, boasts delicate greenish-yellow flowers and adds a unique texture to floral arrangements. This cold-tolerant plant is not only a fantastic filler in bouquets but also offers an airy elegance to your garden beds. This is another one that we included our seed starting tips and tricks for on YouTube. It’s a trickier seed to get started, so be sure to check it out.
Ranunculus: While ranunculus is not as cold-tolerant as some other early spring flowers, they can still be started indoors to get a head start on the growing season. Plant ranunculus tubers in pots or trays about 8-10 weeks before the last frost. Once the threat of frost has passed, transplant them into well-drained soil with plenty of sunlight. These vibrant, rose-like flowers will reward you with a stunning display of color in late spring.

Other GREAT Flowers Perfect for Starting Early Spring:
Ammi
Forget-Me-Not
Dara
Orlaya
Saponaria
We hope this have given y’all some inspiration of some flowers you can start in early spring to have flowers earlier in the season. All of the flowers we mentioned here provide a gorgeous array of color and texture in the garden and for bouquets. By starting these flowers early, providing them with the care they need, you'll be rewarded with a vibrant and flourishing garden and flowers for cutting, as the days grow longer and warmer.
XX Jenn and Adam
Seed Starting Basics
Embarking on the journey of gardening or flower farming unveils a world of possibilities, but for enthusiasts seeking precision and a bountiful harvest, seed starting emerges as an essential chapter in their horticultural adventure. This practice not only aligns with the rhythm of nature but also empowers cultivators with a meticulous approach to plant propagation.
The art of seed starting unfolds within the confines of indoor spaces or carefully curated environments like greenhouses, where the germination process is ushered into existence. No longer does one have to cast seeds into the open expanse of the garden, crossing fingers in hopes of sprouts. Instead, by commencing the journey indoors, gardeners seize command over the initial phases of a plant's life cycle, orchestrating a symphony of growth with calculated precision.
The beauty of starting seeds indoors lies not only in the hands-on involvement it necessitates but also in the certainty it bestows upon cultivators. Gone are the days of uncertainty, where the whims of nature dictated the fate of scattered seeds. Instead, by germinating and nurturing young plants in controlled environments, individuals gain a profound understanding of their impending floral abundance.
The allure of knowing exactly how many plants will grace the garden creates a sense of order amidst the chaotic beauty of nature. Seed starting transforms gardening into a strategic venture, offering a tangible and quantifiable measure of the impending botanical splendor. Beyond the meticulous counting of plants, there's an additional advantage that beckons enthusiasts – a head start on the growing season.
By initiating the seed starting process early, indoors, cultivators gain a temporal advantage that transcends the conventional boundaries of the growing season. This temporal leap propels them ahead, enabling an extension of the cultivation period and the promise of blooming flowers earlier in the seasonal ballet. As the world awakens to the warmth of spring, these preened seedlings, nurtured with care and intentionality, stand as a testament to the ingenuity of those who dared to cultivate the future amidst the embrace of their indoor sanctuaries.
Seed starting is a necessary part of gardening and flower farming that offers tons of advantages for flower lovers. By starting the germination process indoors or in a controlled environment, such as a greenhouse, you can gain control over the early stages of a plant's life cycle. Think: no more throwing seeds out into the garden, seeing if they will sprout. Starting seeds indoors and growing them up before planting them out is helpful, because you know exactly how many plants you’re going to have. Also, doing seed starting early, indoors, can give you a huge head start on the growing season! This helps to extend the cultivation period to have blooms earlier in the growing season.

Starting Plants from Seeds:
Starting plants from seed fosters a deeper understanding of plant biology and horticulture, because you get to witness the complete life cycle from germination to maturity of your plants. It almost feels like magic! Additionally, starting from seeds gives you access to a larger amount of plant varieties, including heirlooms and a few unique selections not commonly found as established plants at nurseries. Ultimately, starting plants from seeds gives flower growers more flexibility, knowledge, and a sense of connection to the plants they’re cultivating.
Where to Begin with Seed Starting
Selecting the Right Seeds:
Choose Varieties Suitable for Your Region and Climate:
Consider local climate conditions and conditions in your own growing space such as temperature, sunlight, and humidity.
Research plant hardiness zones to match varieties that can grow in your region.
Check seed packets for information on ideal growing conditions.
Essential Tools and Supplies:
Seed Trays, Pots, and Containers:
Choose containers with drainage holes to prevent seedlings from getting waterlogged.
Use trays for easy organization and transportation of seedlings.
For home gardeners, opt for biodegradable pots that can be planted directly into the soil to minimize transplant shock. For larger scale flower farming, uses a butter knife to pry the seedling out of the seed staring cell tray.
Quality Seed Starting Mix:
Select a sterile and well-draining seed starting mix to prevent diseases and provide proper aeration.
Look for mixes with a balanced blend of peat moss, vermiculite, and perlite.
Avoid using regular garden soil, as it can be too heavy and may harbor pathogens.
Proper Lighting and Temperature Requirements:
Provide adequate light with fluorescent or LED grow lights if natural sunlight is insufficient.
Monitor and maintain consistent temperatures for germination, typically between 70-80°F (21-27°C).
Adjust lighting height and duration as seedlings grow to prevent leggy growth.

Indoor Seed Starting:
Creating a Dedicated Seed Starting Area:
Designate a well-lit and warm area for indoor seed starting, such as a windowsill, greenhouse, or under grow lights.
Consider using a waterproof tray to contain any water spills and keep the area tidy.
Timing and Scheduling for Successful Germination:
Calculate the ideal germination time by working backward from your region's last expected frost date.
Consult seed packets for specific germination timelines and instructions.
Use a seed starting calendar to plan when to sow seeds based on the desired transplant date.
Outdoor Seed Starting:
Direct Sowing in the Garden:
Choose plants that are well-suited for direct sowing, such as sunflowers, cosmos, zinnias, etc.
Prepare the garden bed by clearing debris and loosening the soil.
Follow seed packet instructions for planting depth and spacing, and water the area regularly until seeds germinate.

Soil Preparation & Care:
Nutrient Availability: Ensure the soil is rich in essential nutrients, as seedlings rely on these nutrients during early growth.
Texture and Aeration: Choose a well-draining seed starting mix with a fine texture to promote root development and prevent waterlogging.
pH Level: Check and adjust the pH level of the soil to create an optimal environment for seed germination and seedling growth.

Watering & Humidity Control:
Water gently to avoid displacing seeds or compacting the soil.
Keep the soil consistently moist, but not waterlogged, to support germination and early growth.
Use a watering can with a fine nozzle for precision
Maintain a consistent humidity level in the seed starting area, especially for indoor germination.
Use a humidity dome or cover trays with plastic wrap to create a greenhouse effect.
Ventilate the area regularly to prevent fungal issues and promote healthy air circulation.

Identify When Your Seedlings Are Ready to be Transplanted Outside:
True Leaves Stage: Seedlings are typically ready for transplanting when they have developed their first fours sets of leaves.
Root Development: Check for a well-established root system by gently removing a seedling from its container to inspect root growth.
The Bigger the Better: Even though little seedlings are okay to be transplanted outdoors, the bigger you can grow your little seedlings before you transplant outdoors, the better.
Before Transplanting, Get Your Seedlings Ready Via the Hardening Off Process
What is the Hardening Off Process? It’s the gradual exposure to outside growing conditions. The plants will literally start out tender and with exposure to outside elements, will begin to feel stiff to the touch.
Start Slowly: Gradually introduce seedlings to outdoor conditions by placing them in a sheltered (protected from too much wind), shaded area for short periods. Example: Day 1 = 1 hour; Day 2 = 2 hours, etc.
Increase Exposure Time: Slowly extend the time seedlings spend outdoors over the course of 1-2 weeks.
Adjust Light Levels: Gradually expose seedlings to direct sunlight, starting with filtered light and progressing to full sun exposure.
Importance of Acclimating Seedlings Before Transplanting:
Prevents Transplant Shock: Hardening off helps seedlings acclimate to the differences in temperature, light, and wind between indoor and outdoor environments, reducing the risk of transplant shock.
Promotes Stronger Growth: Seedlings that undergo a hardening-off process tend to develop stronger stems and roots, enhancing their ability to withstand outdoor conditions.
Minimizes Stress: Acclimating seedlings gradually minimizes stress, allowing them to adjust to the new environment without compromising their health and vigor.
After your little seedlings have been transplanted outside, water them at least every other day, especially if it’s hot outside, but allow for the ground to dry out in between. Watering plant babies well in the beginning helps to get them established. Once established, they do not require a ton of watering unless there are draught conditions that affect the plant.

We hope you learned some basic seed starting tips and tricks! Starting seeds ahead of the growing season is a great way to get a jump on starting flowers before the last frost date. This way, you can enjoy beautiful bouquets earlier in the season. If you’re looking for a great place to grab seeds to start your garden this year, check out our seeds that go online February 10th at Noon. Most of the varieties we grow here on the farm will be available in our seed shop. Grow a little piece of PepperHarrow in your garden!
XX Jenn and Adam

Cultivating Specialty Celosia at PepperHarrrow
Meet the plant enthusiasts behind PepperHarrow, Adam and Jenn, who embarked on an eight-year journey to enhance the beauty of celosia blooms. Starting with a small patch of heirloom peach celosia, they observed fascinating cross-variegation, leading to the creation of unique varieties – Chester Copperpot, Starlight, and Rainbow Sherbet.
Genetic Separation Process:
Selection of Parent Plants: Choosing those with desired traits like color and form.
Cross-Pollination: Natural pollinator-assisted cross-pollination to create unique combinations.
Isolation of Traits: Careful observation and isolation of specific traits in seeds.
Generation Selection: Successive generations refined traits for stable characteristics.
Distinctive Varieties:
Chester Copperpot Mix: Rich coppery hues in shades of gold, hot pink, and red.
Starlight Mix: Celestial blooms with a unique flower structure.
Rainbow Sherbet: Burst of variegated, vibrant colors reminiscent of a summer sunset.
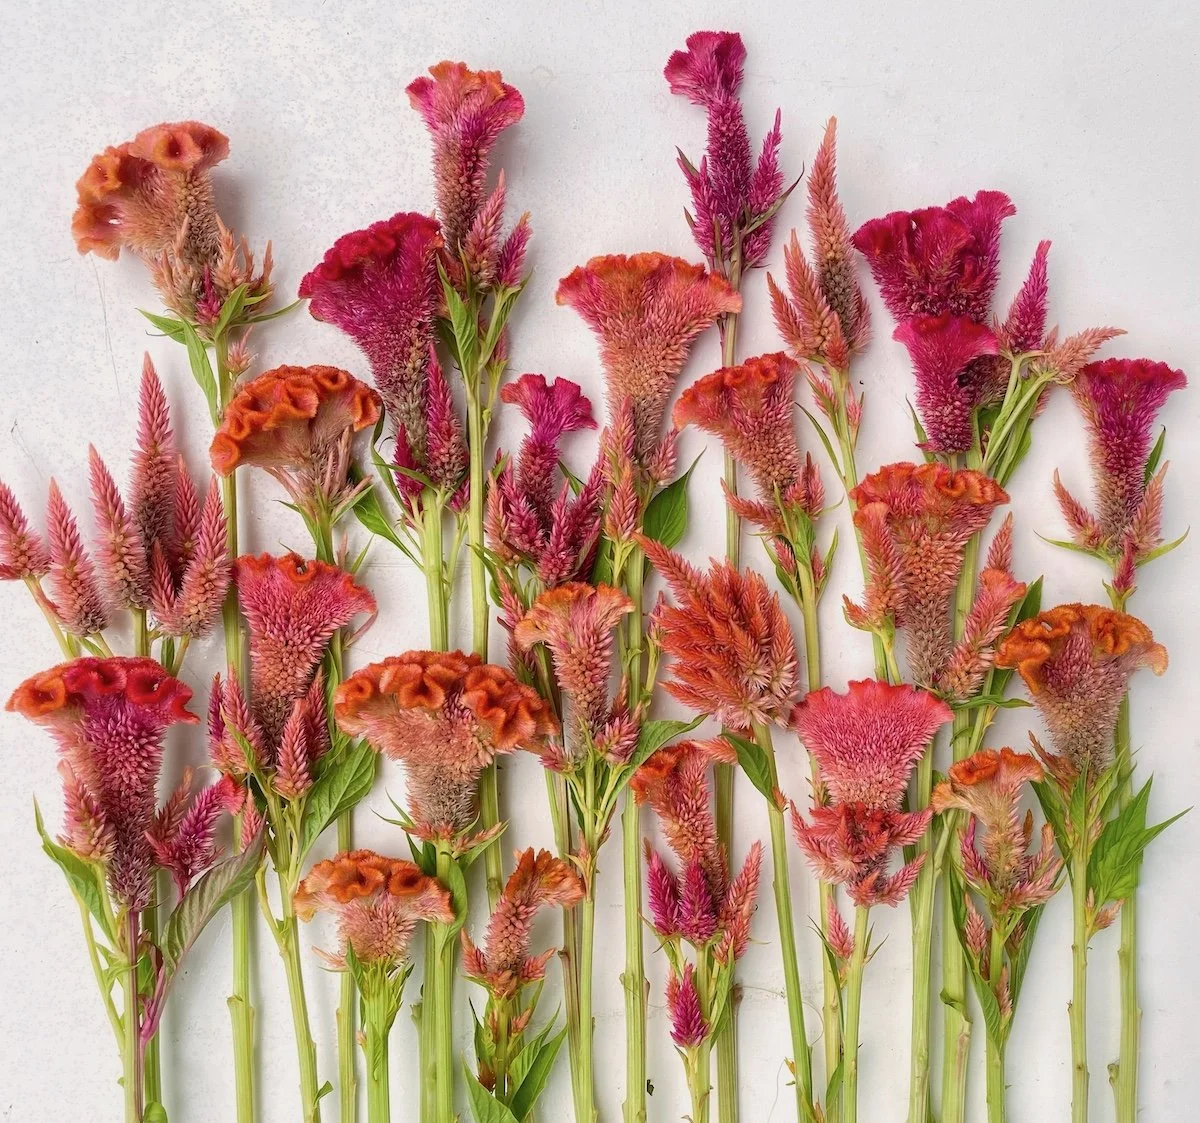
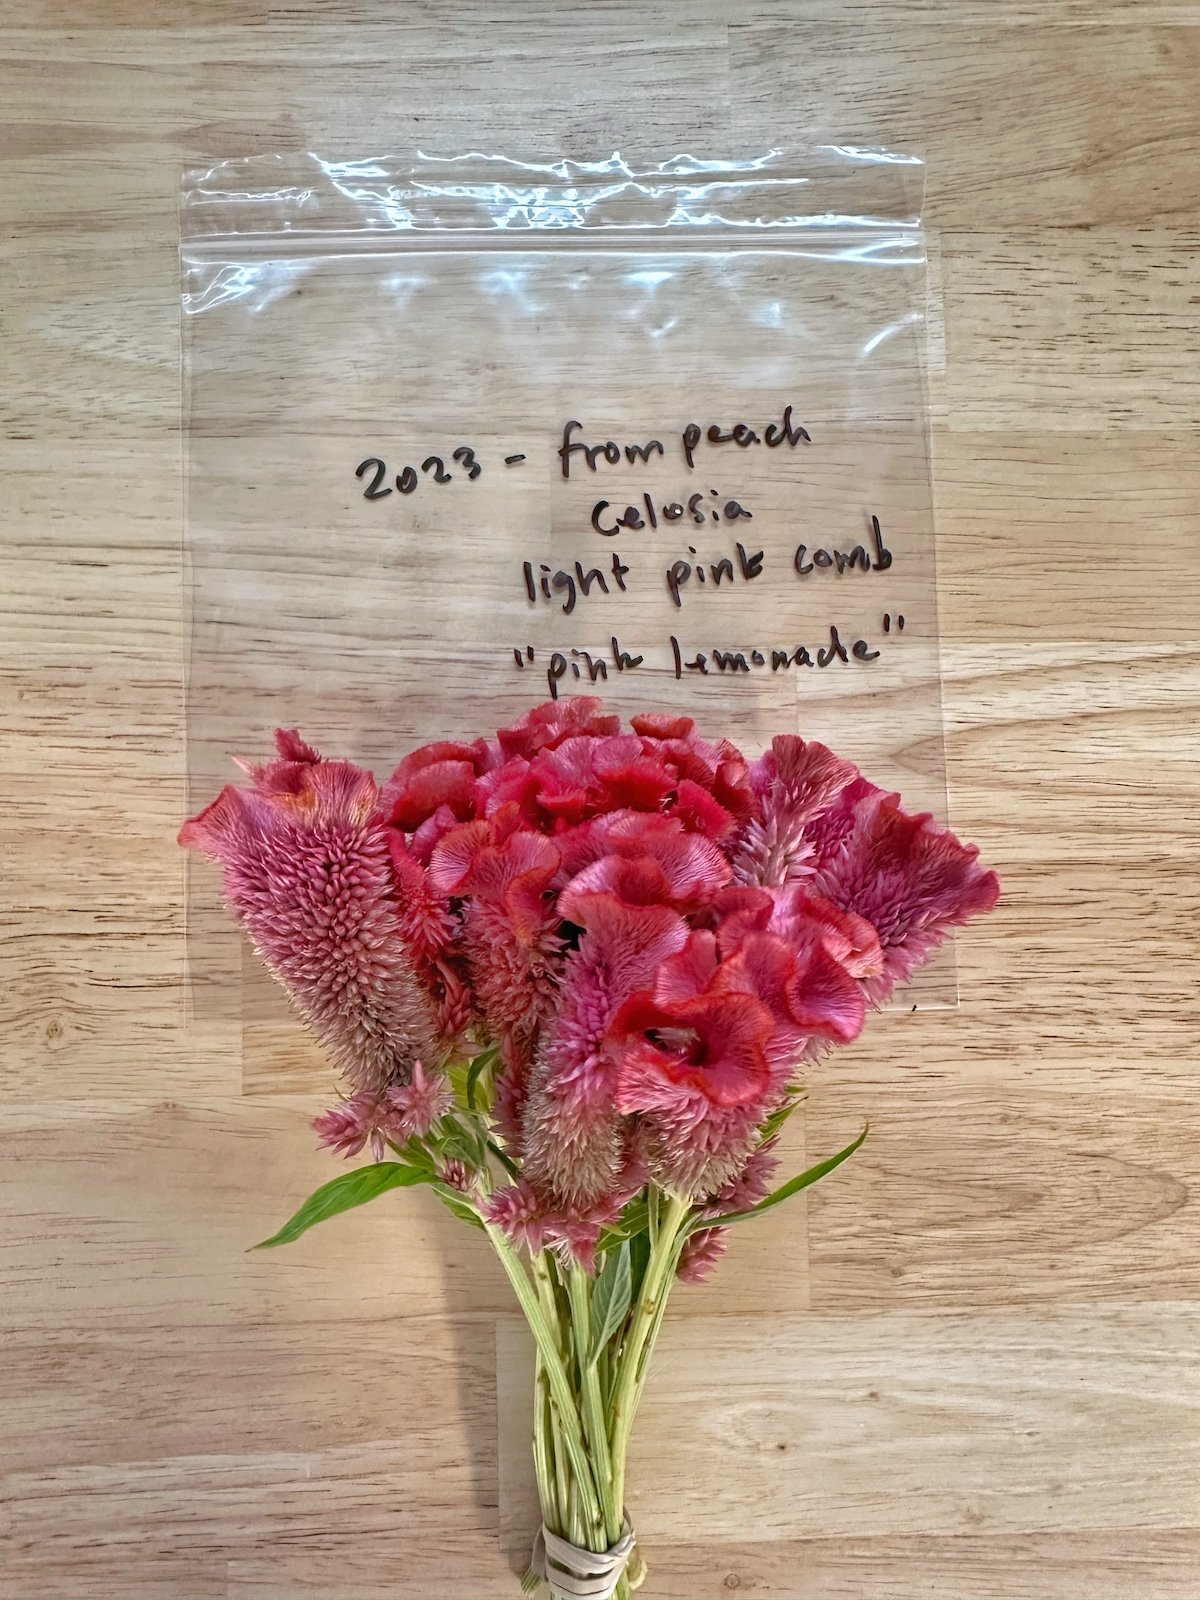
PepperHarrow's success in genetic experimentation extends beyond, with 'Pink Lemonade' as the latest intriguing specimen. These celosia varieties are not just flowers; they are living art, showcasing the endless possibilities in horticulture. As PepperHarrow continues to push floral boundaries, their farm remains a testament to the harmonious intersection of science and nature, where innovation blooms in every petal.
At the heart of our flourishing flower farm, live two self professed plant nerds, Adam and Jenn. Haha! Yes, that’s us. We’ve been doing something special on our flower farm over the last eight years to elevate the beauty of celosia blooms.
It started with a small patch of heirloom peach celosia blooms that started to cross with one of our hot pink varieties, creating a gorgeous peach/hot pink variegation, which was pretty cool to see. From there, we started to see our original peach variety morph into a gorgeous coppery color. Finally, we saw one of our pink varieties of plumed celosia start to take on a blush color with hints of coral. We knew we had found another favorite that we wanted to separate out to create a gorgeous new variety.
After seeing each of these unique varieties, we started on a three year journey to begin to separate genetics on each of these gorgeous abnormalities to create three stunning varieties we now have named: Chester Copperpot, Starlight, and Rainbow Sherbet.
In this blog post, we will talk a little more about these varieities and dip our toes into the interesting world of genetic experimentation and take a glimpse at the process behind the creation of our unique celosia varieties.
Separating Genetics
Creating new and distinct celosia varieties involves separation of genetics to isolate desirable traits (form, color, etc). As we discussed above with our celosia experimentation, we focused on traits like unique color traits, and unique shapes.
The process can be summarized in a few key steps:
Selection of Parent Plants: We began by selecting parent plants with the desired traits we wanted to see in our new celosia varieties. Chester Copperpot, Starlight, and Rainbow Sherbet were envisioned to be extraordinary in color, form, and overall aesthetic appeal.
Cross-Pollination: Natural pollinator (bee, butterfly, beneficial insect) cross-pollination was carried out between the selected parent plants. This involved transferring pollen from the male flowers of one plant to the female flowers of another. This mixing of genetic material set the stage for the creation of unique combinations. It’s worth mentioning that if you want to be more intentional with your crosses, you should do this process by hand and isolate the plants, covering as to not allow further open cross-pollination.
Isolation of Traits: After successful cross-pollination, the seeds obtained carried a diverse genetic makeup. The next step was to take note of all of the plant details, color, size, etc, and isolate the specific traits we aimed to emphasize. This process required quite a bit of patience and attention to detail.
Generation Selection: Over successive generations, we kept selecting plants that exhibited the desired traits consistently. This process helped refine the genetic makeup, ensuring the stability of the characteristics we sought in our celosia varieties.
The birth of Chester Copperpot, Starlight, and Rainbow Sherbet. After years of dedicated work and nurturing, the distinctive celosia varieties—Chester Copperpot, Starlight, and Rainbow Sherbet—blossomed into existence. We love getting to share these unique varieties with gardeners, flower growers, and flower farmers alike!

Chester Copperpot Mix
With its rich coppery hues and fun shape, Chester Copperpot is a stand out of our variety. This mix comes in coppery shades shown here, as well as gold, hot pink, and red.

Starlight Mix
True to its name, Starlight boasts blooms that look like starlight. The delicate interplay of colors and the unique flower structure make Starlight a celestial beauty that captivates all who behold it.

Rainbow Sherbet
A burst of variegated, vibrant colors characterizes Rainbow Sherbet. With hues reminiscent of a summer sunset, this variety is a harmonious blend of fuchsia and orange. Each bloom is a sweet treat for the eyes.
Our journey doesn’t end here. With these absolutely gorgeous varieties we’ve grown, we’re even more intrigued and excited to create even more beautiful varieties. Over the growing season, we snagged a few more unique specimens that we have high hopes for in the future. Shown below is our latest celosia that we’ve already pre-named ‘Pink Lemonade’. If we can isolate them and get them to keep this unique color over the next two growing seasons, this will be one we will release into the growing market.

PepperHarrow's venture into genetic experimentation has had great success. Three new, extraordinary celosia varieties have been created out of this process to grace gardens all over the country.
Chester Copperpot, Starlight, and Rainbow Sherbet are not just flowers; they are living works of art that showcase the endless possibilities within the realm of horticulture. As we continue to push the boundaries of floral beauty, our flower farm remains a testament to the intersection of science and nature, where innovation blooms in every petal.
XX Jenn and Adam

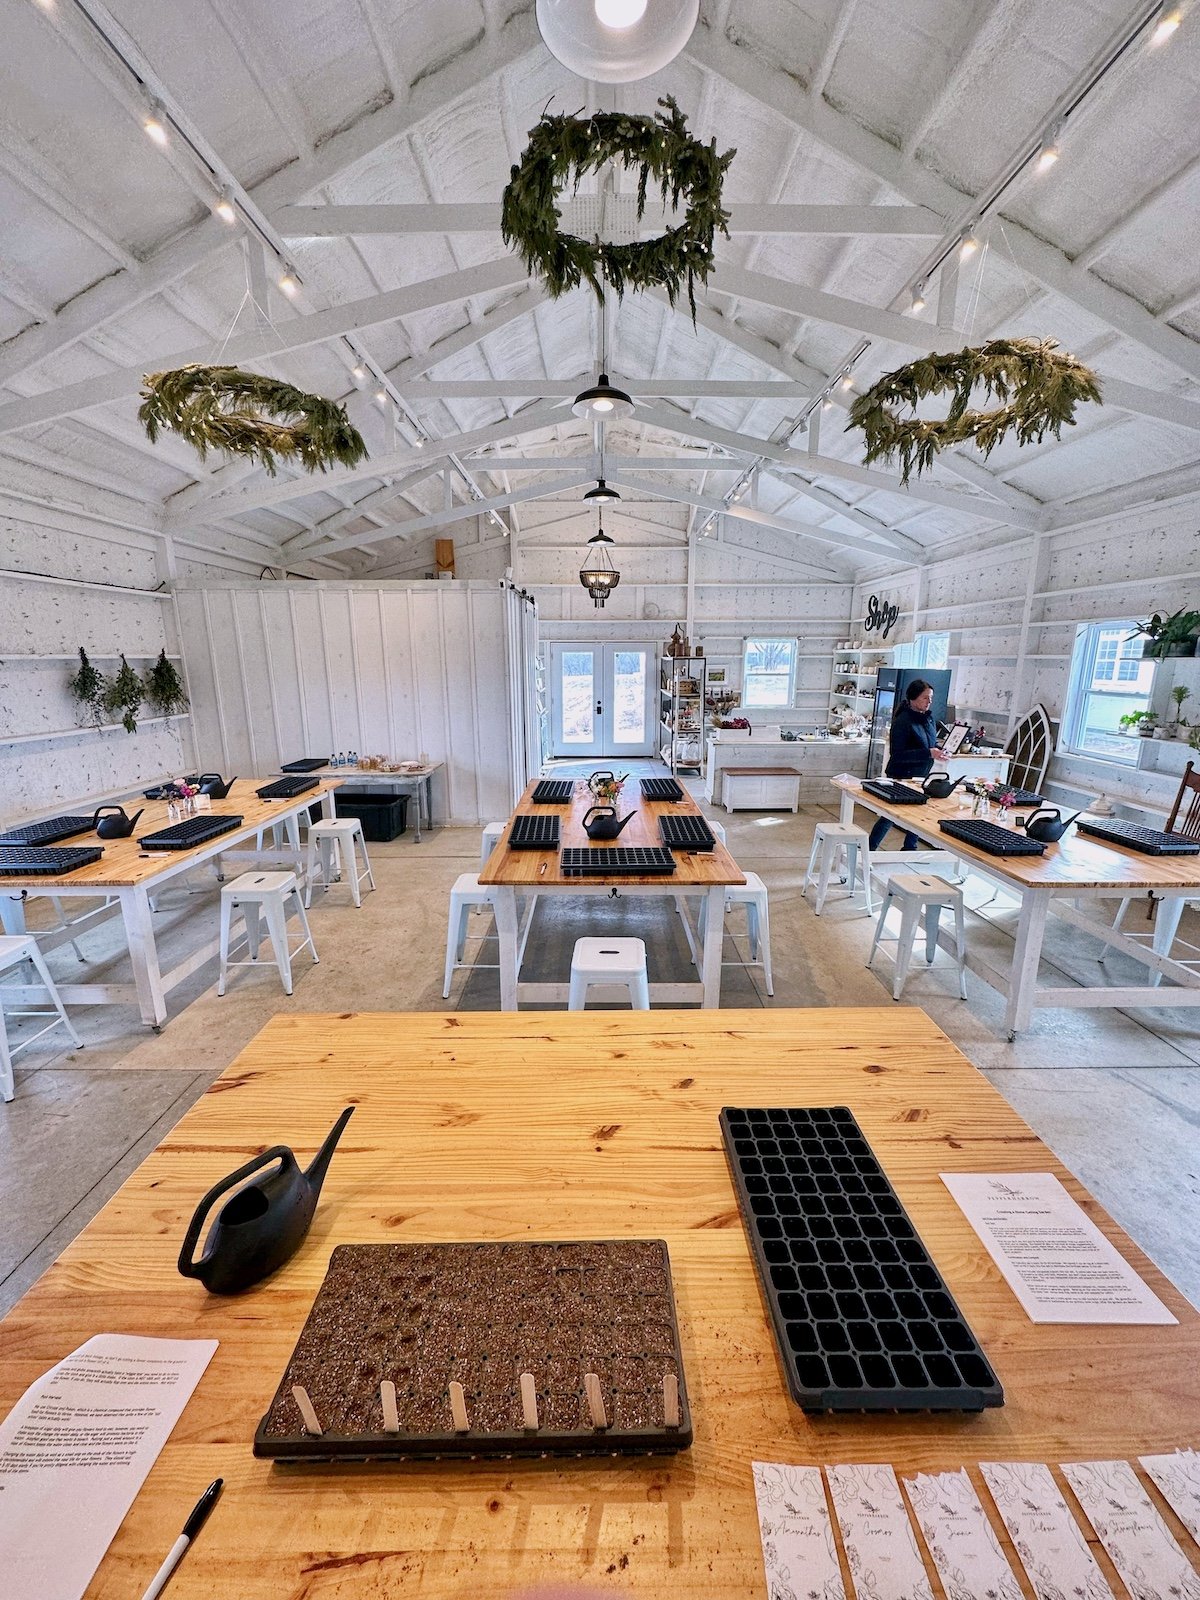
Discover the Magic of Floral Design Workshops
Discover the joy of making beautiful flower arrangements at PepperHarrow Flower Farm! Our Floral Design Workshops and Flower Arrangement Classes are not just about flowers – they're a mix of fun and learning on the farm.
In our workshops, we teach you how to create stunning centerpieces while enjoying the therapeutic beauty of the flower farm. It's a chance to connect with nature, make new friends, and express yourself through flowers. Join us to learn the secrets of crafting amazing floral arrangements, unlocking your creative talent, and showcasing your unique style.
When you arrive, you'll be warmly welcomed, offered refreshments, and shown a floral design demonstration by Jenn or Adam. They've learned the art of floral design through their own experiences on the farm and training with top designers. After the demo, you get to choose flowers from our pre-cut bar or venture into our 8.5 acres of flower fields with a pail and snips to pick your own. Guests love exploring the fields, handpicking blooms, and creating memorable arrangements.
Join our Floral Design Workshops to gain expert tips and head to the flower fields to pick your own blooms. Back in the workshop, you'll have all the materials to bring your vision to life, creating a bouquet that reflects your unique style.
Choose your colors wisely by pairing opposite hues for vibrancy or mixing shades for depth. Whether you love bold contrasts or subtle harmonies, trust your instincts, use your favorite flowers, and have fun! Classic greenery with white flowers can be stunning too.
For long-lasting bouquets, include sturdy blooms like lisianthus and flowers that dry well, such as static or strawflower. Sunflowers, zinnias, and celosia are great choices for durability and vibrant colors.
Floral design is more than arranging flowers; it's a therapeutic journey with mental health benefits. Creating beautiful arrangements is mindful and meditative, offering a sense of accomplishment and boosting self-esteem. The colors and fragrances of flowers enhance mood, while nurturing and tending to them connects us to nature, reducing stress and anxiety. Bring a friend or loved one for an invigorating experience!
Discover the magic of creating a beautiful floral centerpiece through our on farm Floral Workshops, including our Flower Arrangement Classes at PepperHarrow Flower Farm. Our floral experiences go beyond the flowers, offering a unique opportunity to experience the flower farm with a blend of creativity and learning.
During our floral workshops, not only do we provide hands-on guidance in crafting beautiful centerpieces, but our flower farm and the experience itself, also serves as a therapeutic escape, allowing participants to connect with nature, friends - new and old, and express their individuality through the language of flowers. Join us to learn tips & tricks of how to create stunning floral arrangements by mastering the mechanics and art of floral design, tapping into your own creative talent and unique style.
Setting the Stage for Floral Arranging with a Bounty of Blooms
When guests arrive, everyone is personally greeted, offered refreshment, and settled into a spot of their choosing to enjoy a demonstration of floral design by Jenn or Adam, who have gained floral design self-taught skills over time on the flower farm, and also through training with top floral designers like Philippa Craddock in the UK, Sinclair and Moore, and Tinge Floral.
After the floral demonstration is completed, guests are offered a full array of flowers from a pre-cut flower bar within the event space, and they are also welcomed to grab a pail and pair of floral snips to forage their own blooms from the nearly 8.5 acres of blooms from the flower farm. The latter is the most popular option for guests visiting, who love to roam the massive fields of flowers to hand select their own special blooms to grace their beautiful floral arrangements. Can you imagine being set loose into massive fields of flowers to cut your own blooms? It’s absolutely incredible and something our guests always talk about later and will never forget.
Learn, Relax & Create
Join us for more expert tips and tricks during our 2024 Floral Design Workshops. After learning the ins and outs of floral design, you’ll make your way out to the flower fields to pick your own flowers to create your unique bouquet. Back in the workshop, you'll have access to all the floral materials and supplies you need to bring your vision to life, ensuring your masterpiece is a reflection of your unique style.
Choosing Your Colors for Design
We love pairing colors from opposite sides of the color wheel to create a vibrant and balanced arrangement. Contrast warm tones like reds and oranges with cool tones like blues and purples for a dynamic effect. Don't shy away from mixing different shades of the same color for depth and dimension. Pay attention to the mood you want to convey; bold contrasts evoke energy, while subtle harmonies radiate tranquility. We also love a simple, but classic greenery with white flowers, which can be absolutely stunning. Trust your instincts, use the flowers you love and have fun!

Best Flowers for Long Lasting Centerpieces
For enduring and stunning bouquets, include resilient blooms like lisianthus and flowers that dry well, such as static or strawflower. Don't forget cheery sunflowers, known for their striking beauty and impressive vase life. Zinnias, celosia, and sunflowers offer both durability and a burst of colors, making them ideal choices for long-lasting arrangements.
The Connection of Floral Design
Floral design isn't just about arranging flowers, it's also a therapeutic journey with a ton of mental health benefits. The act of creating beautiful arrangements serves as a mindful and meditative practice, allowing individuals to immerse themselves in the present moment and find solace in the rhythmic process of arranging blooms. Floral design offers a creative outlet for self-expression, promoting a sense of accomplishment and boosting self-esteem. The vibrant colors and pleasant fragrances of flowers have been linked to mood enhancement, contributing to an overall sense of well-being. Additionally, the act of nurturing and tending to flowers provides a grounding experience, fostering a connection to nature that can alleviate stress and anxiety. Bringing along a friend or loved one can also be a great way to connect and invigorate the spirit.


Bouquet Combination Inspiration
Discover seasonal bouquet inspiration from PepperHarrow Flower Farm, showcasing stunning combinations for spring, summer, and fall. Explore creative arrangements featuring daffodils, tulips, zinnias, dahlias, and more. Unleash your creativity by incorporating dried flowers for a unique touch. Stay tuned for the opening of our online seed shop in February. Dive into our blog to learn about our flower farming practices and favorite blooms. Find inspiration for your cutting gardens and share your thoughts in the comments below. For more insights, watch our YouTube video covering seasonal favorites. Elevate your garden with PepperHarrow – where nature's bounty meets vibrant blooms.
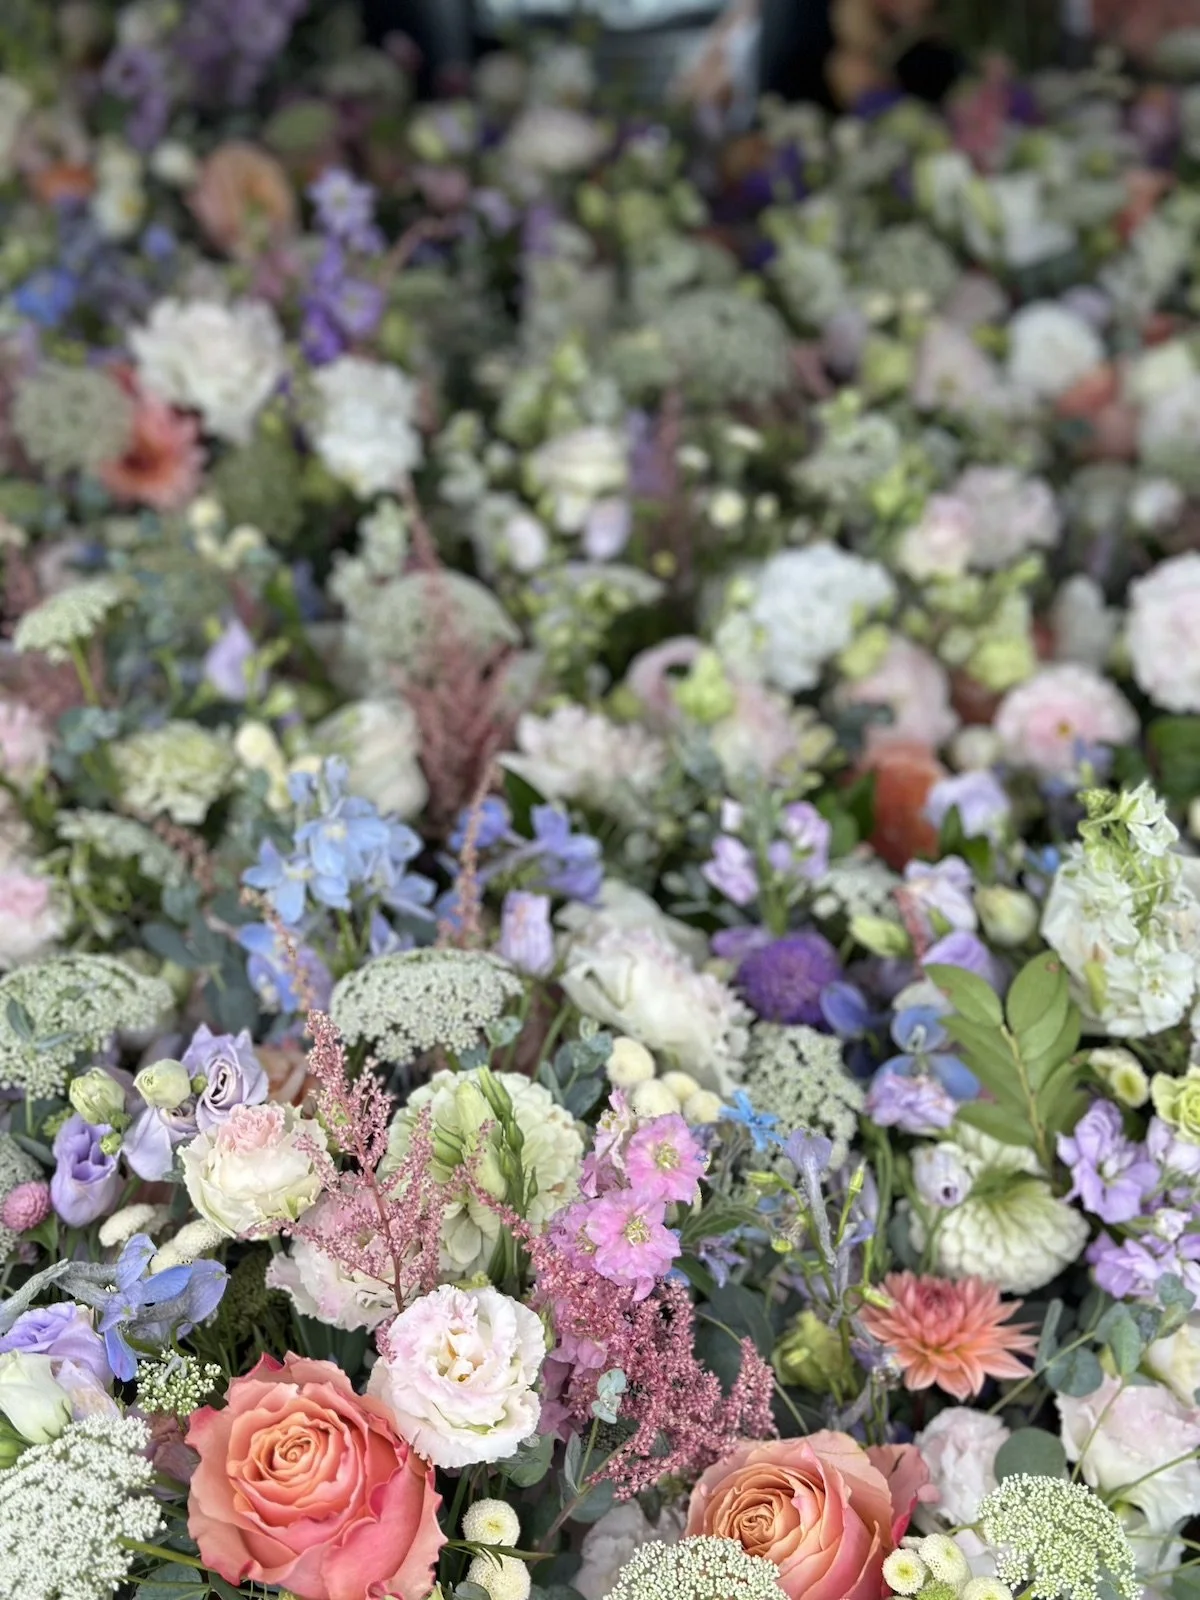
Throughout the growing season, we took some time to capture some of our best bouquet combinations. From the soft, pastel flowers of spring, bright colors of summer, to the muted colors of fall, each season brought some stunning combinations that we can’t wait to share with y’all today. Our hope is that by sharing some of our best combinations, that you’ll be inspired to put together some of these combinations from your garden, or add seeds/plants to your garden for the growing season.
This is the time of year to focus on shopping for flower seeds, either browsing from paper catalogs, or shopping online. If you’re inspired to start a cut flower garden or simply a flower that you’ve never seen before in our bouquets and want to grab seeds, our online seed shop will be opening this February, so stay tuned for details! Until it opens, it will be password protected, so we can make updates to inventory.

SPRING BOUQUET INSPIRATION
Spring ephemerals are some of the most beautiful and fragrant flowers to enjoy. We love their soft, pastel colors, but love to play with adding a splash of color to mix things up occasionally.
Making beautiful spring bouquets isn’t difficult, but it is sometimes hard to make a large volume of bouquets. Like all of us, Mother Nature starts her stride off slow in the spring, gradually increasing blooms as the sun stays out longer and things get warmer and warmer. Still, there are plenty of wonderful flowers to enjoy during the spring season.
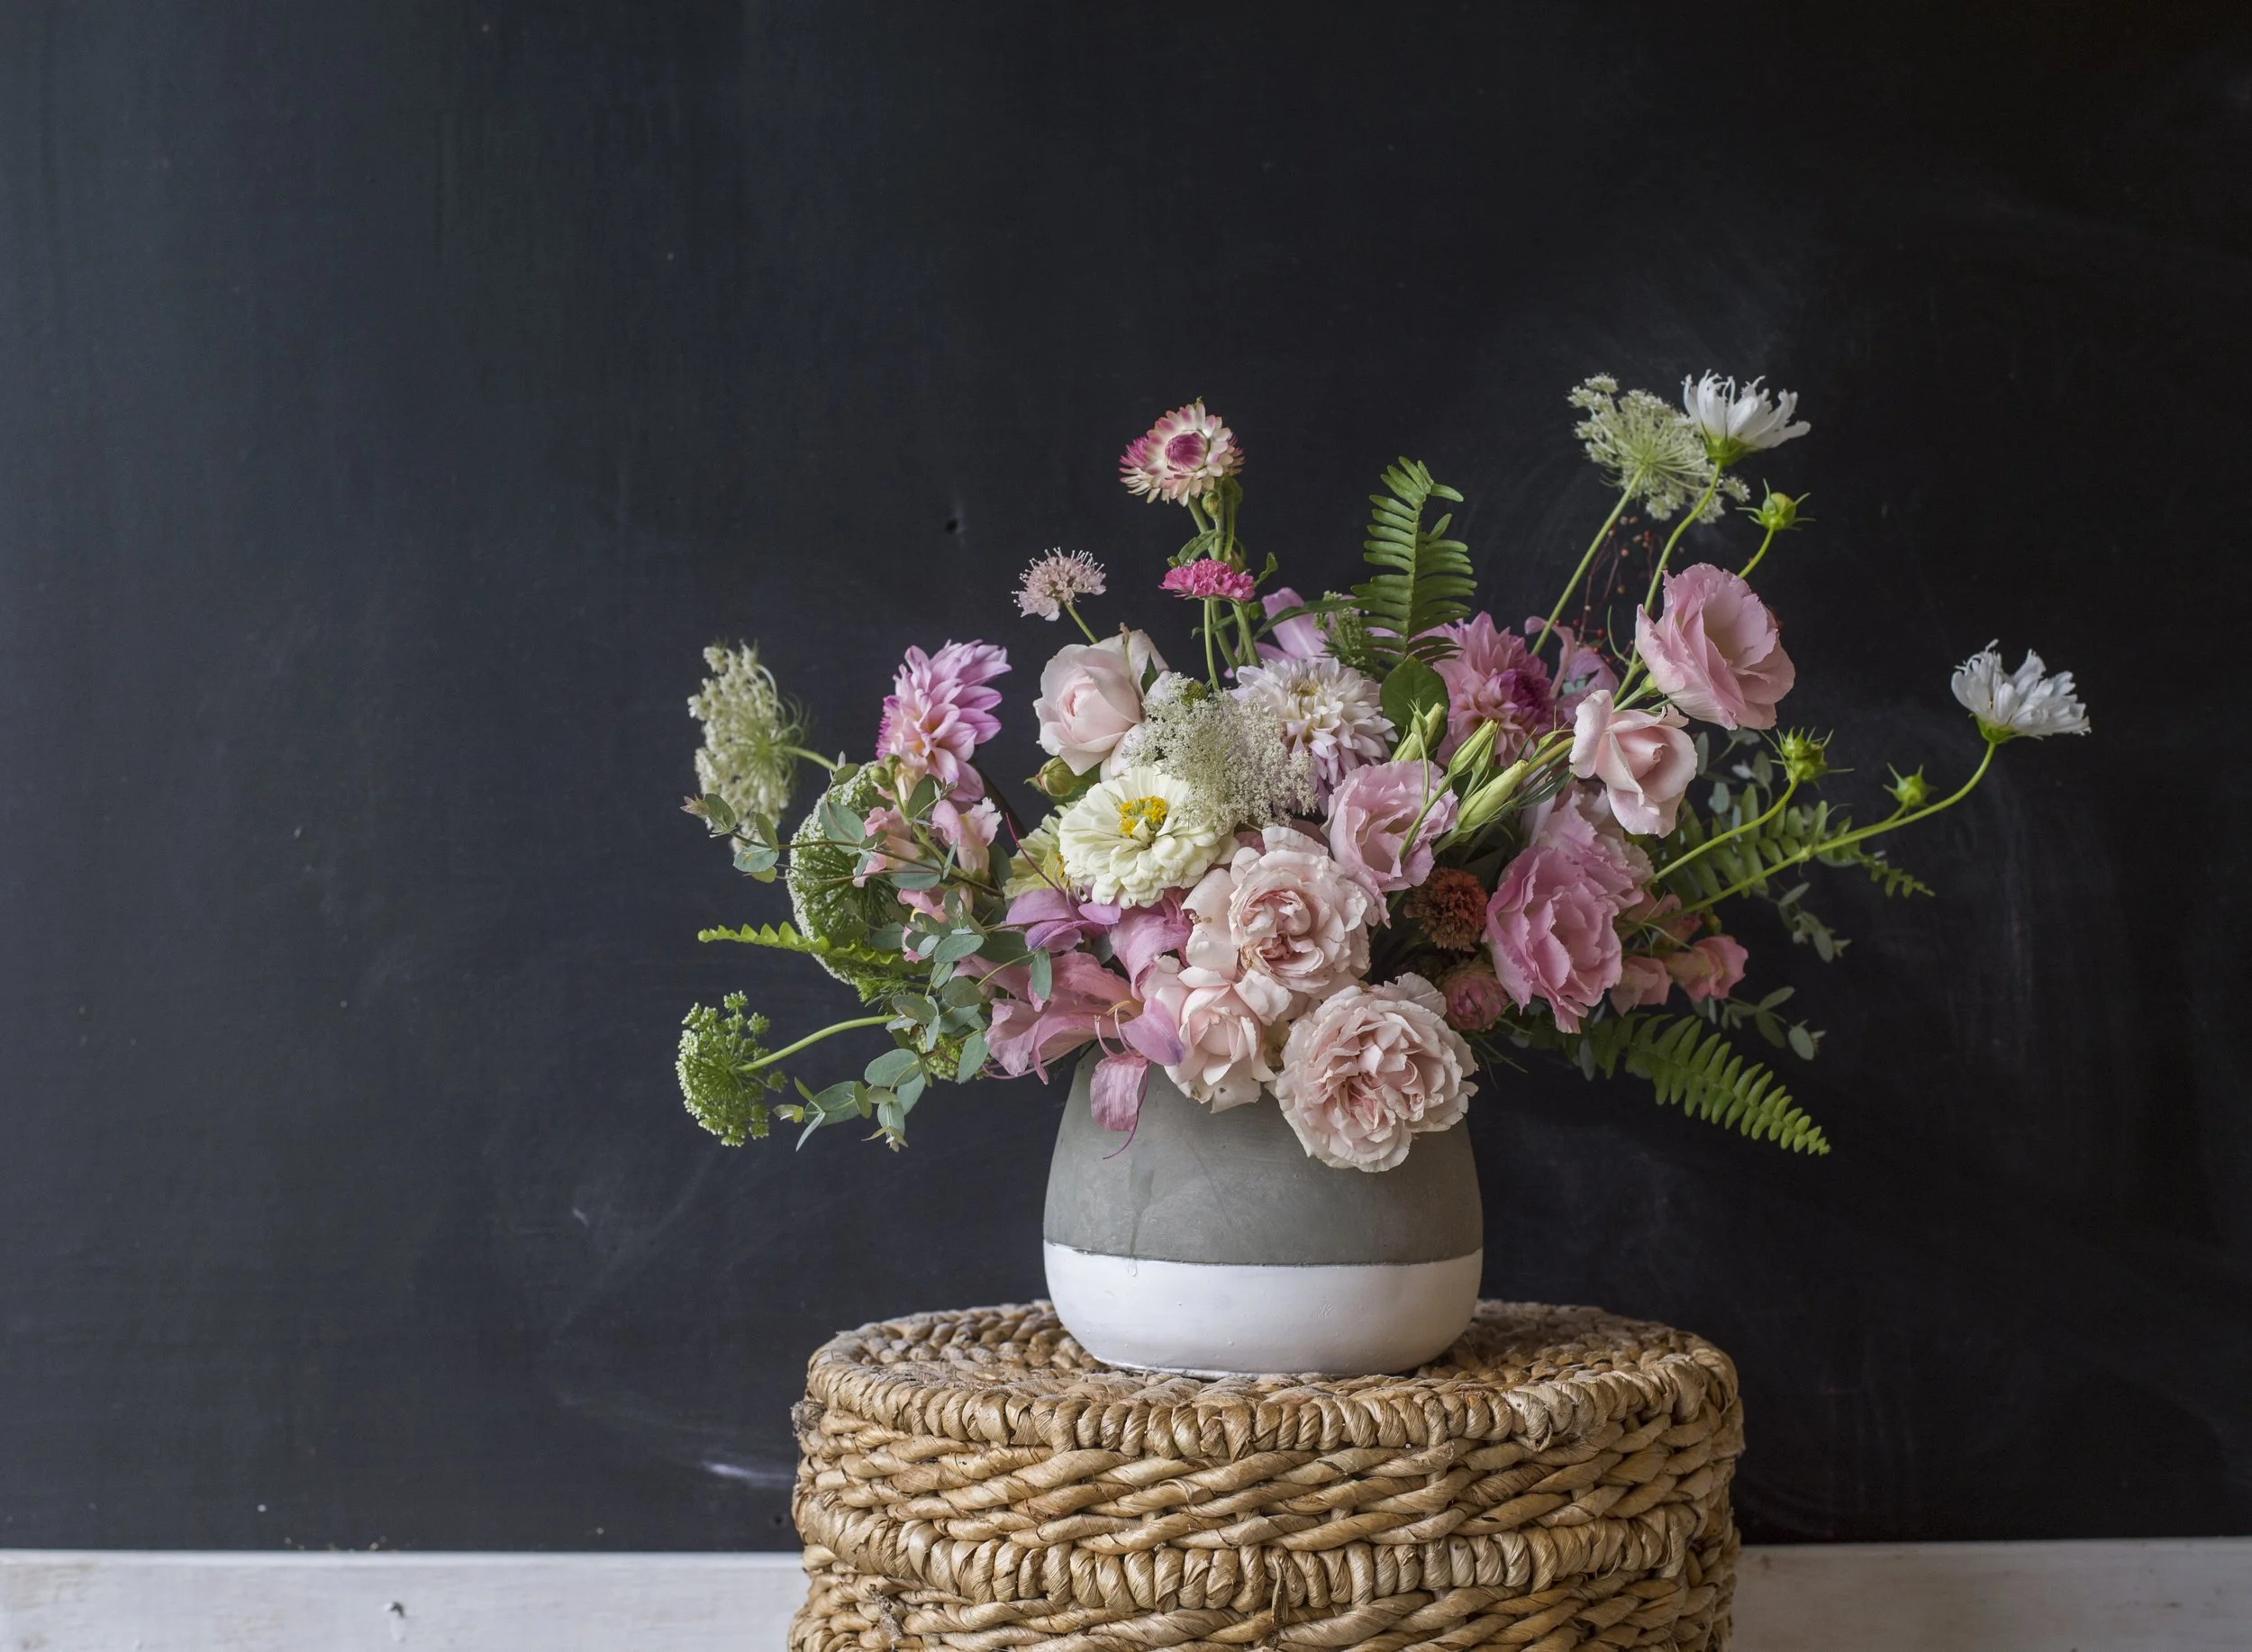
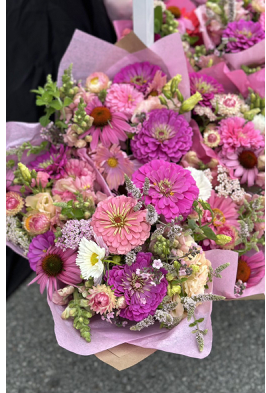
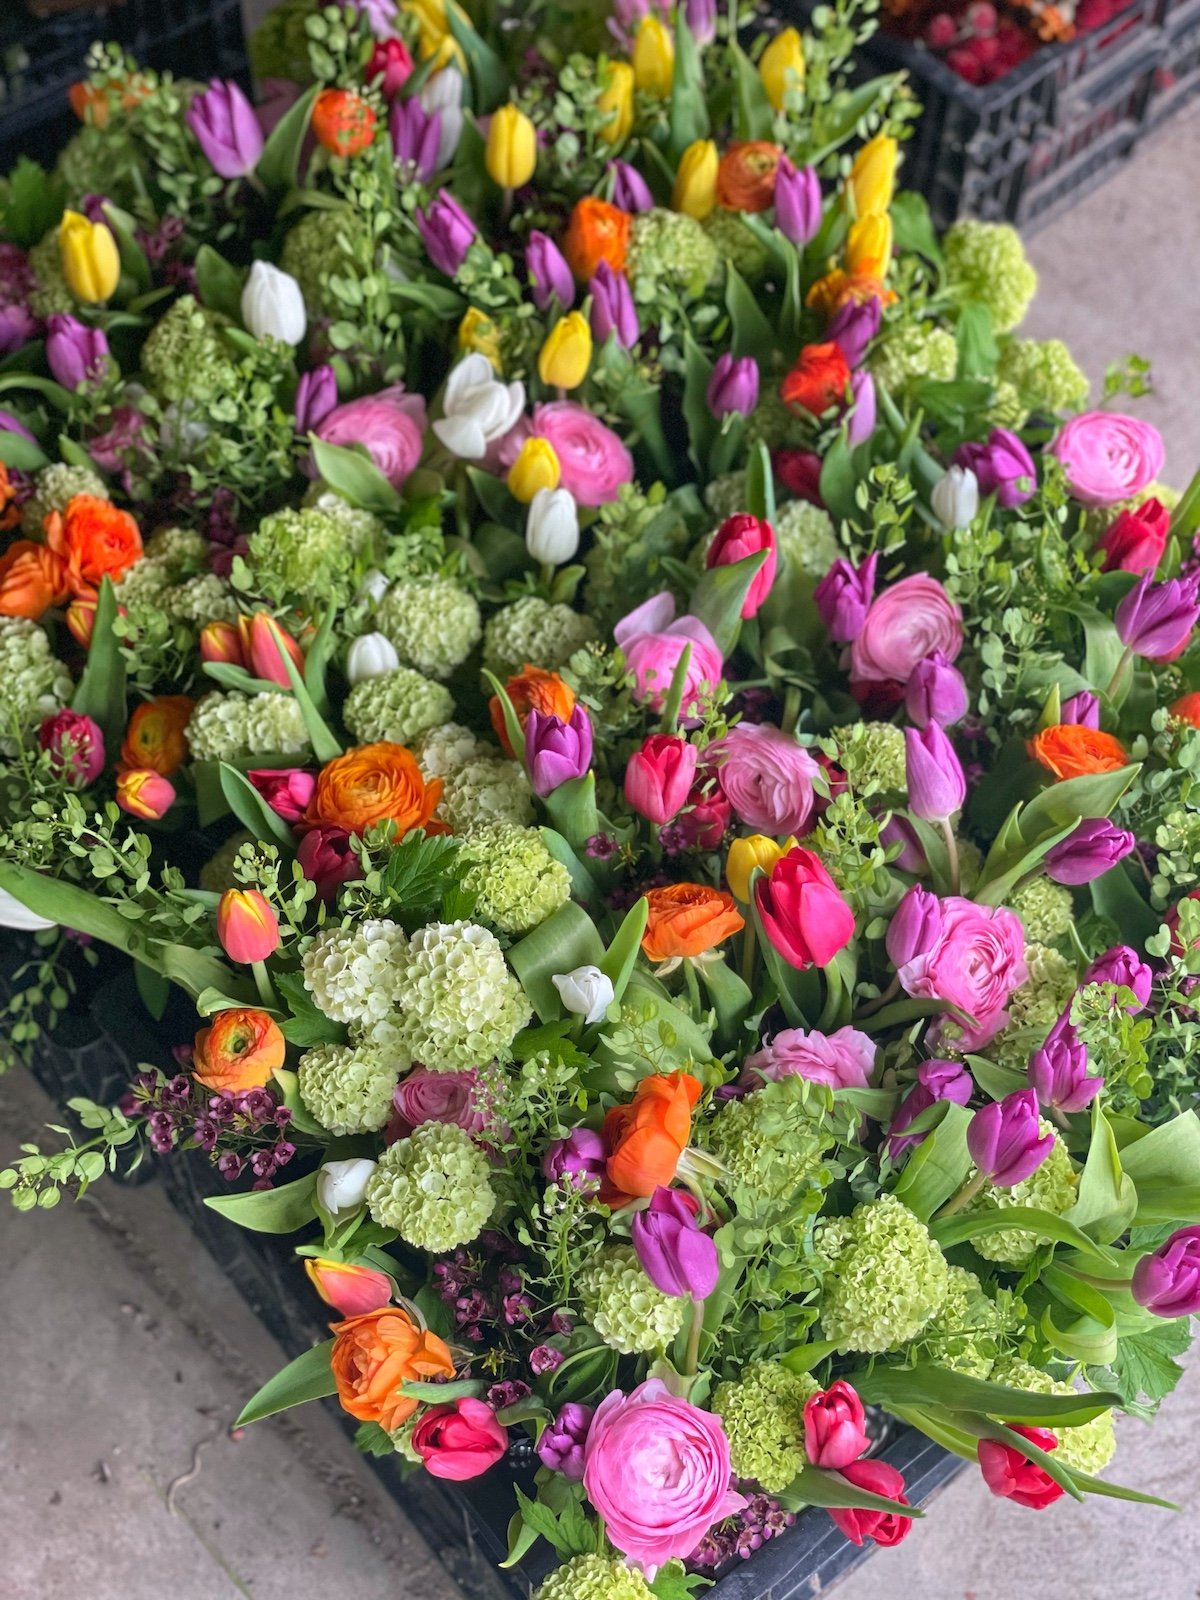
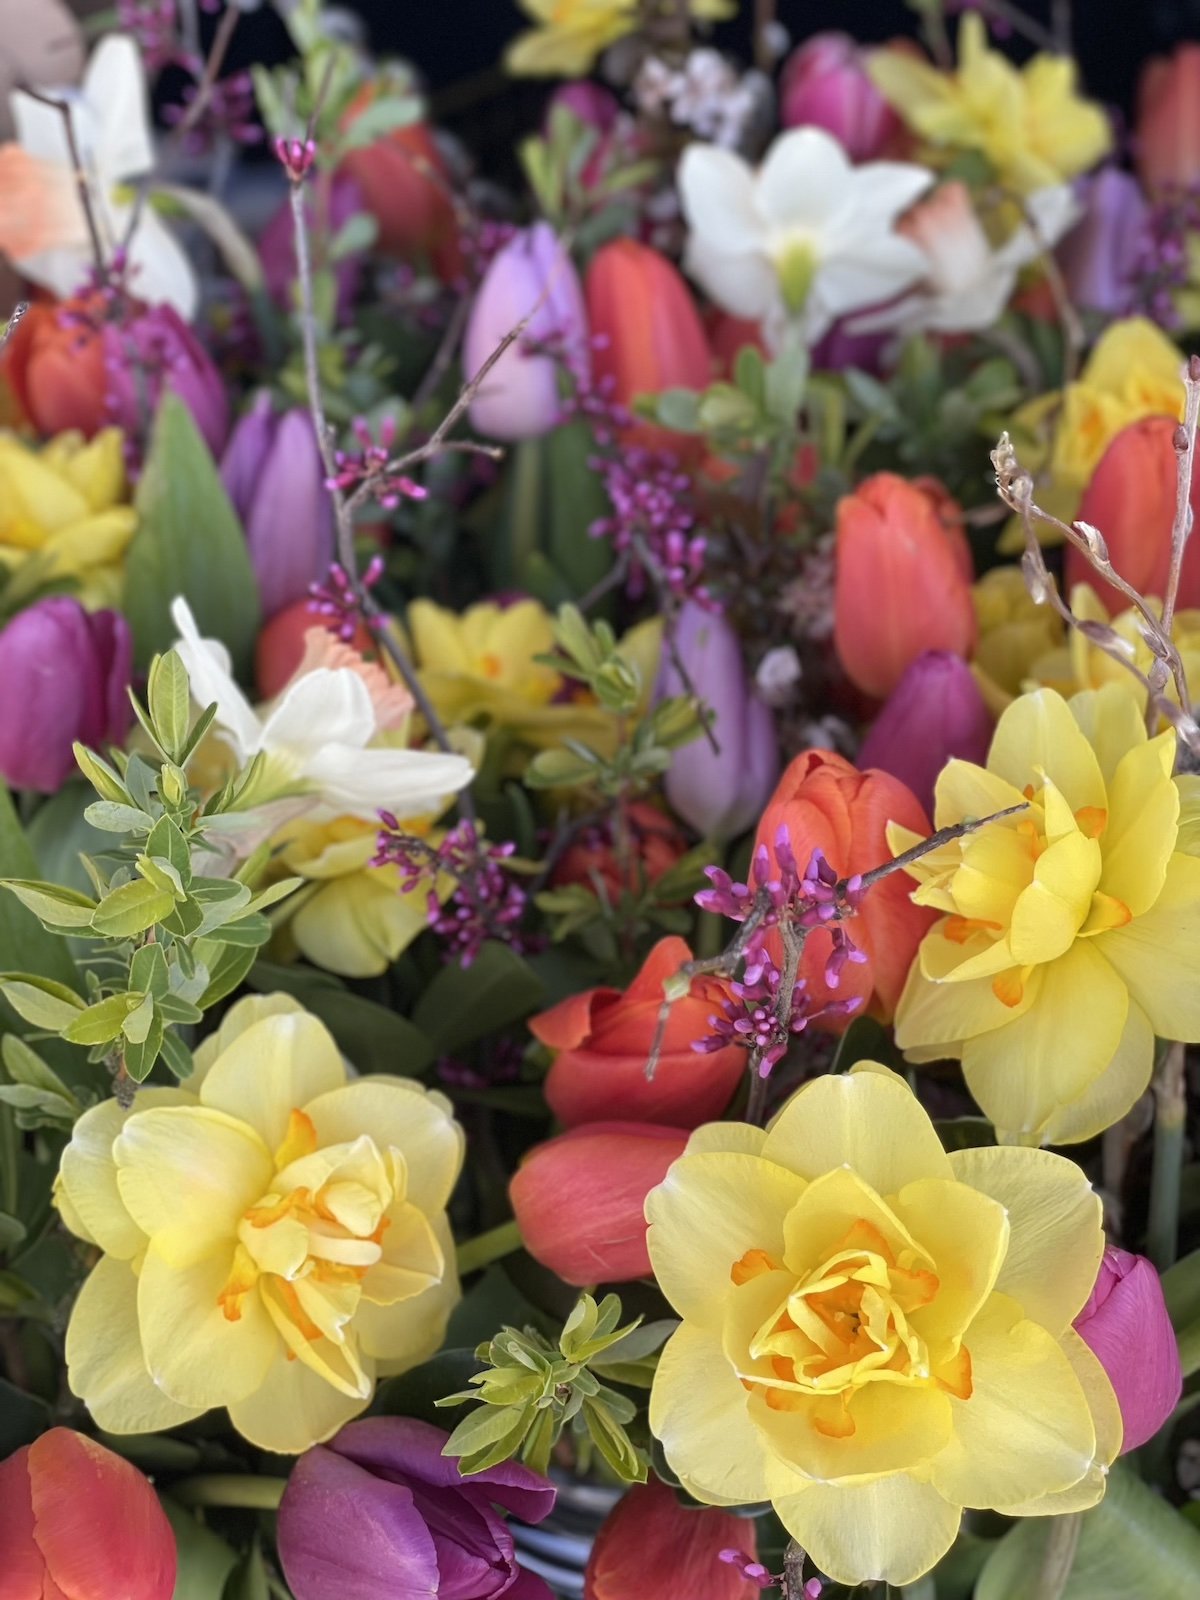
Shown below are some beautiful spring bouquets we made that include favorite spring flowers such as daffodils, tulips, ranunculus, allium, snowball viburnum, redbud blooms, and other goodies. Click on each to see what’s included!

Be as Creative as Possible
Spring is the season where there are limited flowers in bloom, so we have to be really creative with what we put together for our flower bouquet combinations. Think outside of the box and think about using whatever you have available, such as dried flowers from the season before.
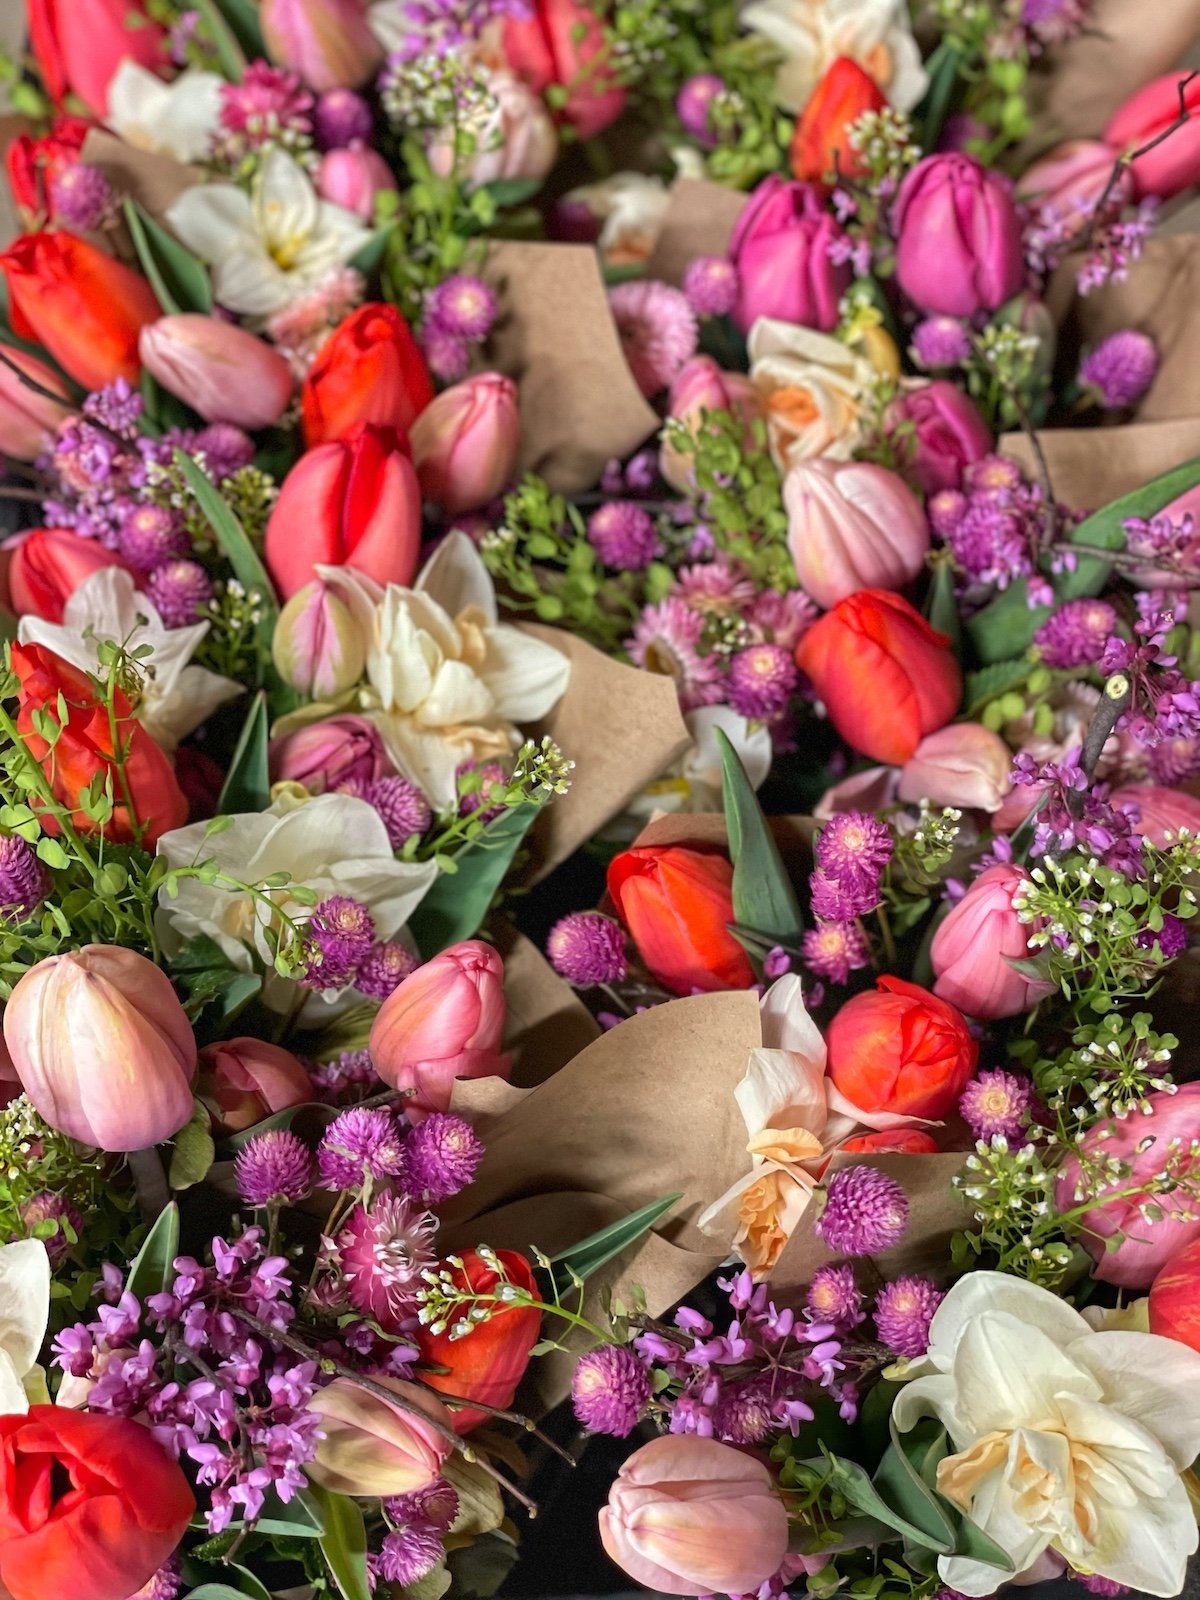
Shown in this early spring bouquet are dried globe amaranth, which give these bouquets a unique, lovely pop of color that you’re not expecting. Just perfect!

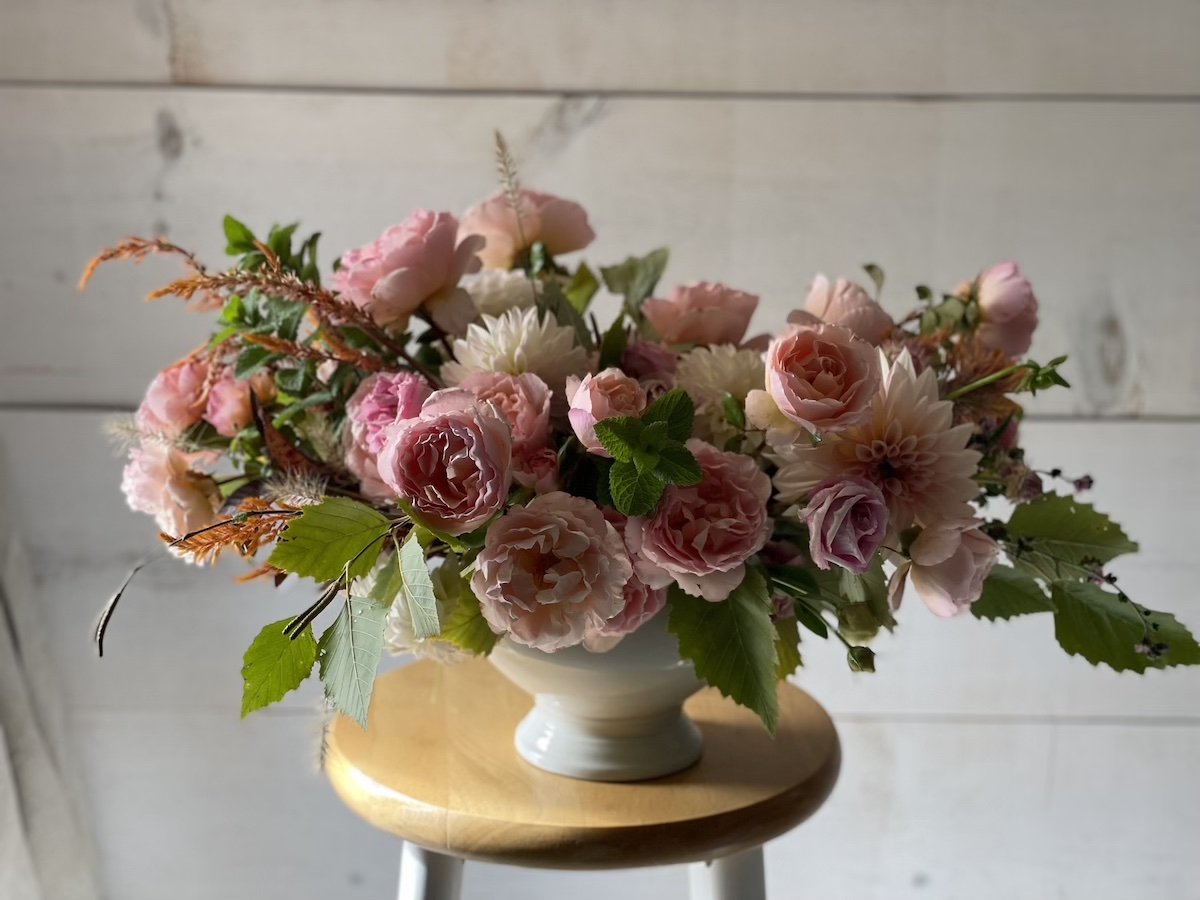
Keeping it Simple
Spring ephemerals are beautiful by themselves and look incredible in a bouquet by themselves in a mono-botanical combination. However, adding a few pops of something unexpected that compliments the season is a great idea, like these gorgeous tulip bouquets with pops of salix cinerea. The soft pastel colors with the bits of gray of the salix cinerea are classic and absolutely stunning.

Summer Bouquet Inspiration
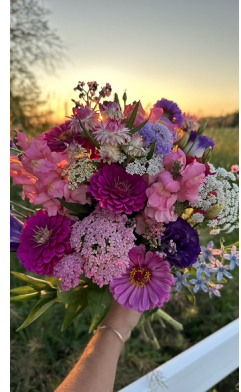
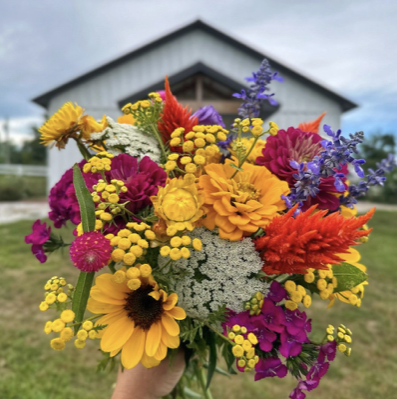
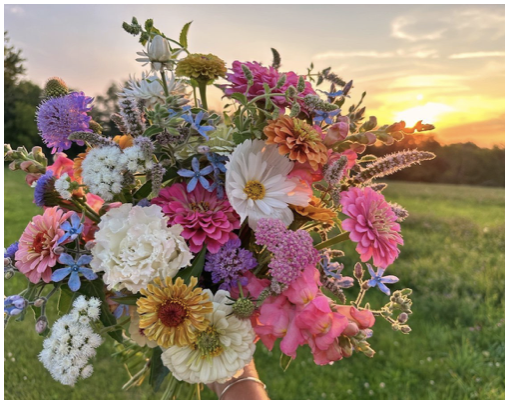
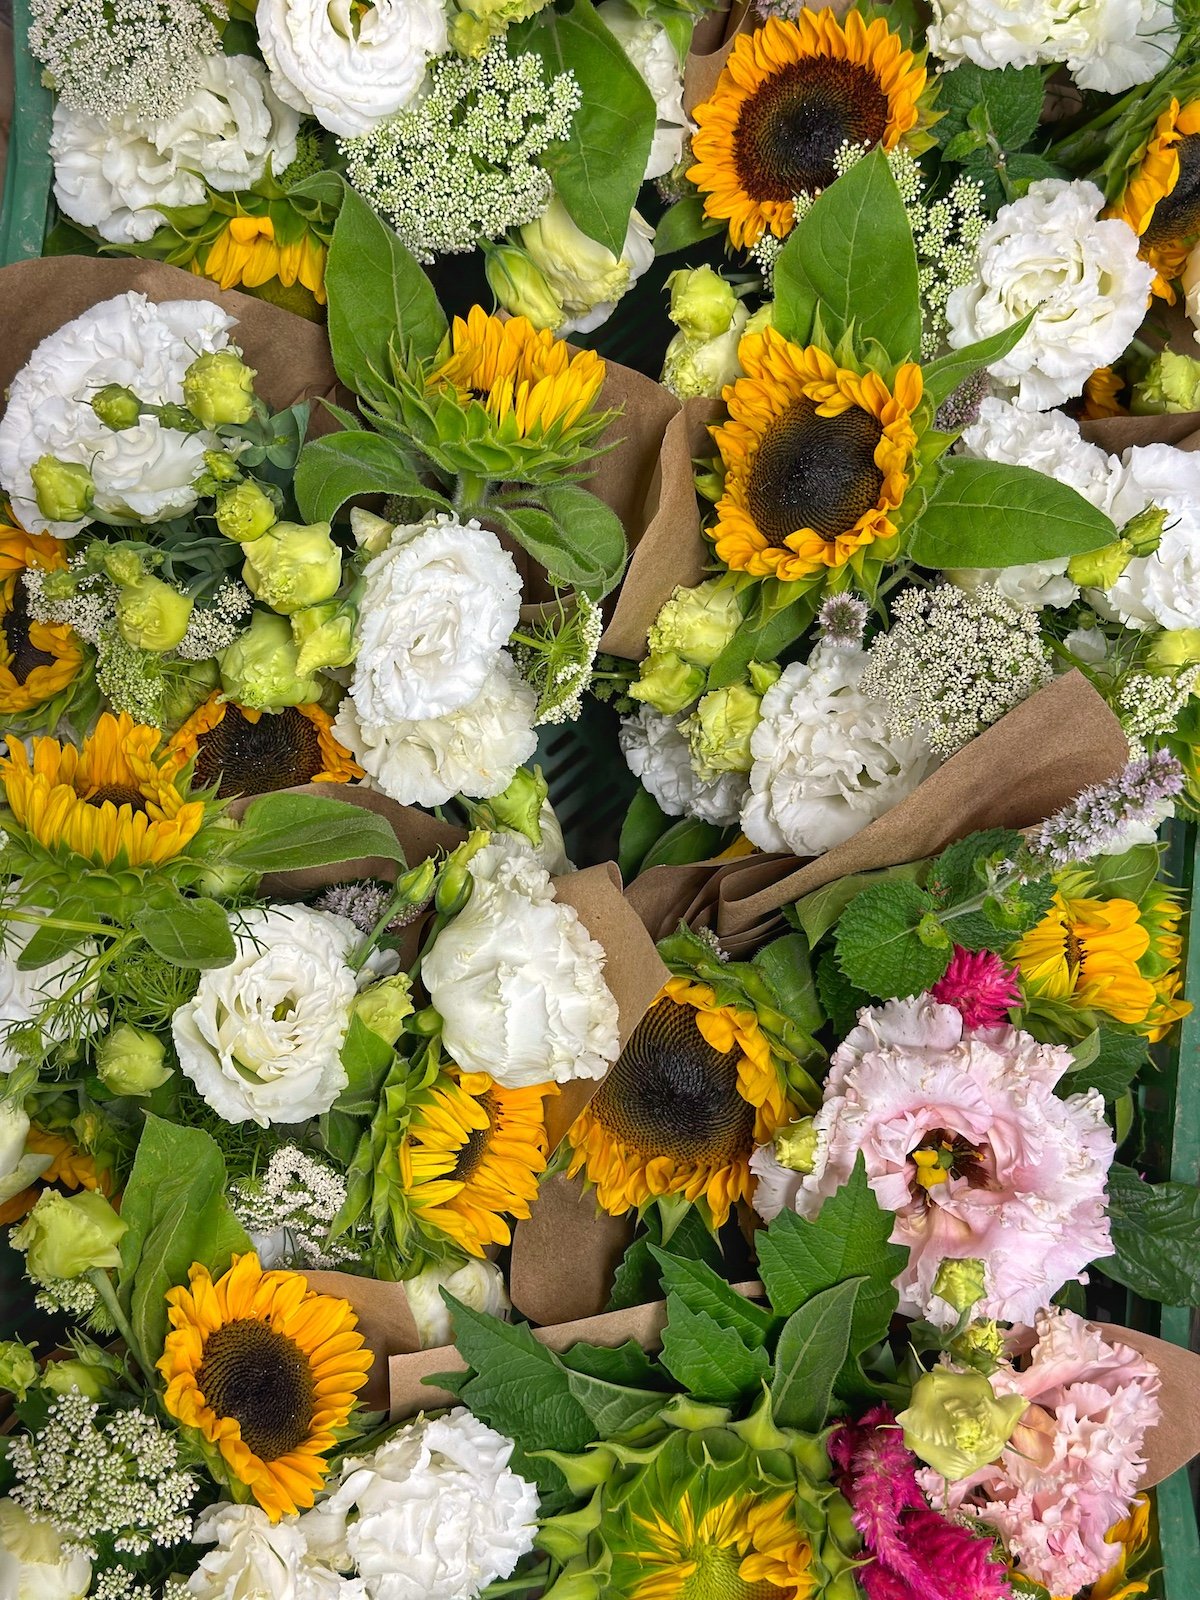
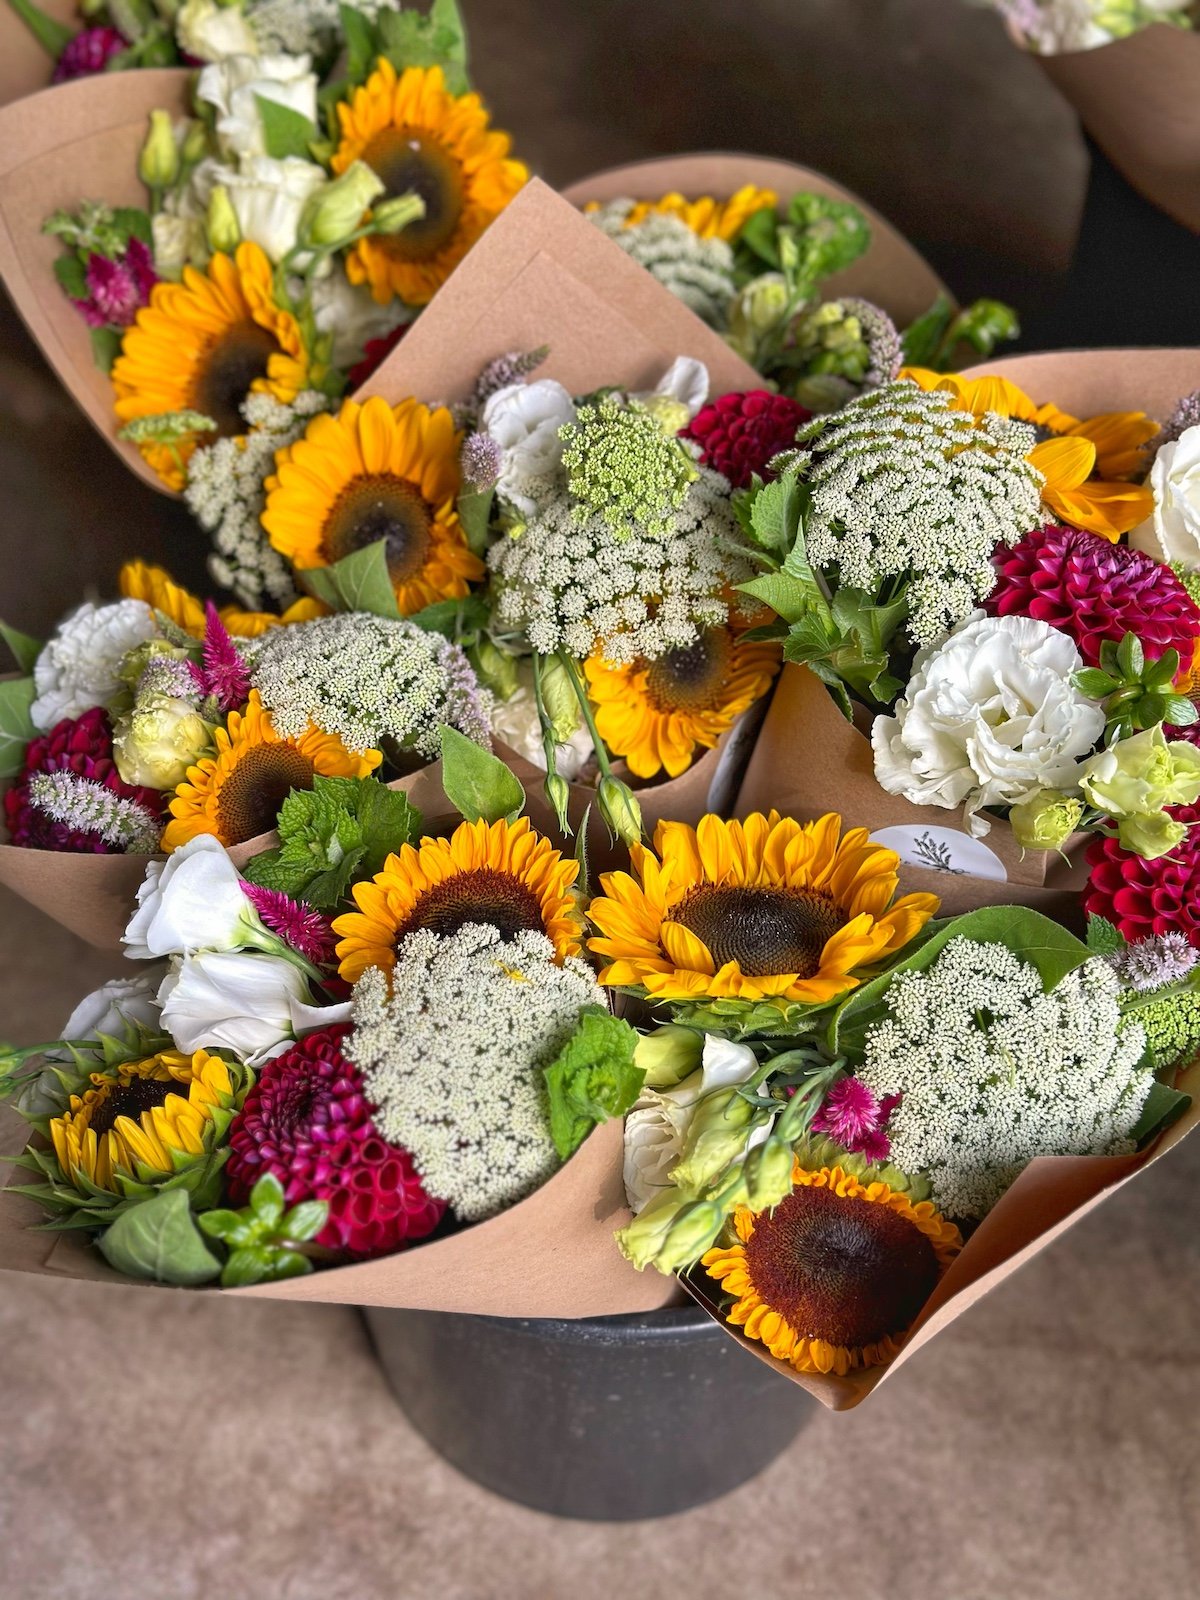
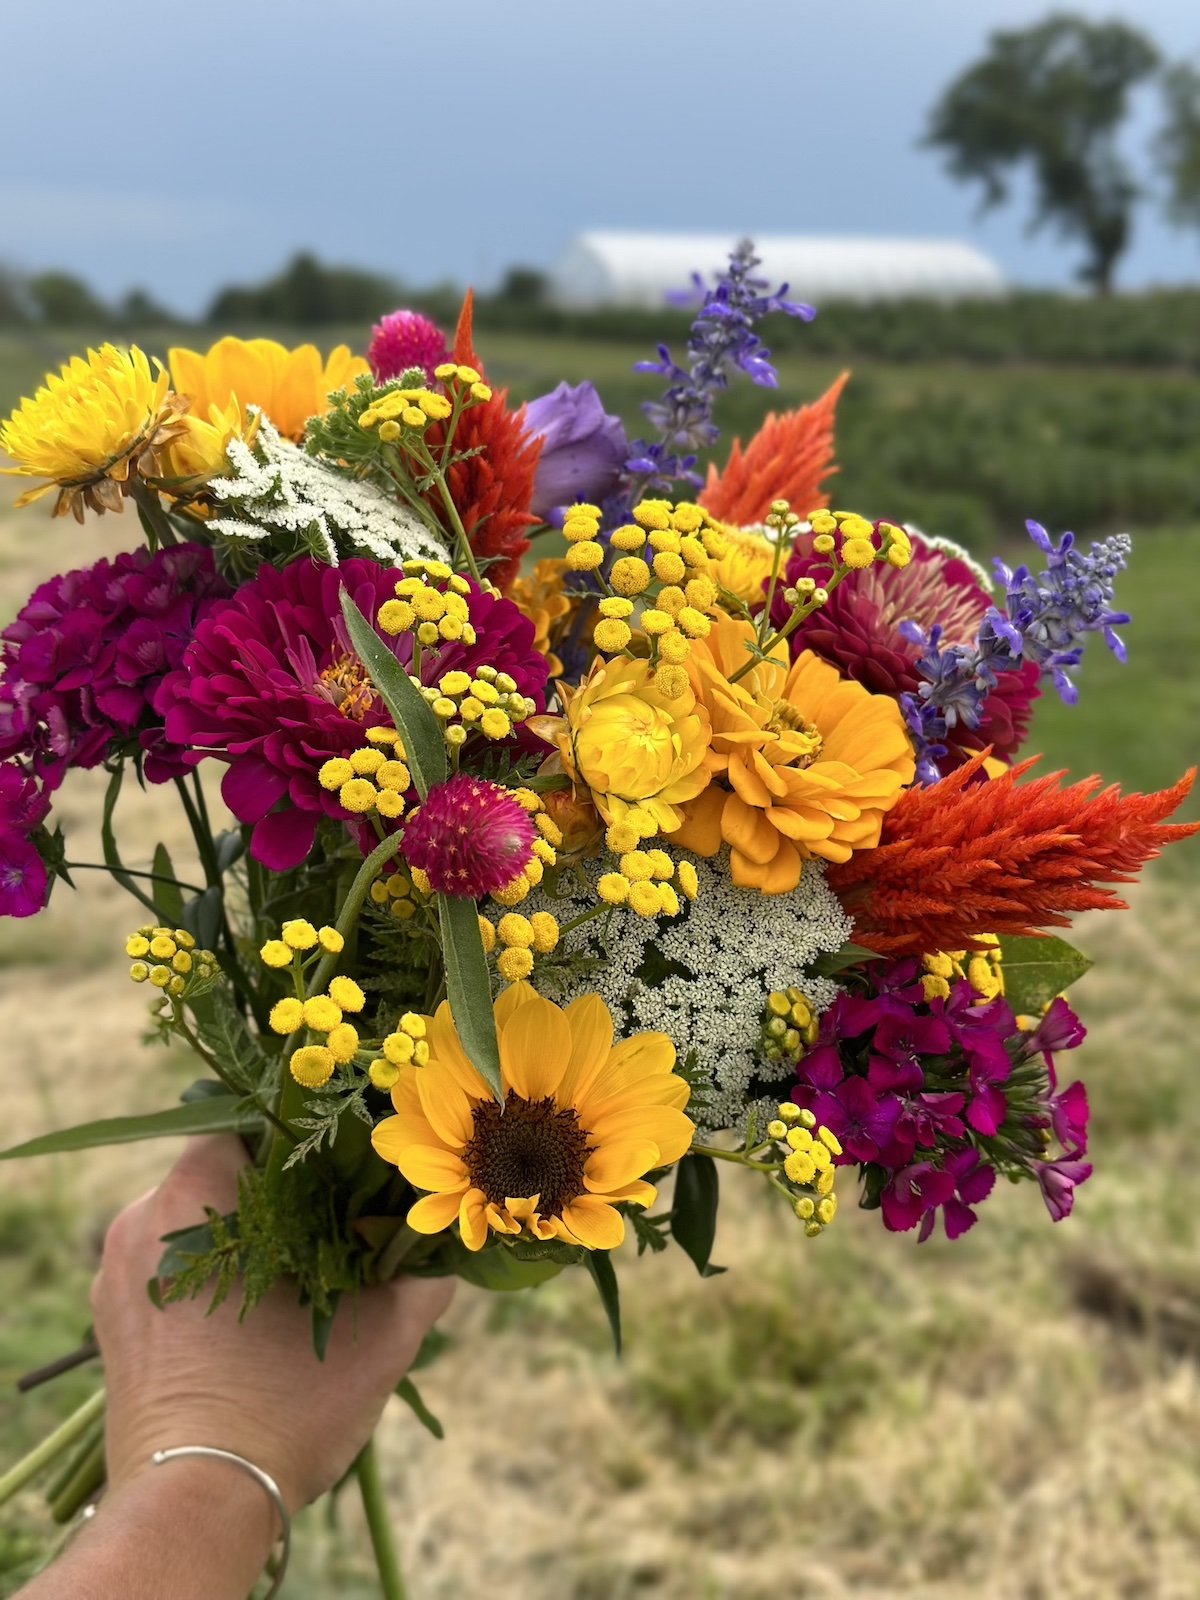
As the season progresses from spring into summer, we start to transition slowly into bright and vibrant colors. With the long, warm days of summer, these colors match the season. During this time of year, we love to lean into sunflowers and zinnias to add the best pops of color and make the BEST bouquets.
The transition from the soft pastel colors of spring into the vibrant colors of summer happens with a little bit of overlap. In the month of June, is when we start to make the transition towards brighter colors, but during the earlier part of this month, we still make bouquets with some of the more pastel colors, transitioning into some of the brighter colors towards the end of the month. However, one thing we’ve noted over the last 13 years of flower farming is that it’s about 50/50 on what color combinations our customers love. Half love bright and bold and the other half love soft and romantic, so we try to bring a mix of both each week to give our customers and option on which they’d like.
Shown below are some great summer bouquet combinations we made throughout the season. These bouquets include flowers like zinnias, sunflowers, snapdragons, ammi, dahlias, lisianthus, celosia, scabisoa, rudbeckia and others! There are so many options and different types of flowers in bloom during this time of year that it’s easy to make some lovely bouquet combinations.


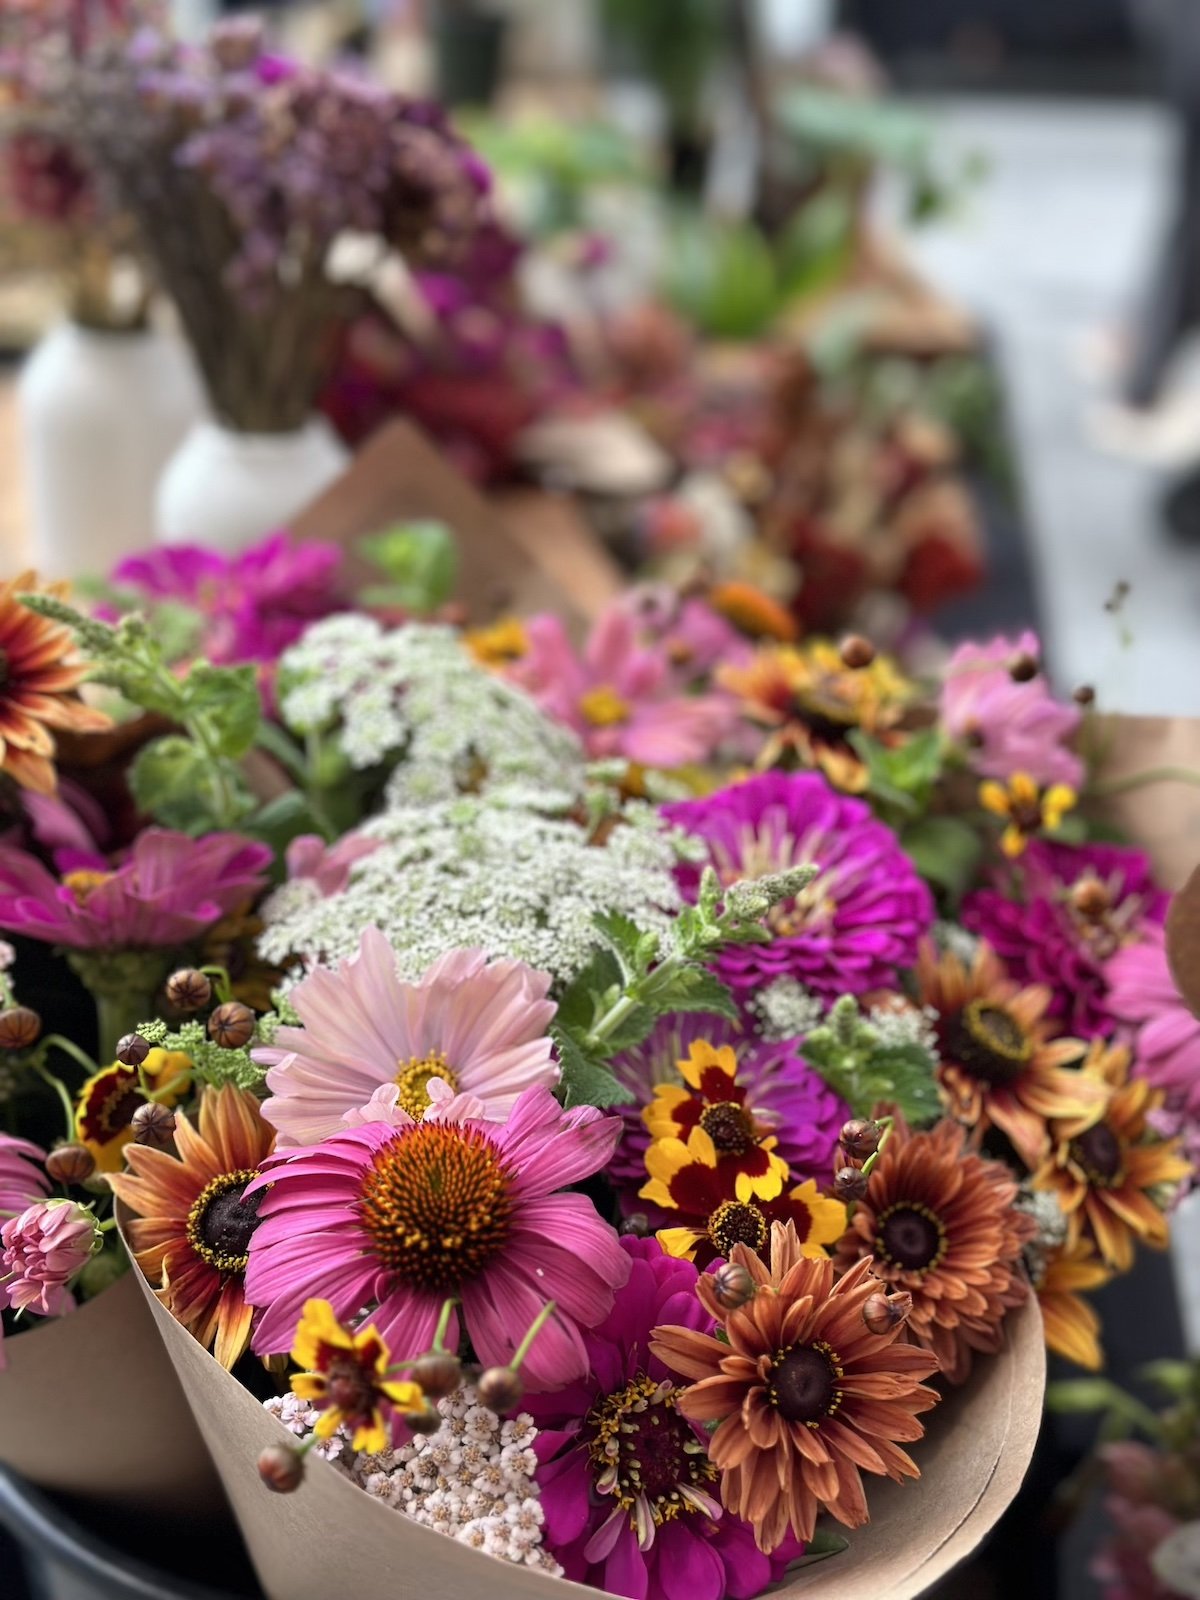
Soft and Romantic
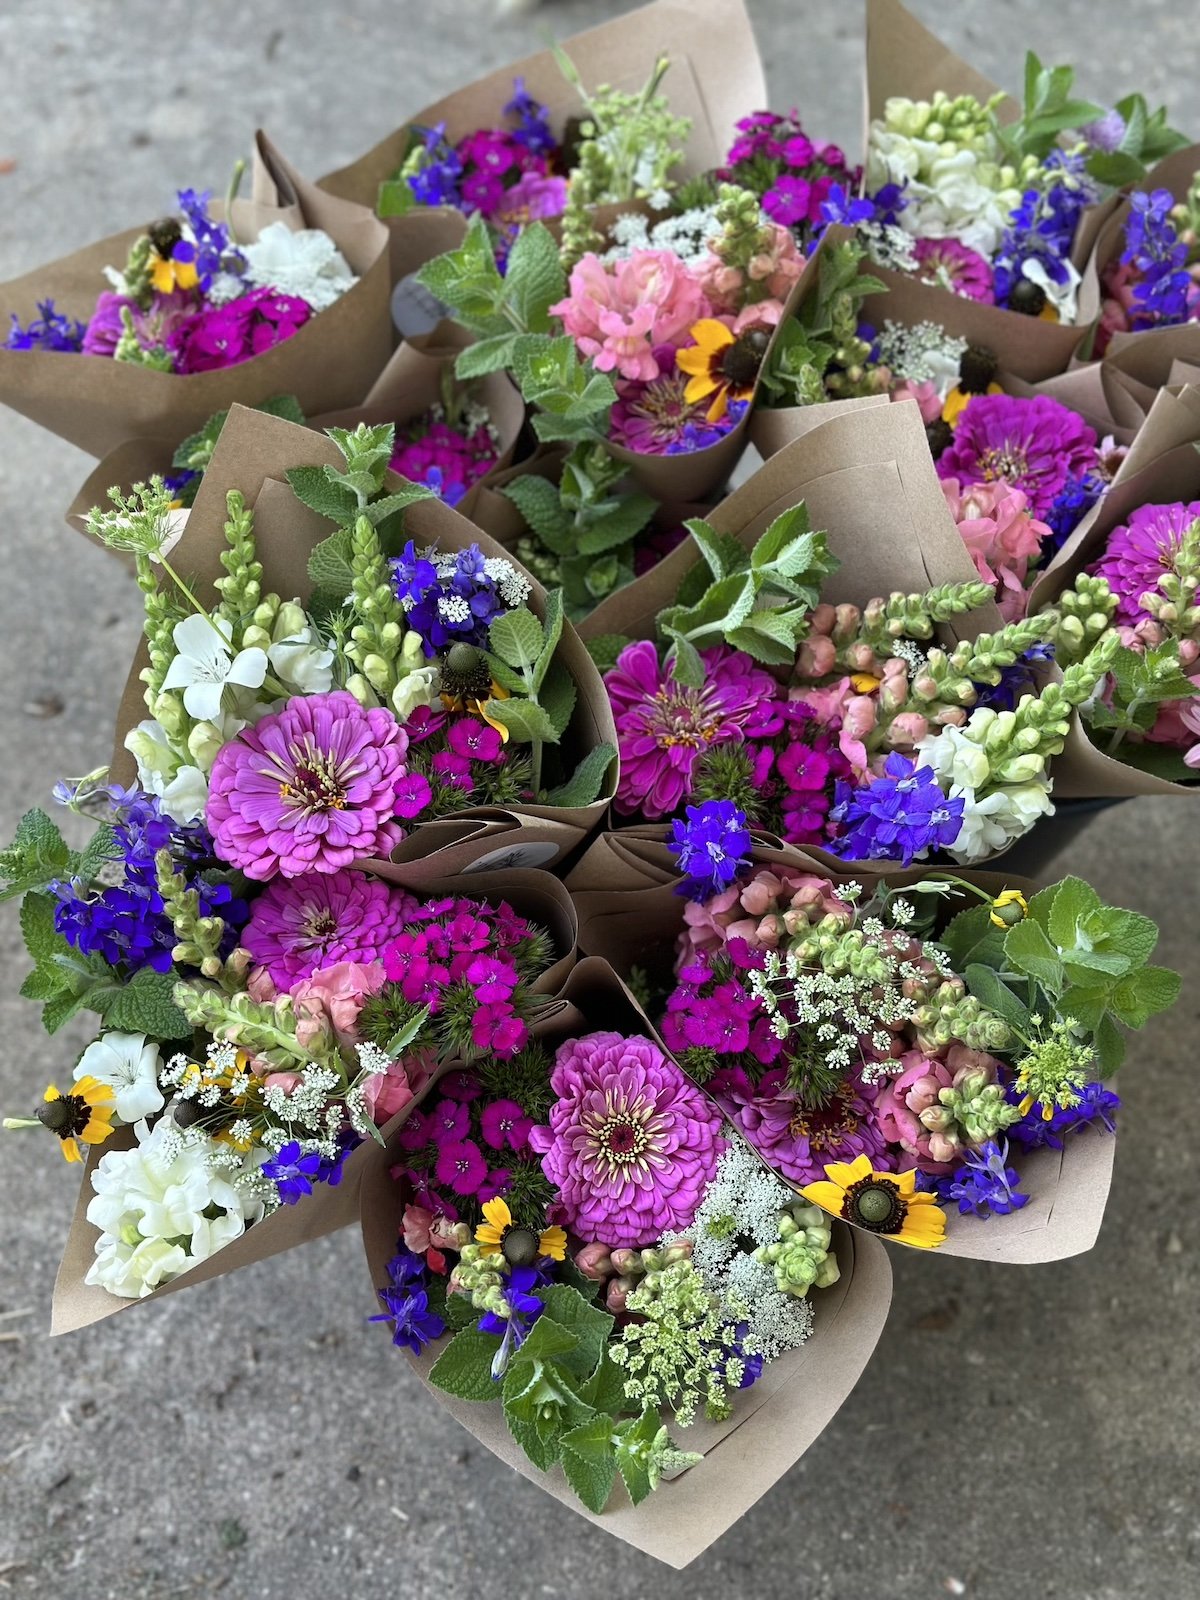
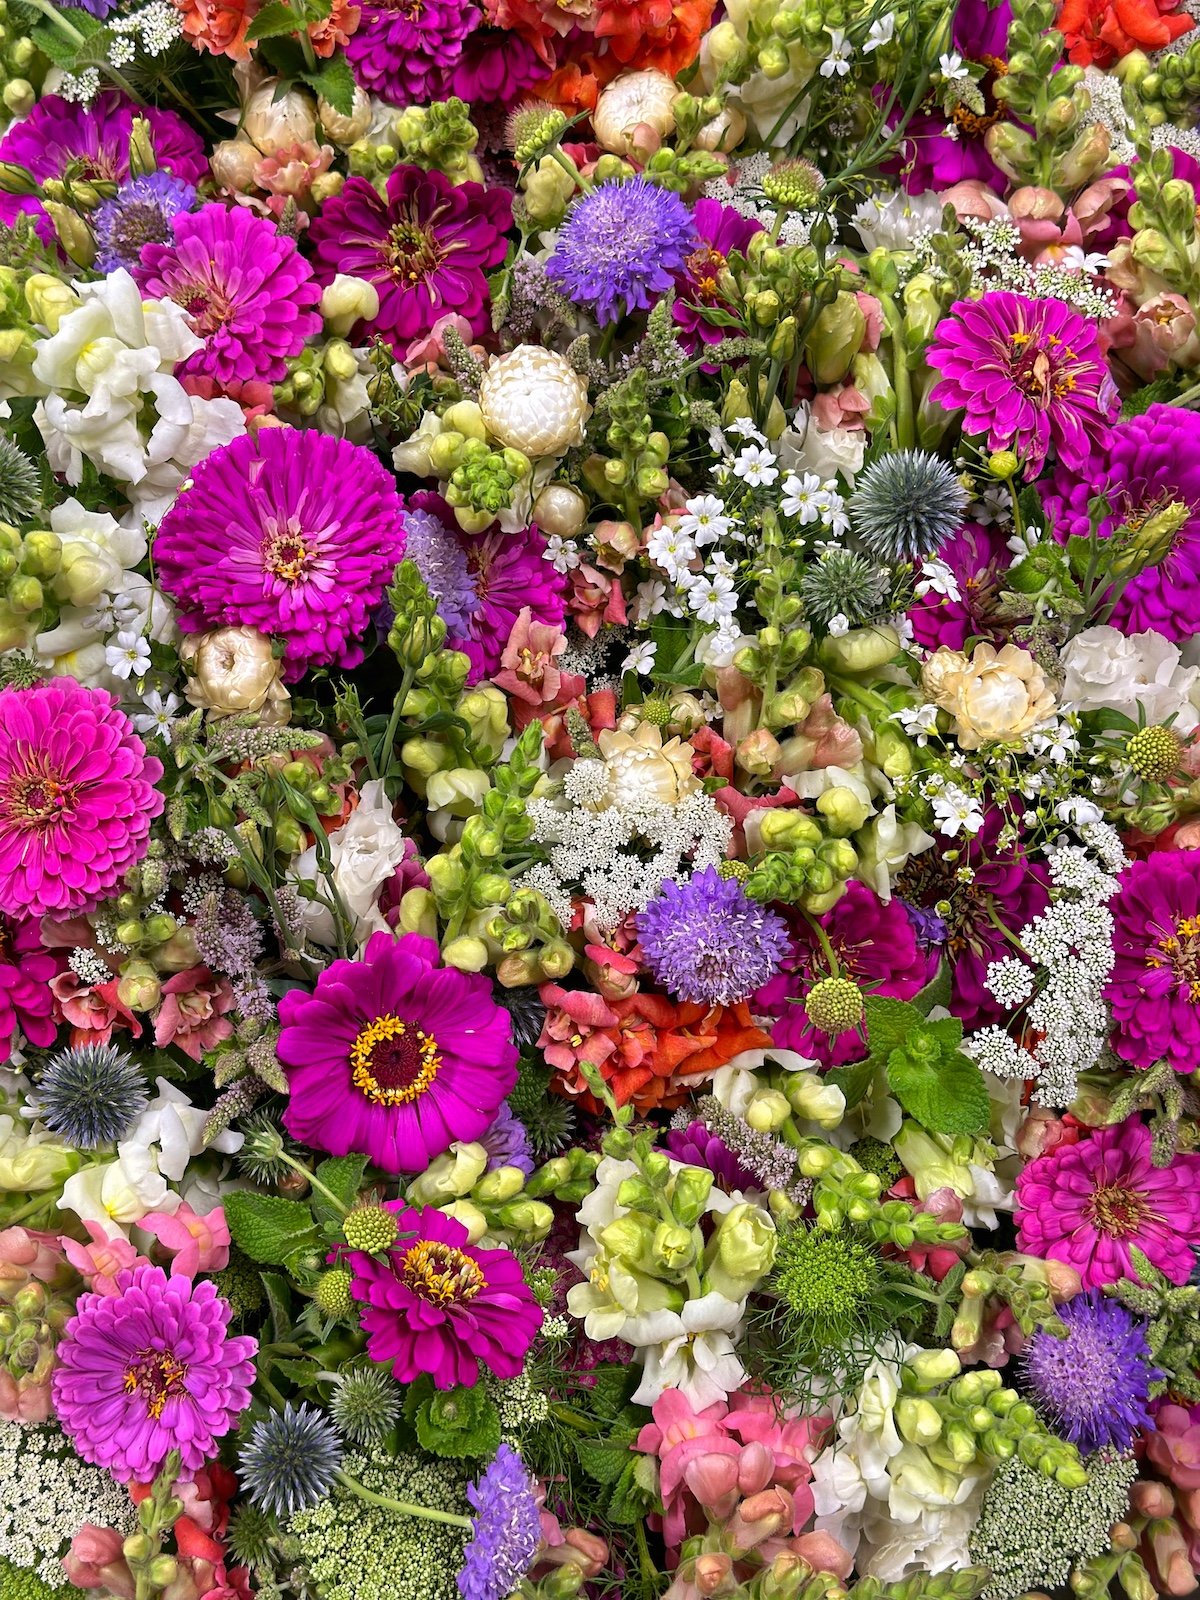
Are you a fan of soft and romantic colors in a bouquet? These were pretty ‘barbie’ themed bouquets we put together during the summer and were a customer favorite. They were elevated by an extra addition of pink tissue paper, which really gave them a polished look.
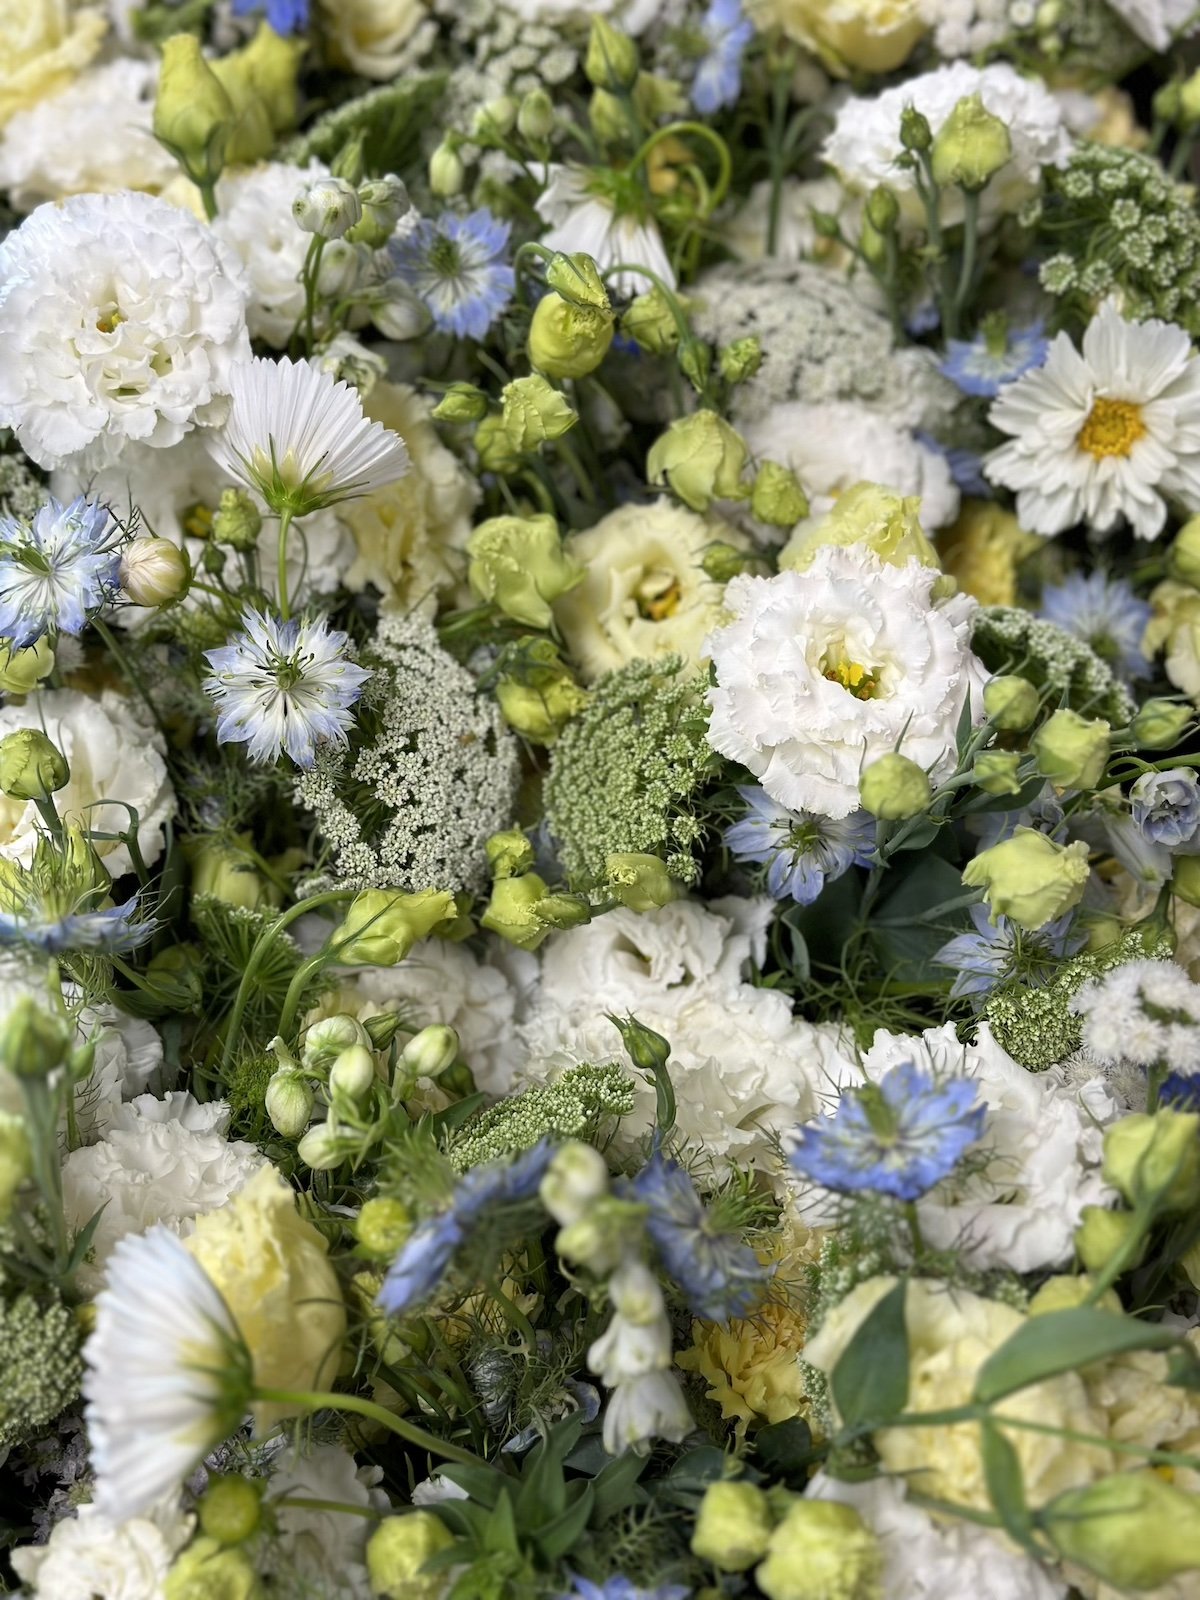
Included in these pretty bouquets are zinnias, snapdragons, echinacea, strawflower, yarrow, lisianthus, and apple mint.
— OR —

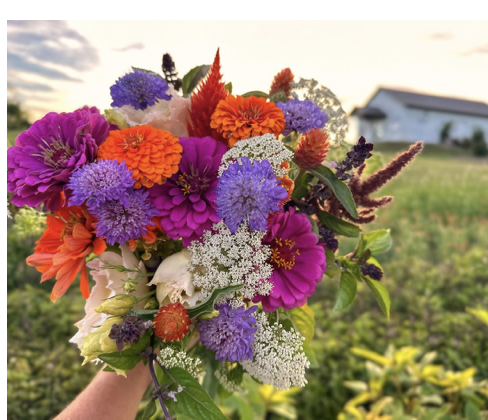
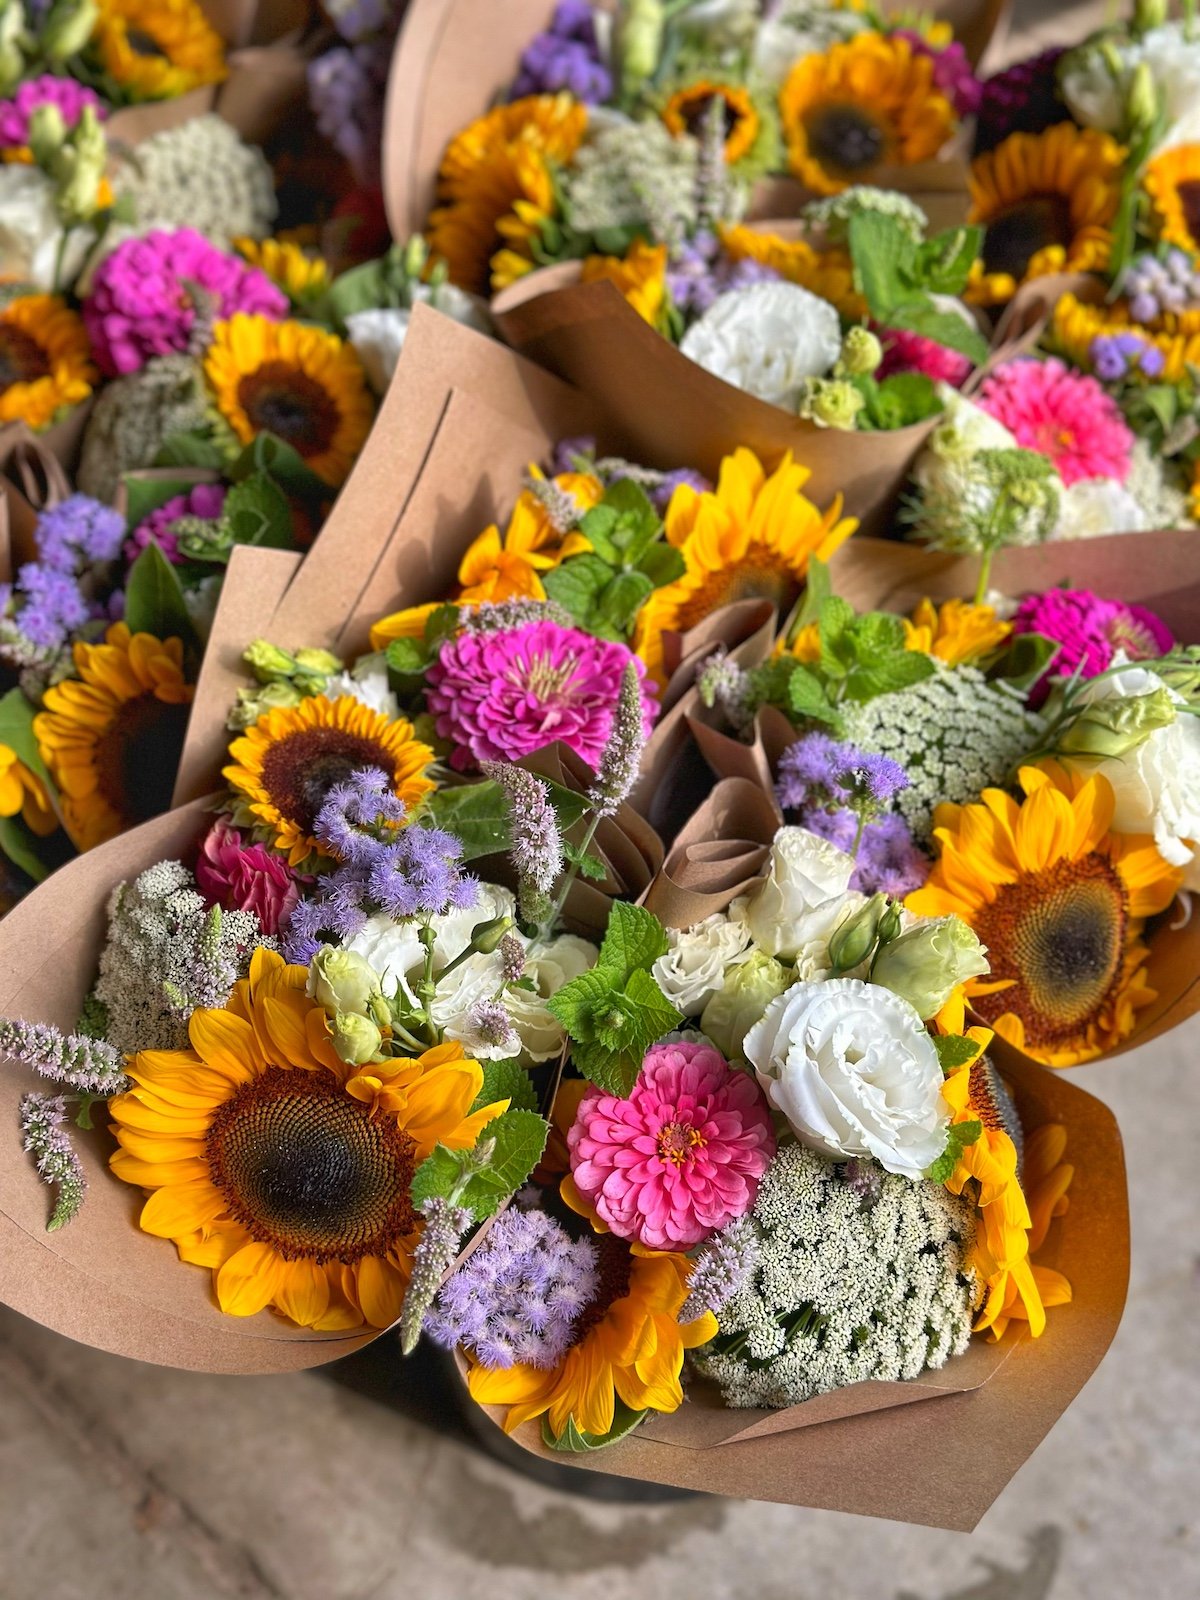
Bright and Bold
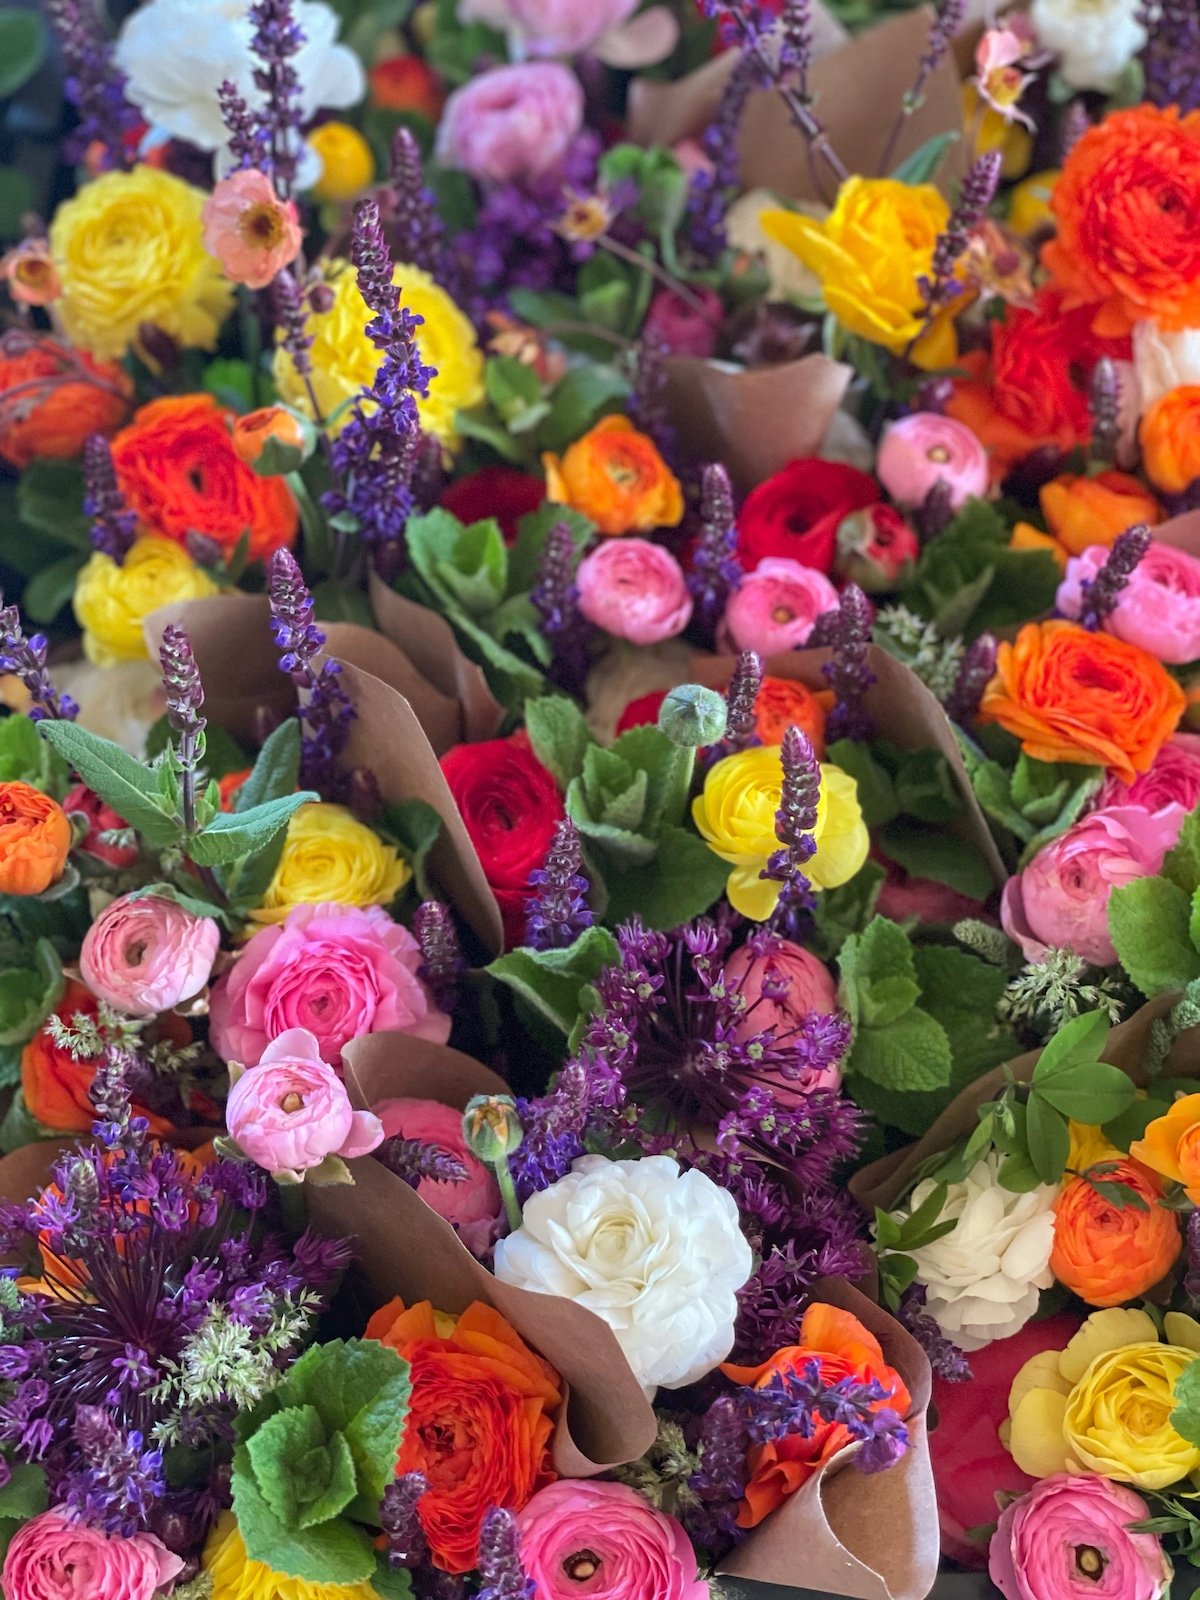
Are you a fan or bright and bold colors in bouquets? Our wrapped jar bouquets are a customer favorite, especially when they’re backed with bright, beautiful blooms at the height of the growing season.
Our customers look for our signature wrapped jars with their distinctive black & white ribbon and often tell us they see them and know instantly the they’re PepperHarrow bouquets.
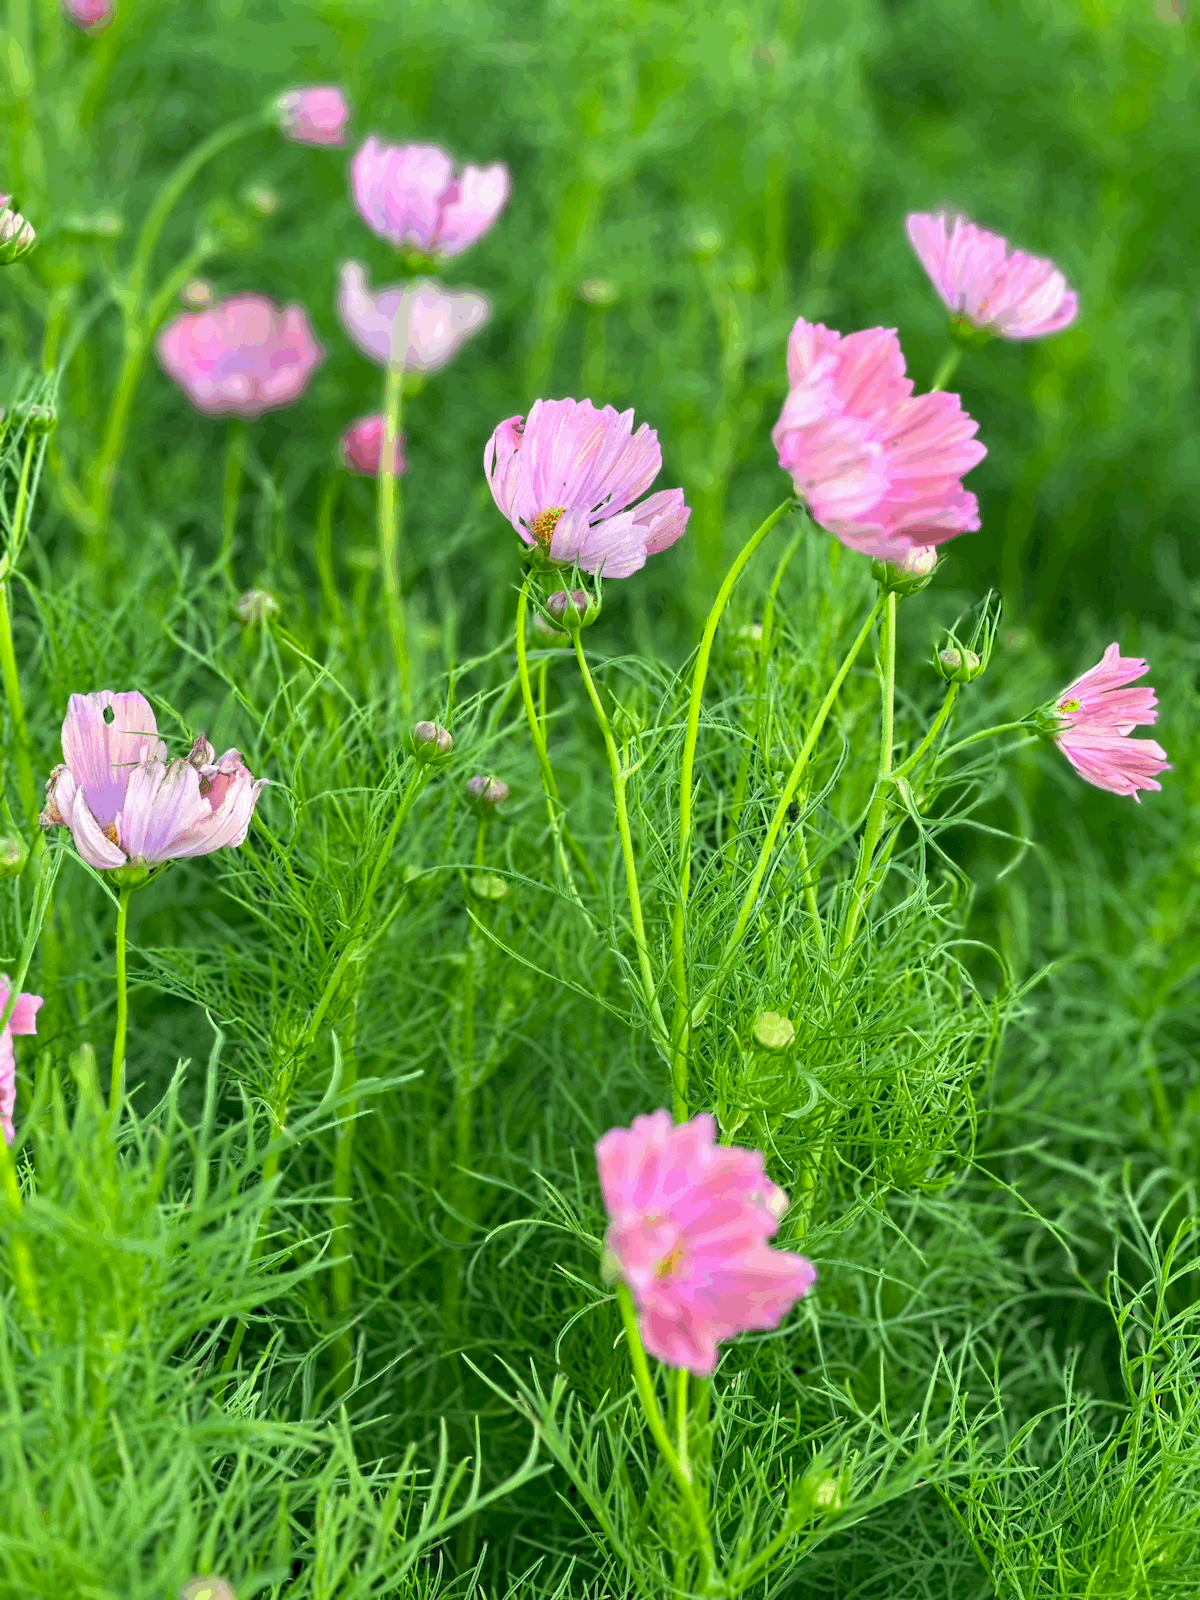
The flowers shown in these beautiful bouquets are zinnias, ageratum zinnias, lisianthtus, dahlias, tansy, celosia, snapdragons, and cosmos greens.

Fall Bouquet Inspiration
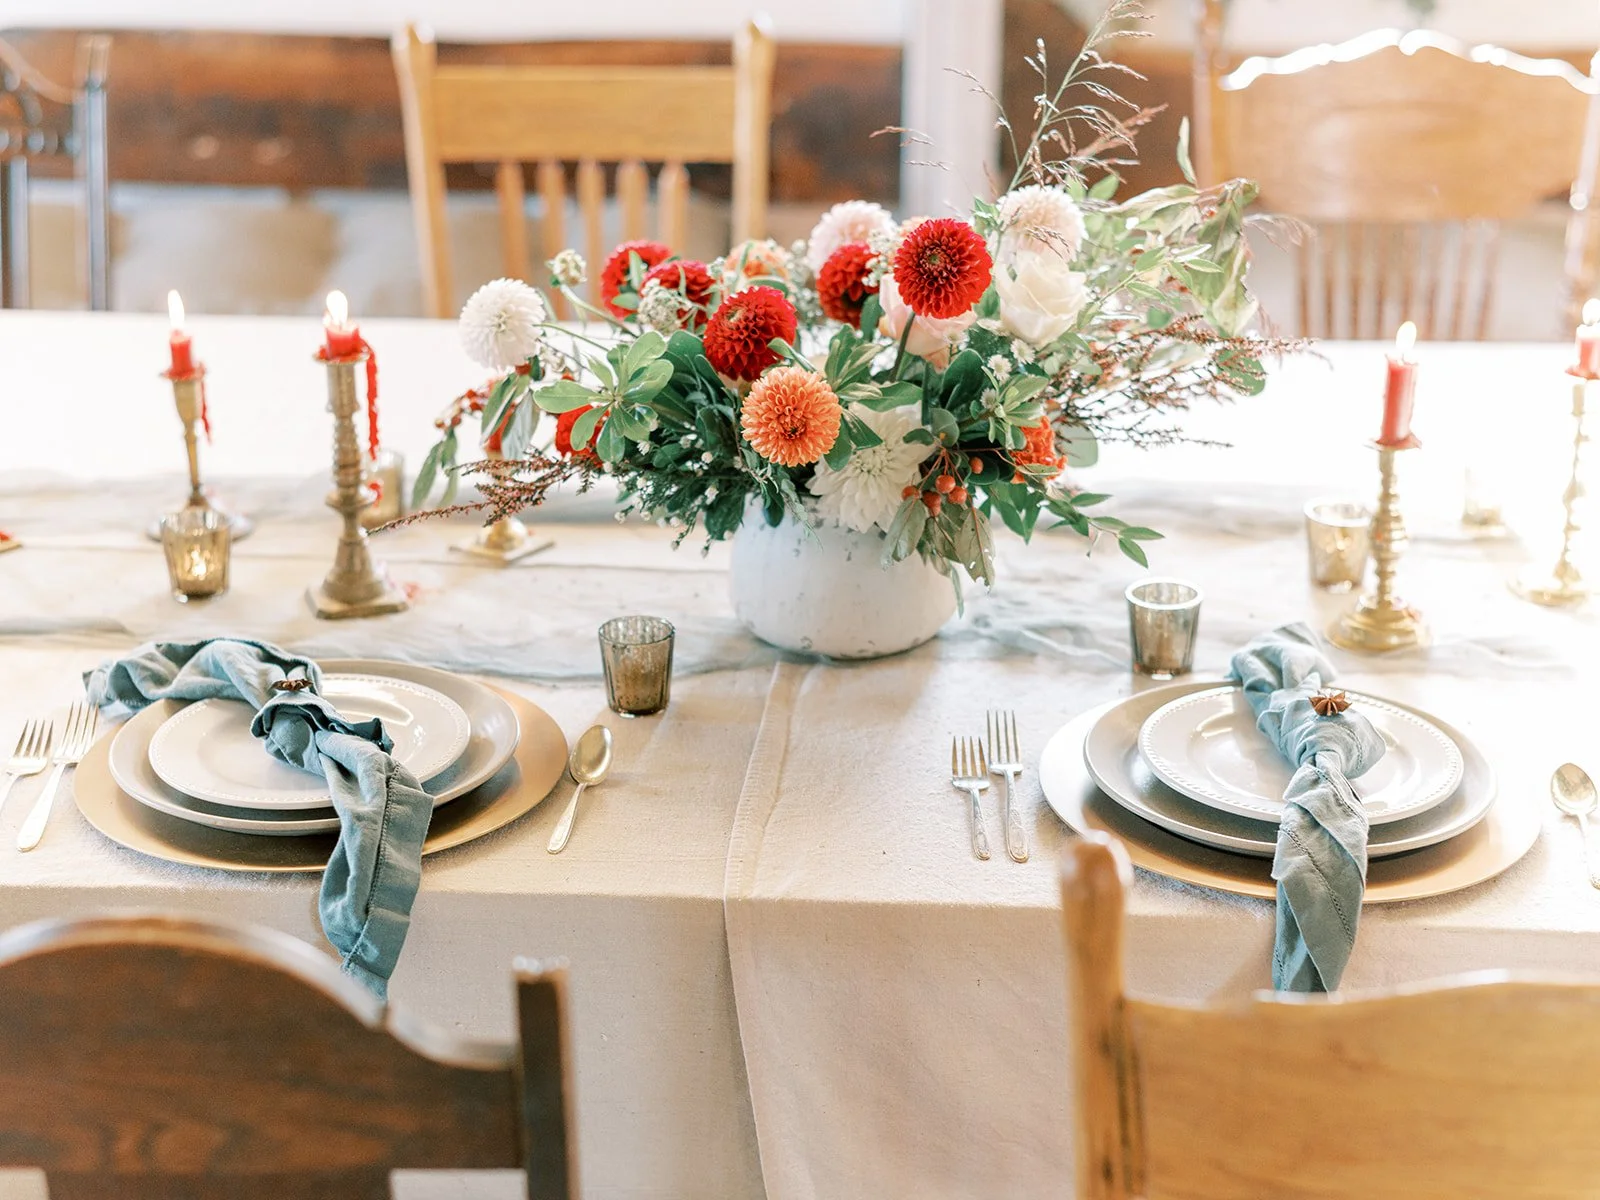
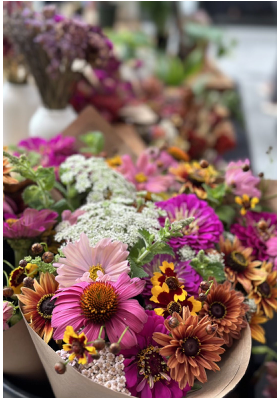
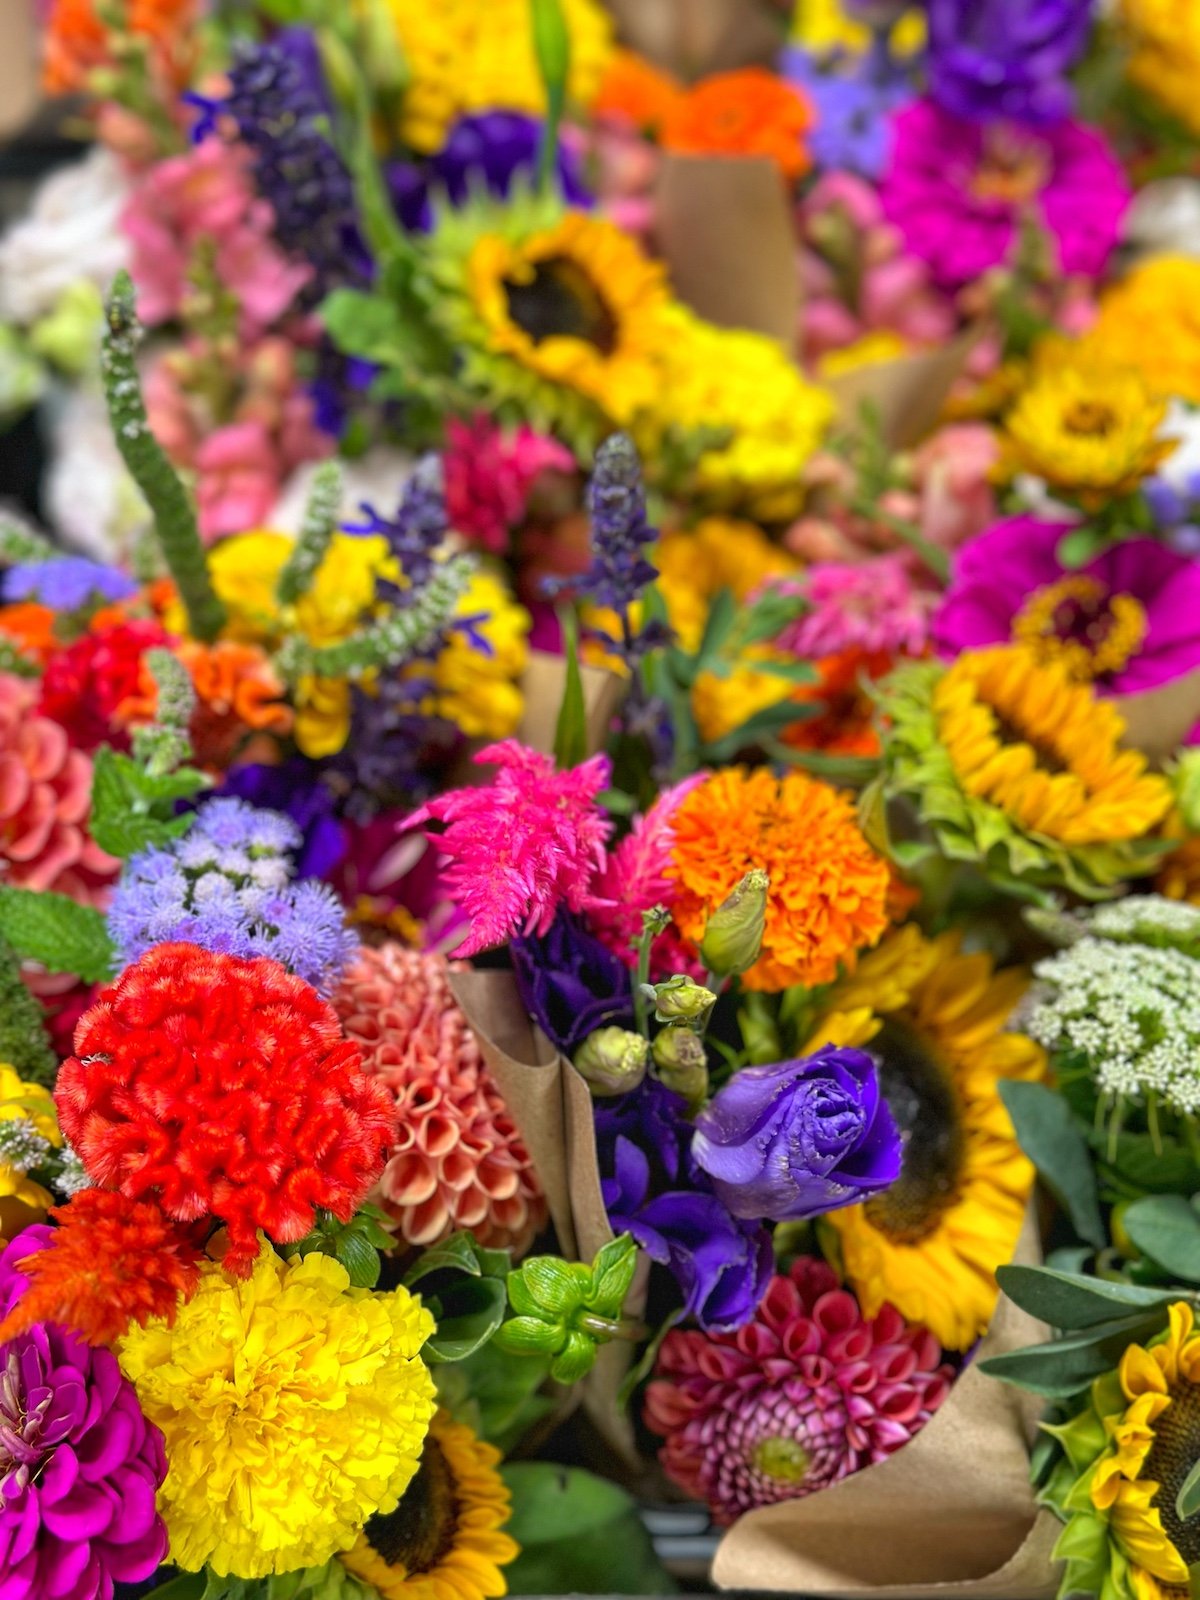
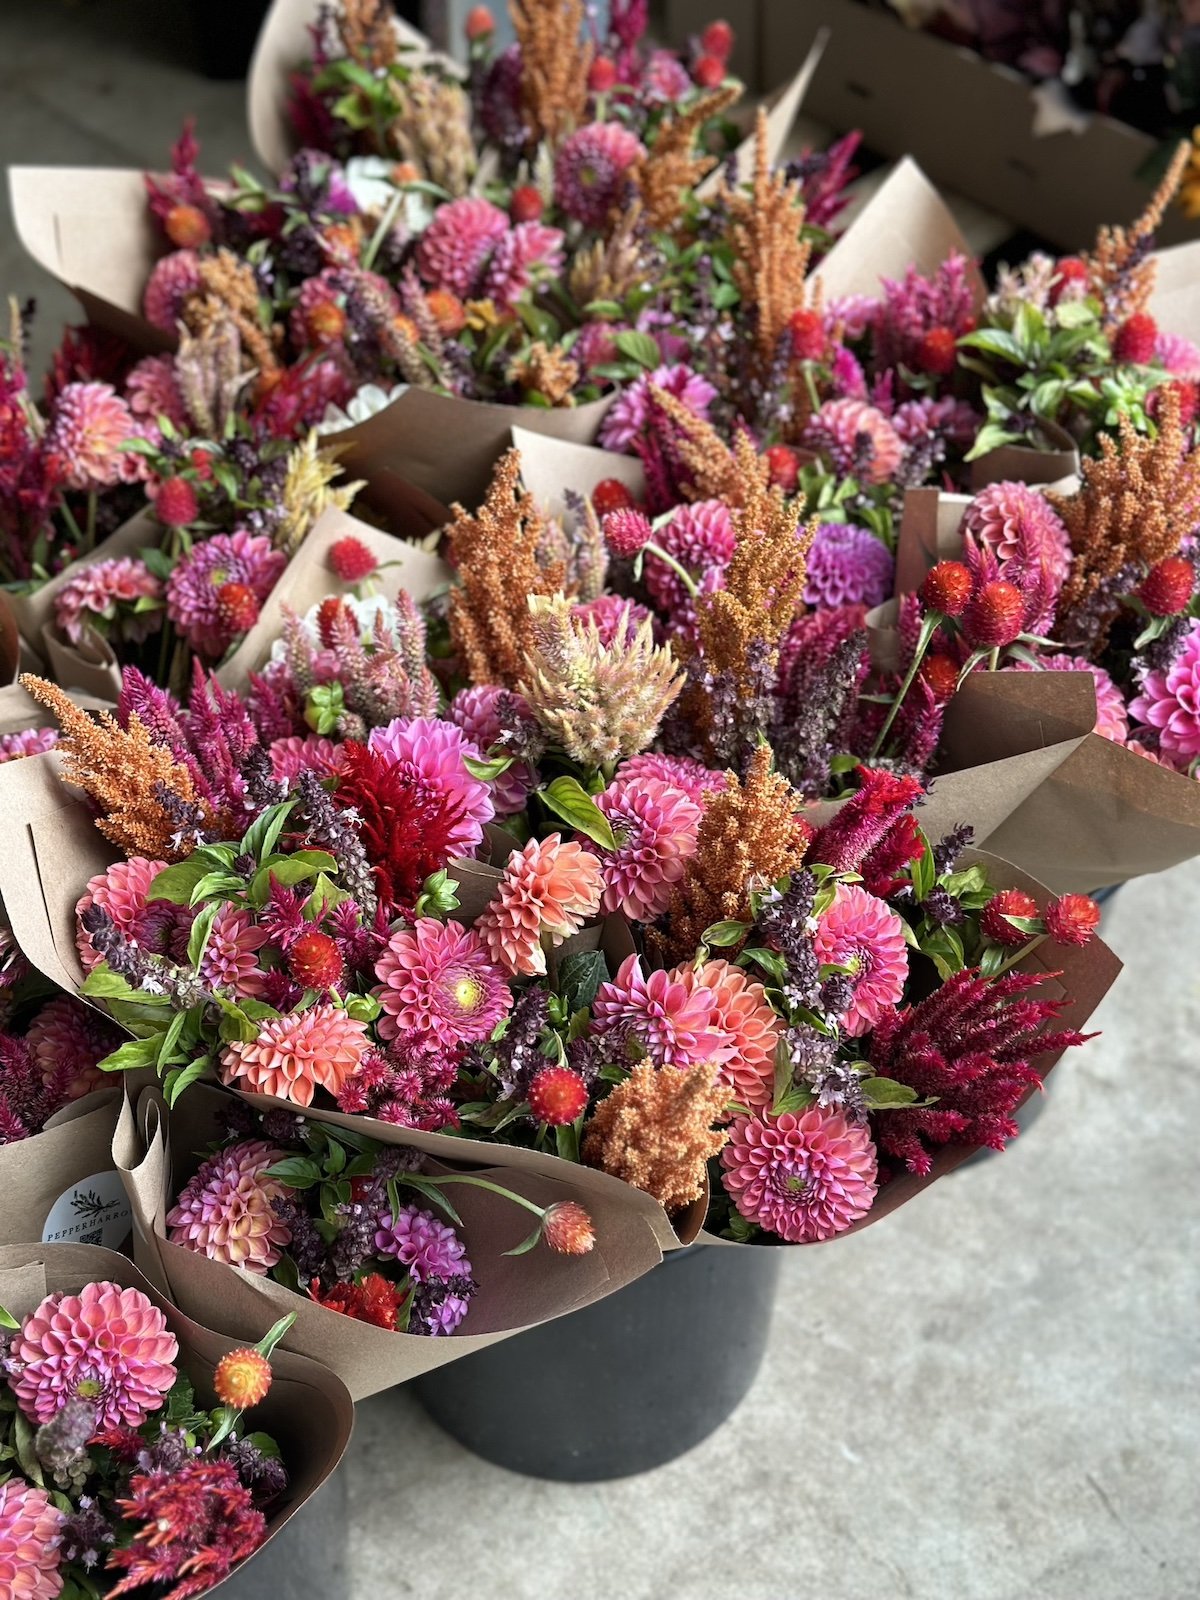
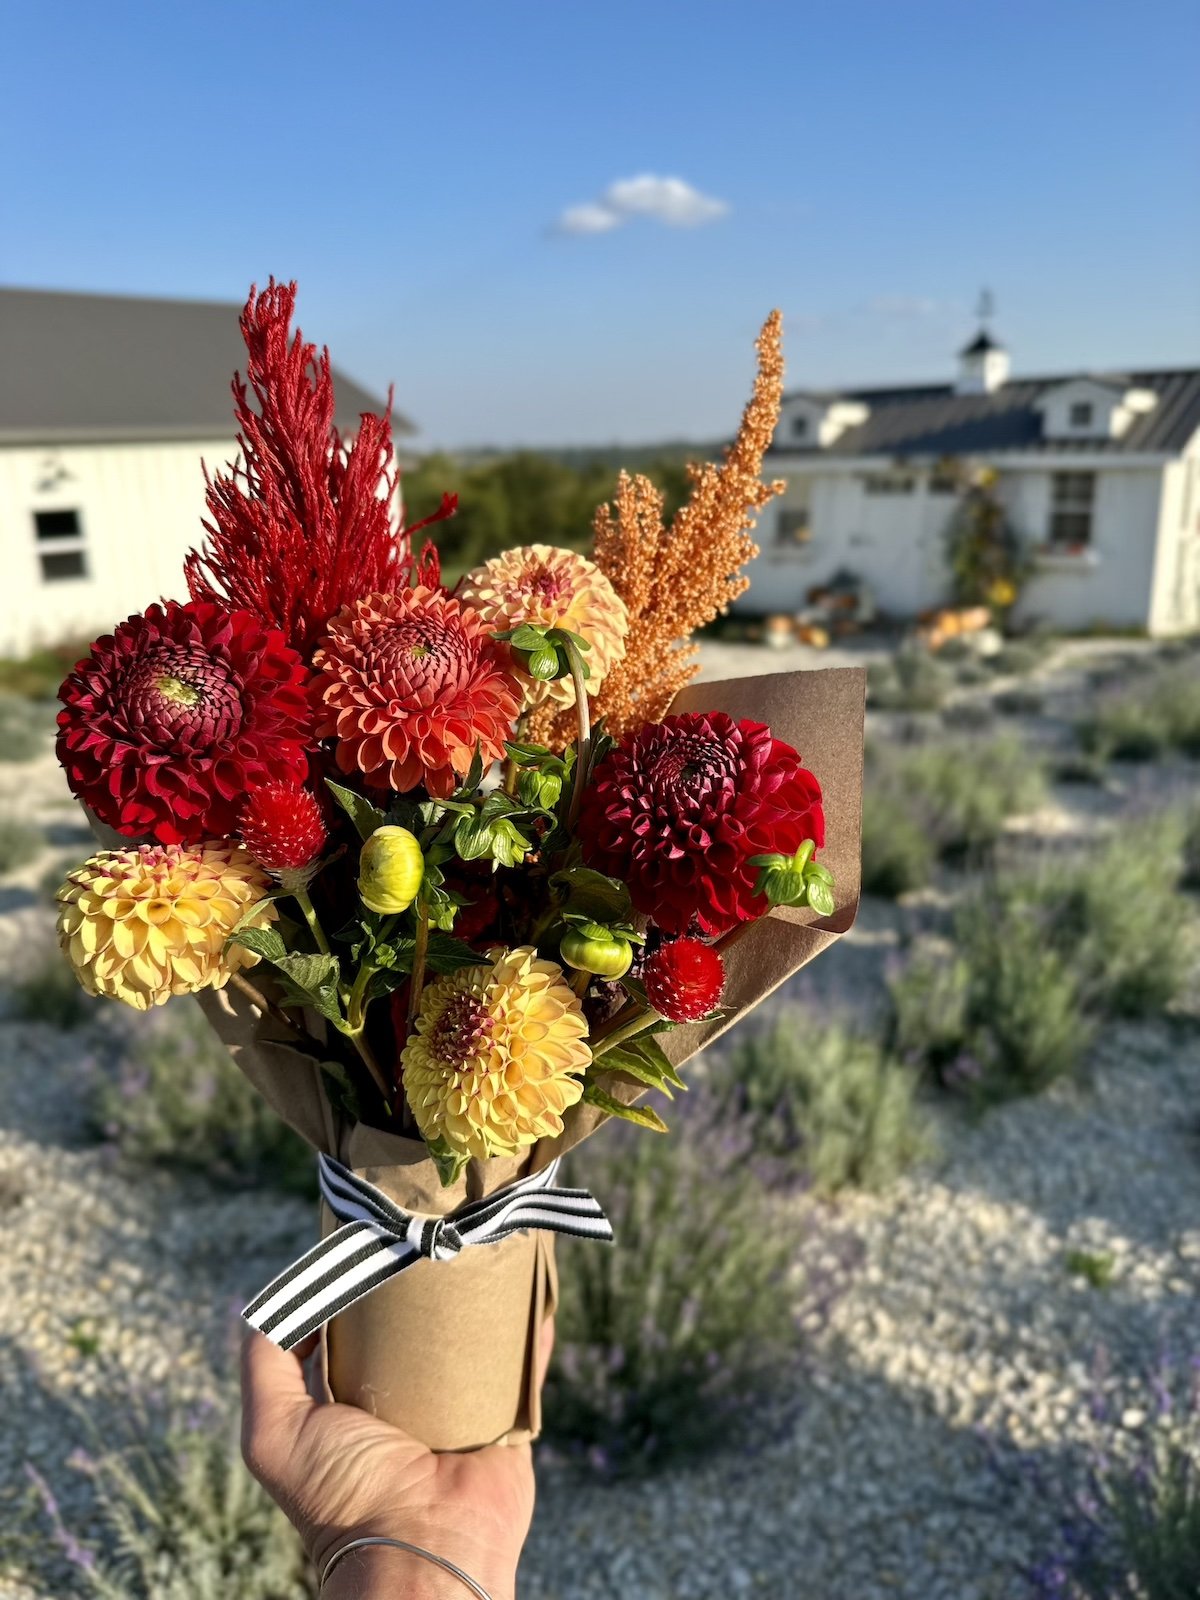
Warm, autumnal colors are typically what we like to focus during the fall season. We lean into oranges, browns, reds, and yellows for bouquet making. However, we’ve been increasing our inclusion of pinks and purples for a nice contrast of color to provide a nice contrast against the warm colors of fall.
Fall is a time to play with as many color combinations as you can, but always keep a seasonal color tie as part of the bouquet color scheme. Most of the colors customers gravitate towards during this time of year are what we stated above: browns, reds, yellows, burgundy, and oranges, but it’s fun to play off of these colors to experiment and create beautiful combinations.
We plan out the flowers that we’ll have blooming during this time in very early spring, start our flowers in early June and plant them out around the beginning of July. If you’re interested to learn more about how we do this, check out our YouTube video of blooms we plan in July for fall harvest, or a video that explains our succession planting schedule.
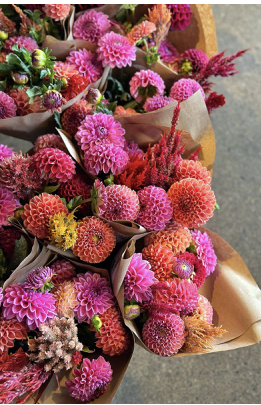
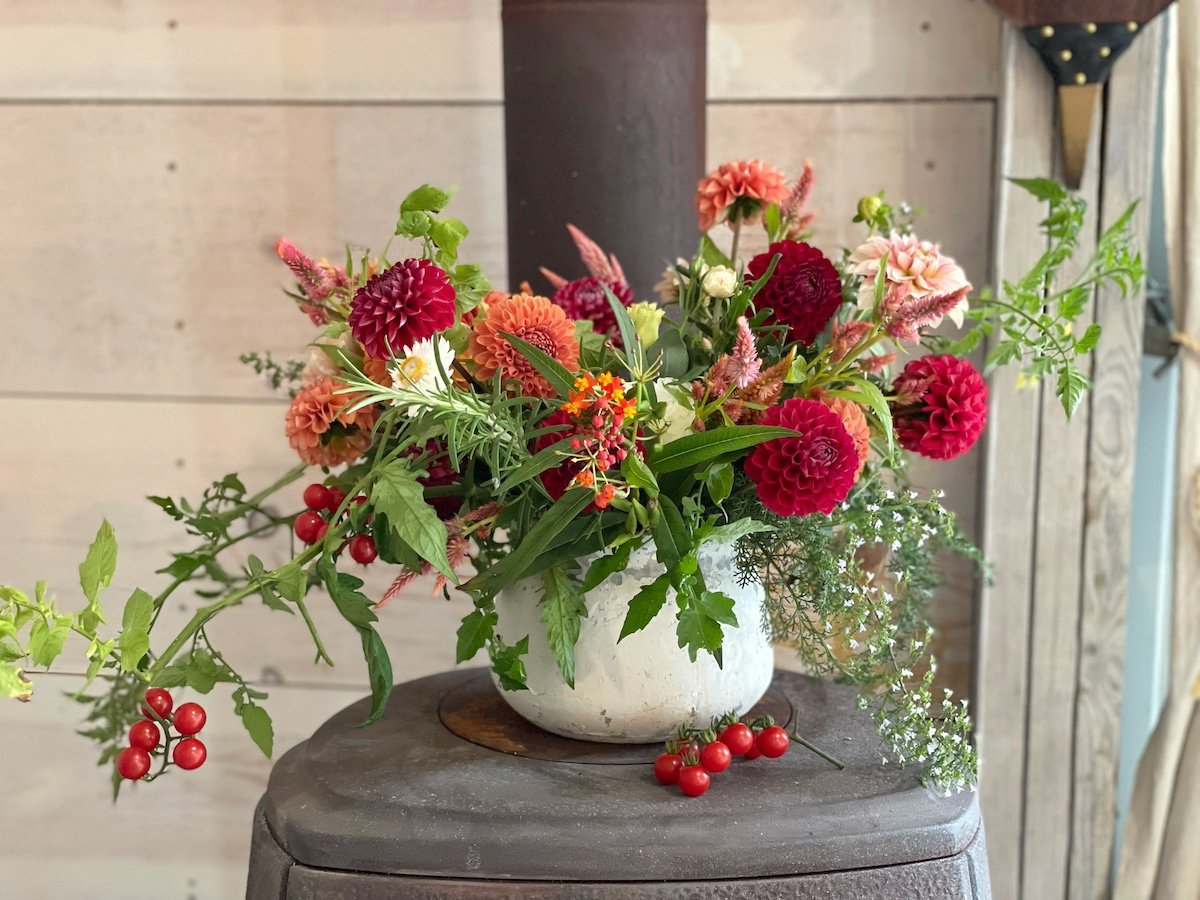
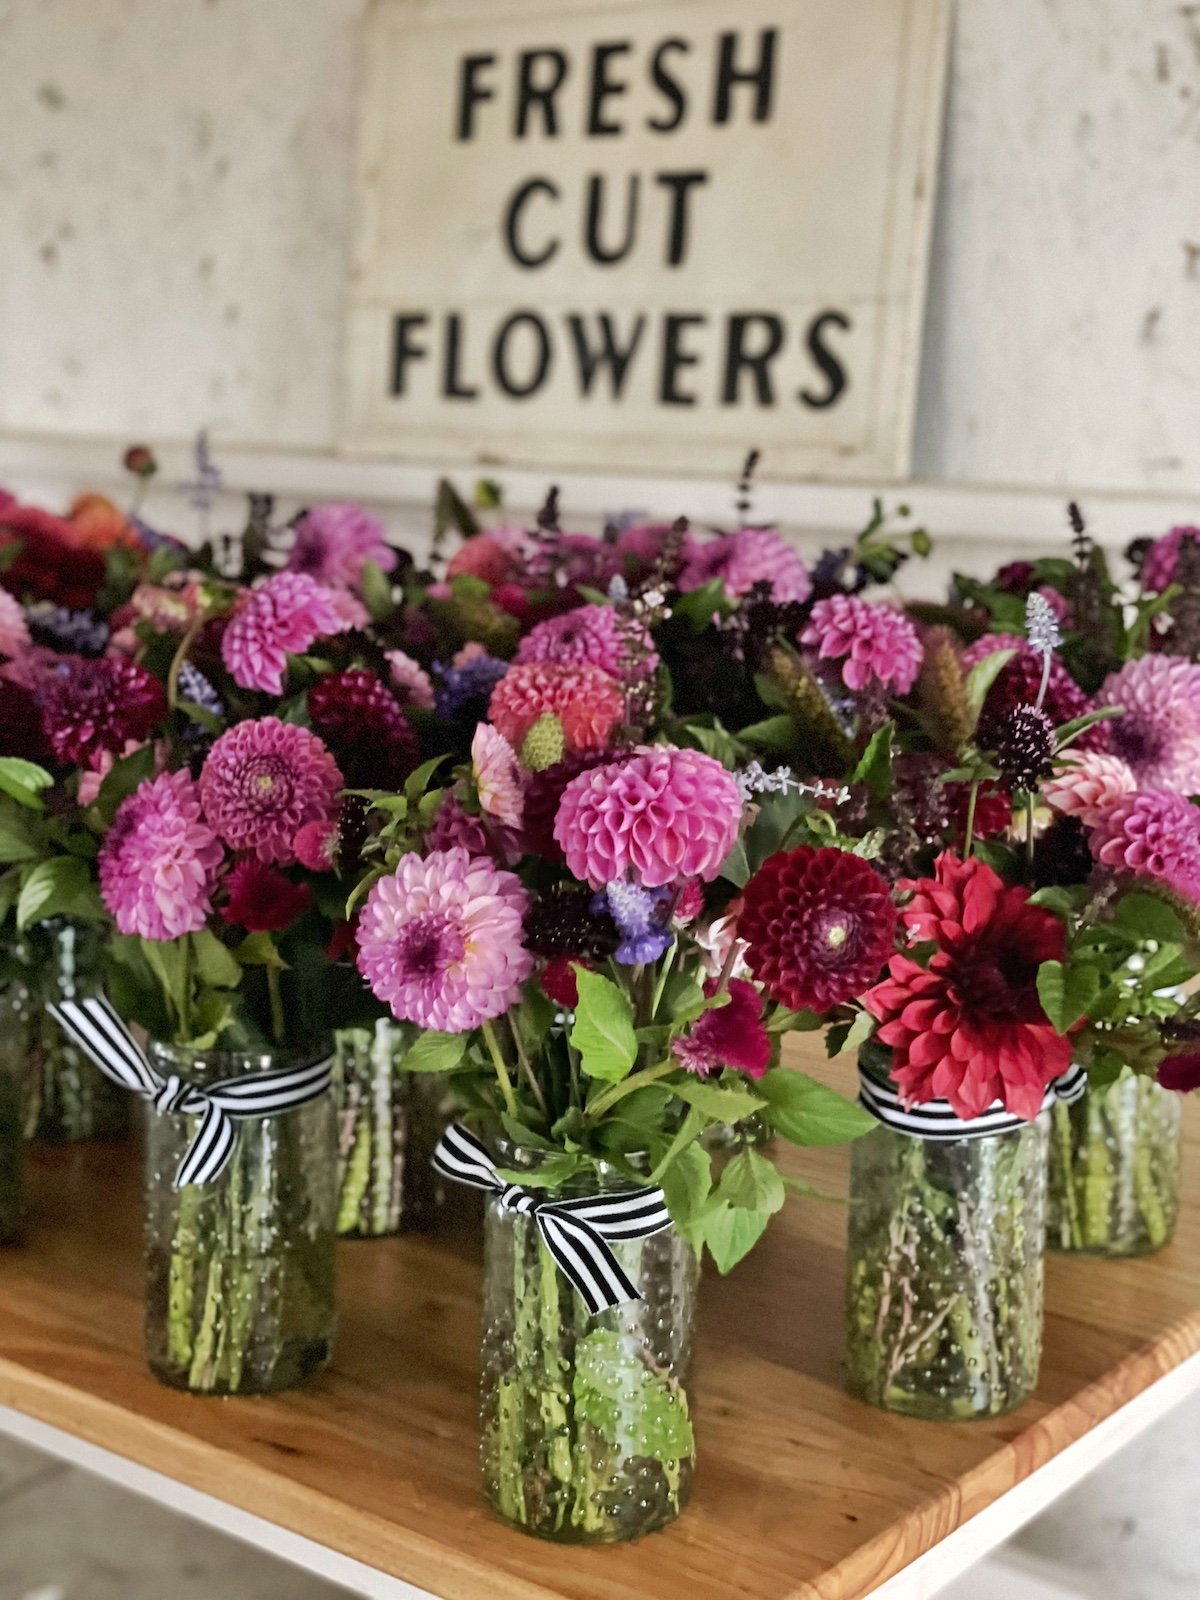
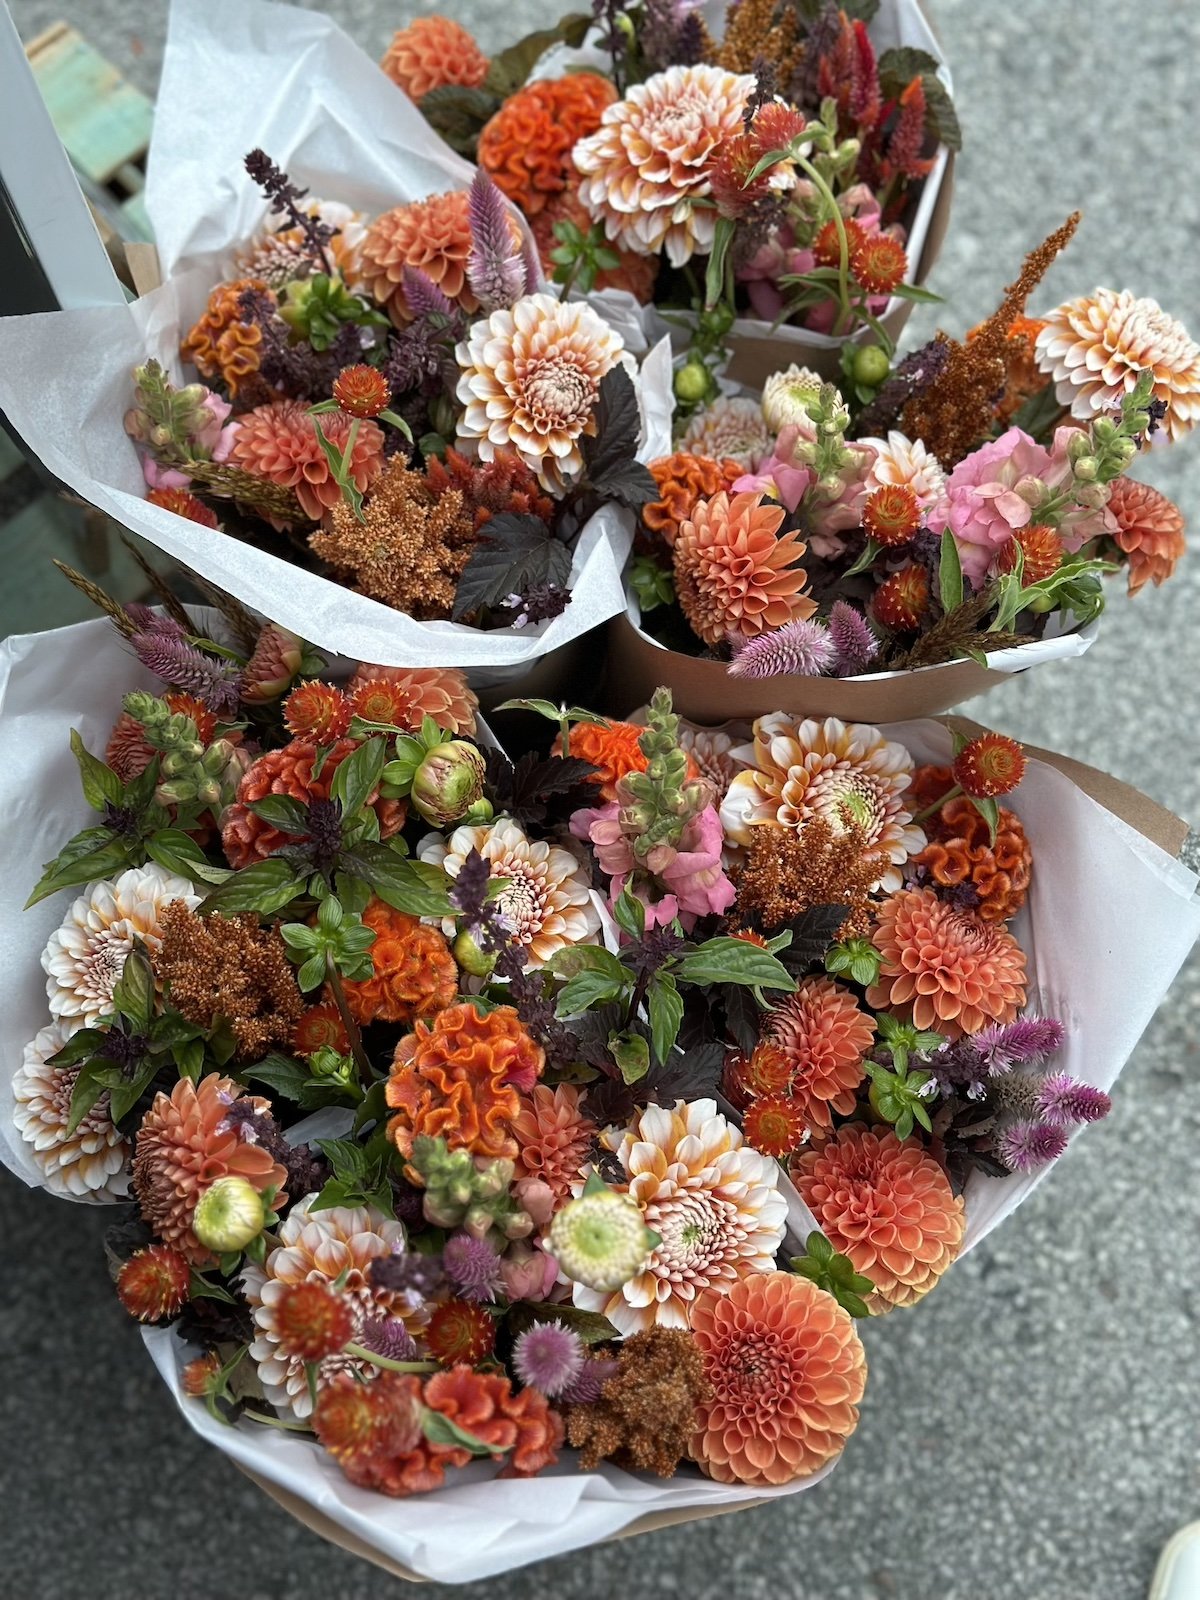
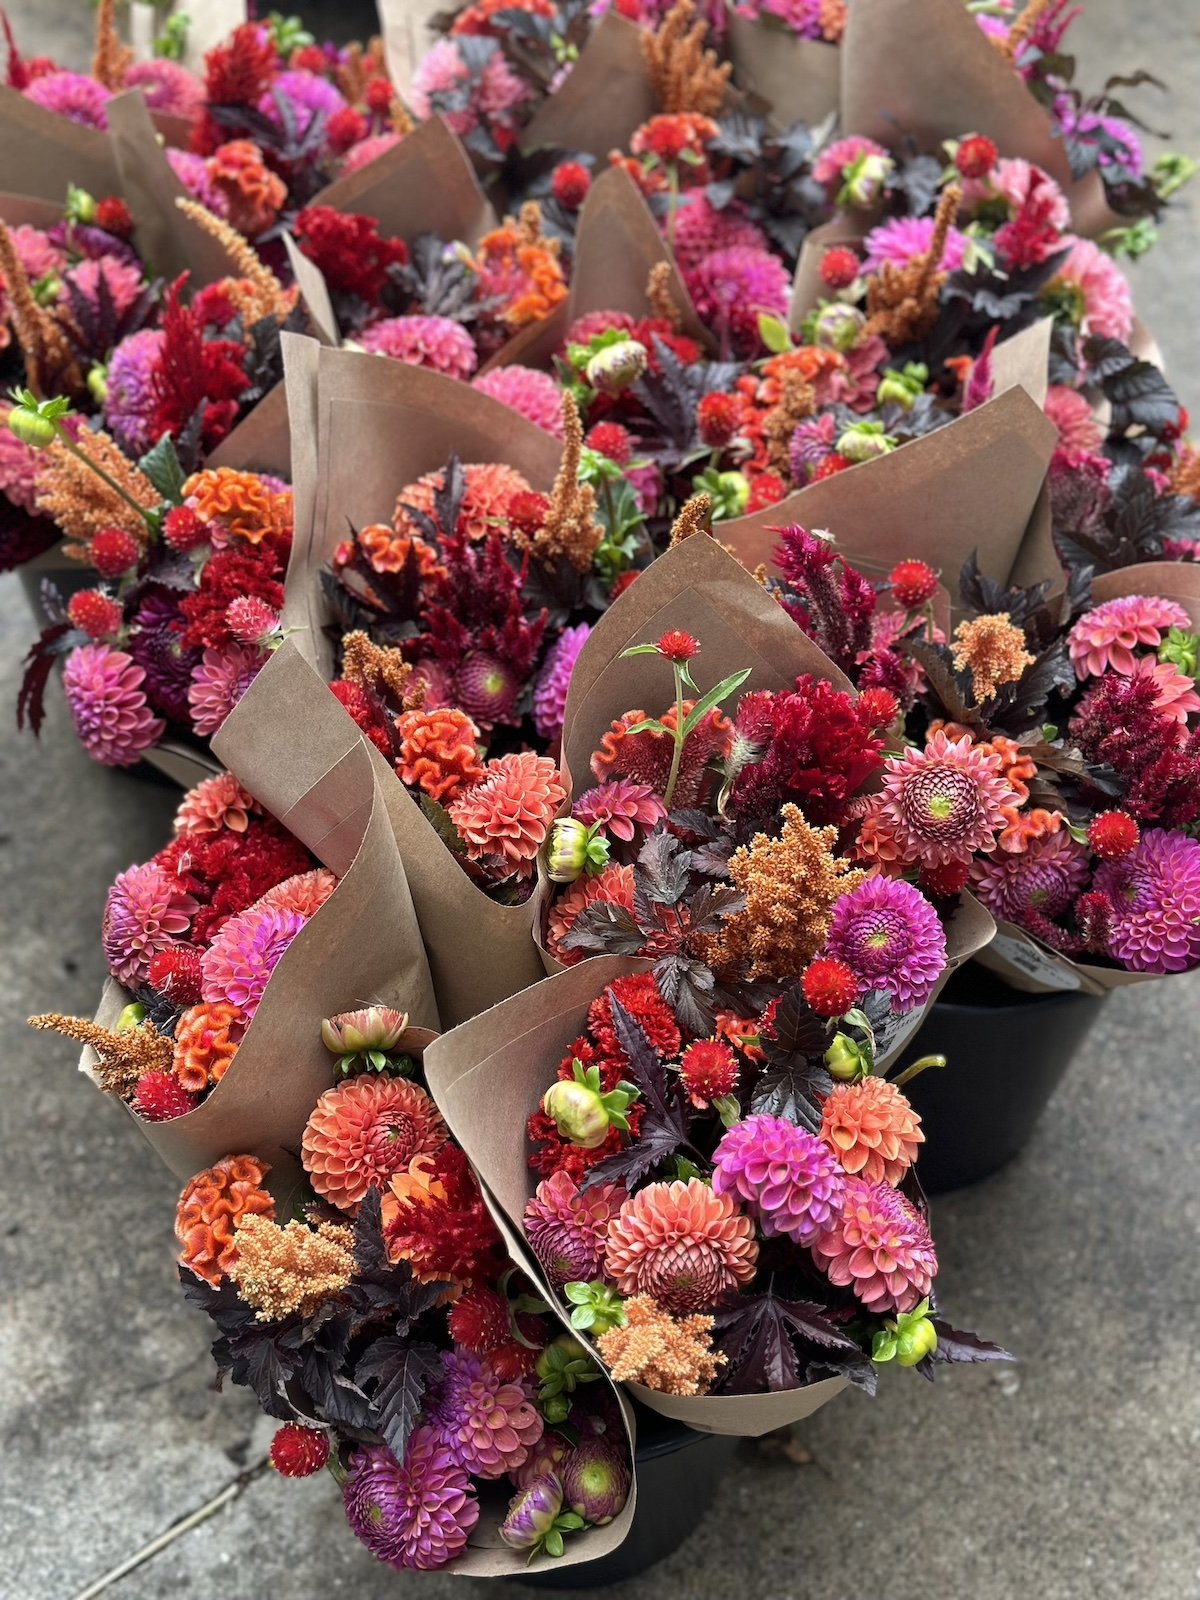
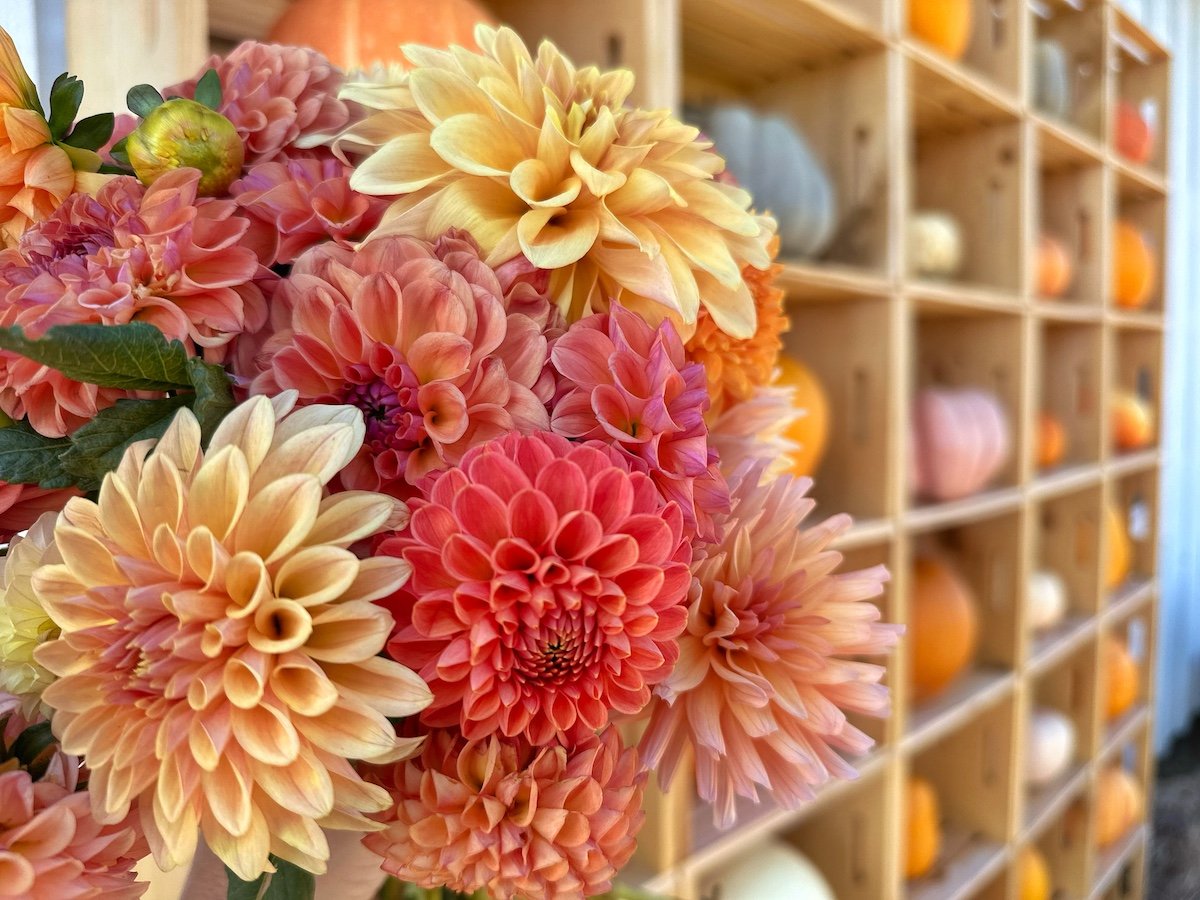
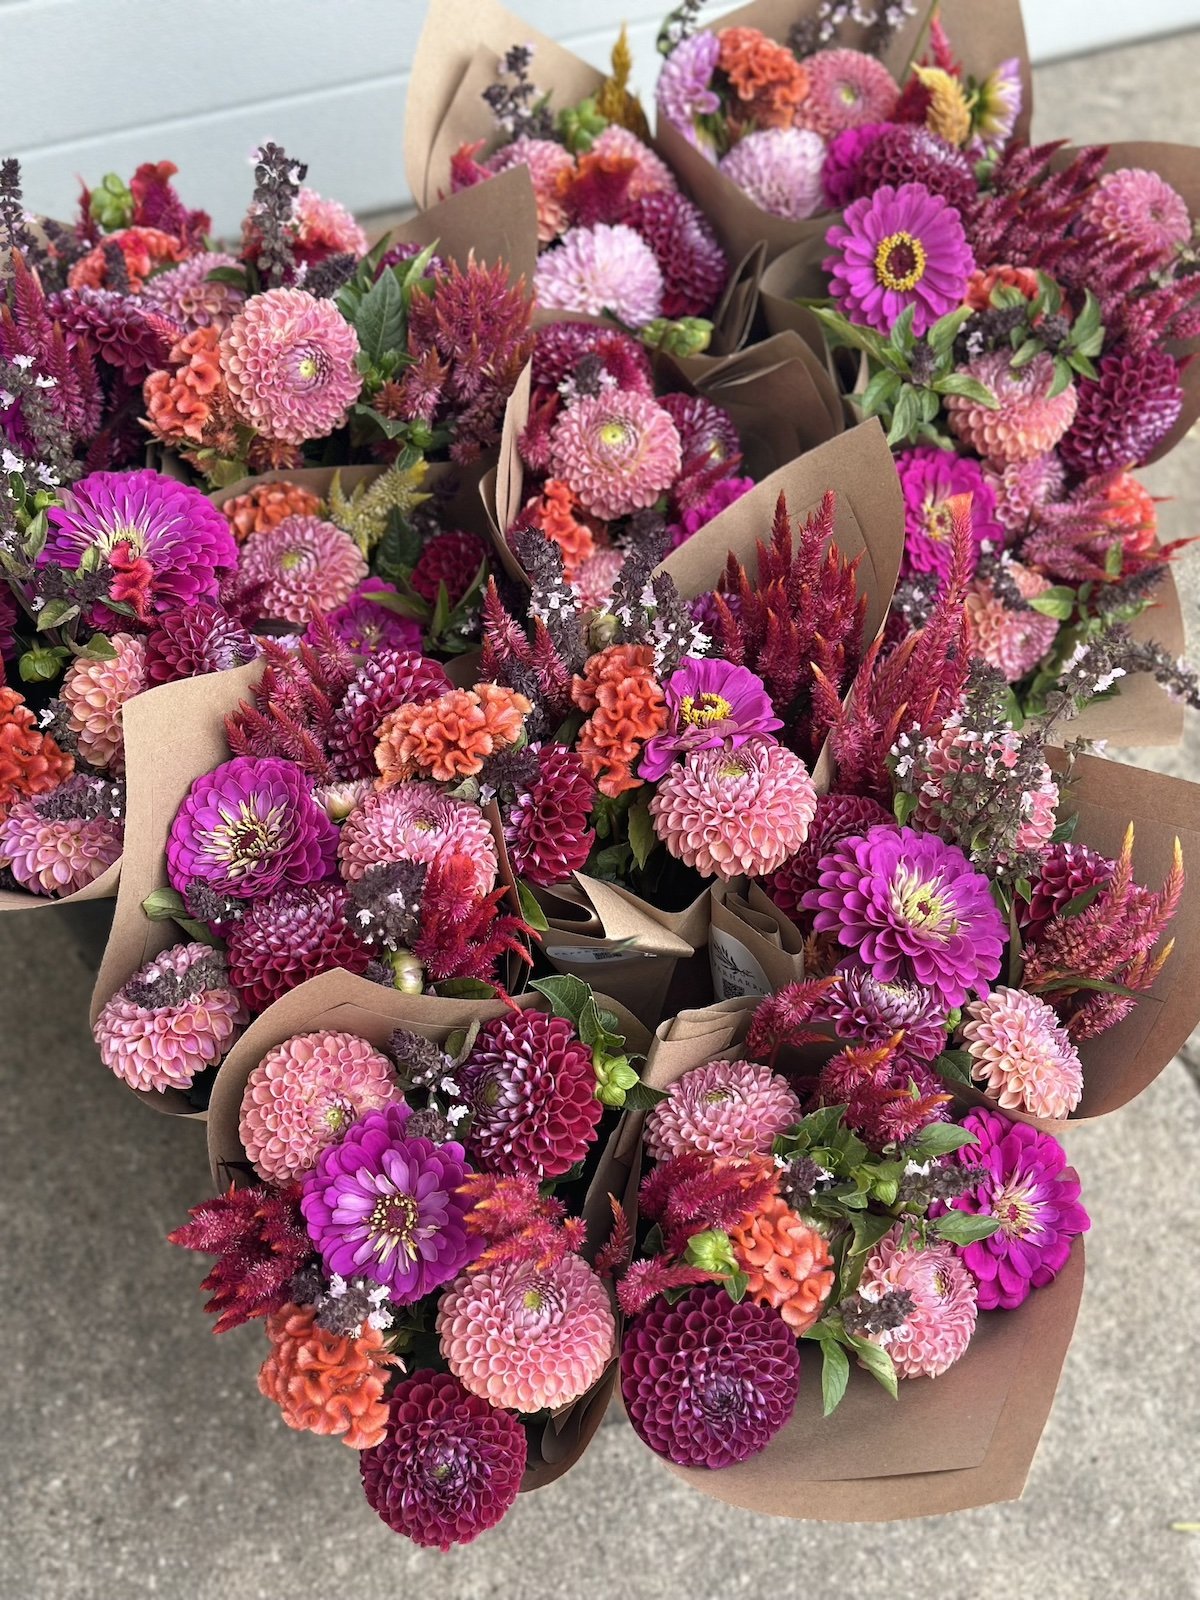
This is the time of year when nature’s bounty is at its best and our flower farm has a rainbow array of flower colors to chose from. This especially true of our most favorite flower that we’re know for this time of year: DAHLIAS! It’s easy to see why they’re our favorite. Not only do they come in so many shapes, sizes, and colors, but they bloom like crazy during the fall season, which makes them a staple at our flower farm.
Shown below are several of our bouquet combinations from the growing season. Our favorite was to accent our seasonal fall bouquets with pink and orange shades, which gave them a vibrant, but seasonal look. We also loved creating what we call our ‘pumpkin spice’ bouquet, which has a mix of warm orange dahlias and celosias, dahlias, globe amaranth and other goodies.
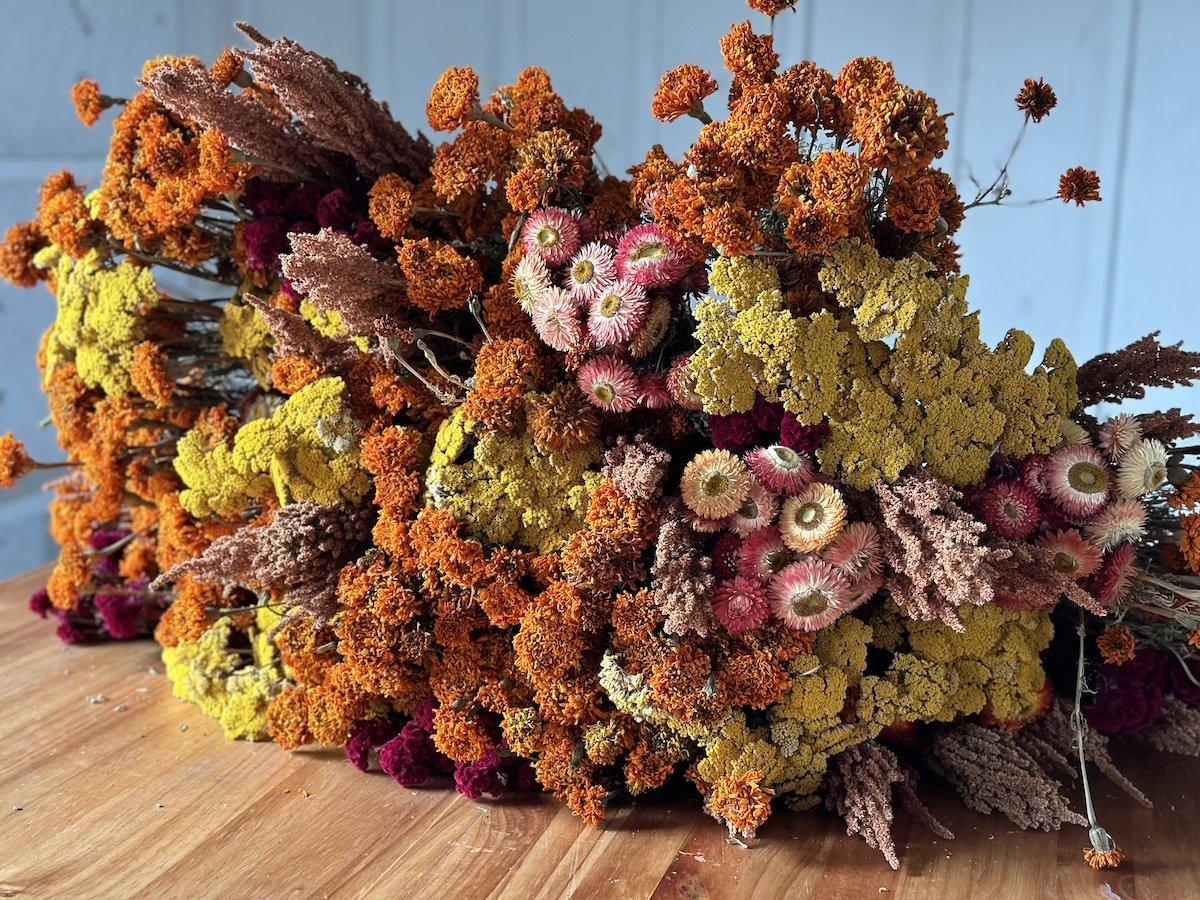

Leaning into Everlasting Flowers
During this time of year, it’s also good to use dried flowers to make everlasting bouquets for customers that are looking for a bit of color throughout the winter months.
Dried flower bouquets have been a customer favorite during the fall season. The thing we love best about them is it seems that any color combination looks pretty, so there isn’t a wrong way to put them together to make something pretty.

Digging on Dahlias
Dahlias are blooming so much during this time of year that we can only include them in so many mixed bouquets. With any extra dahlia blooms we have to offer, we put them in a mono-botanical combination of different types of dahlias. They’re a customer favorite, despite their short vase life, which varies, but is typically between 5-7 days.
For our growing zone, dahlias have to be dug up and stored throughout winter, but we use this opportunity to divide them to sell them to the public. We’re sold out for the season, but if you love dahlias, keep us in mind for future purchases.
We hope you loved seeing some of our favorite bouquet combinations and found inspiration for your own cutting gardens. Were there any flowers you saw in this blog post that you’ll be adding to your gardens this year? Or are there combinations of flowers you love together for a certain season we missed? If so, share them with us in the comments below!
For more inspiration, check out our YouTube video where we cover more of our seasonal favorites.
XX Jenn and Adam
