
Starting A Flower Farm in 2023
Embark on the rewarding journey of starting a flower farm in 2023 with these key steps: research the local market, create a comprehensive business plan, choose a strategic growing location, invest wisely in supplies, and start growing with care. Explore selling avenues like Facebook Marketplace and farmers markets, prioritizing visual presentation. Turn your passion into a successful business venture. Happy farming!
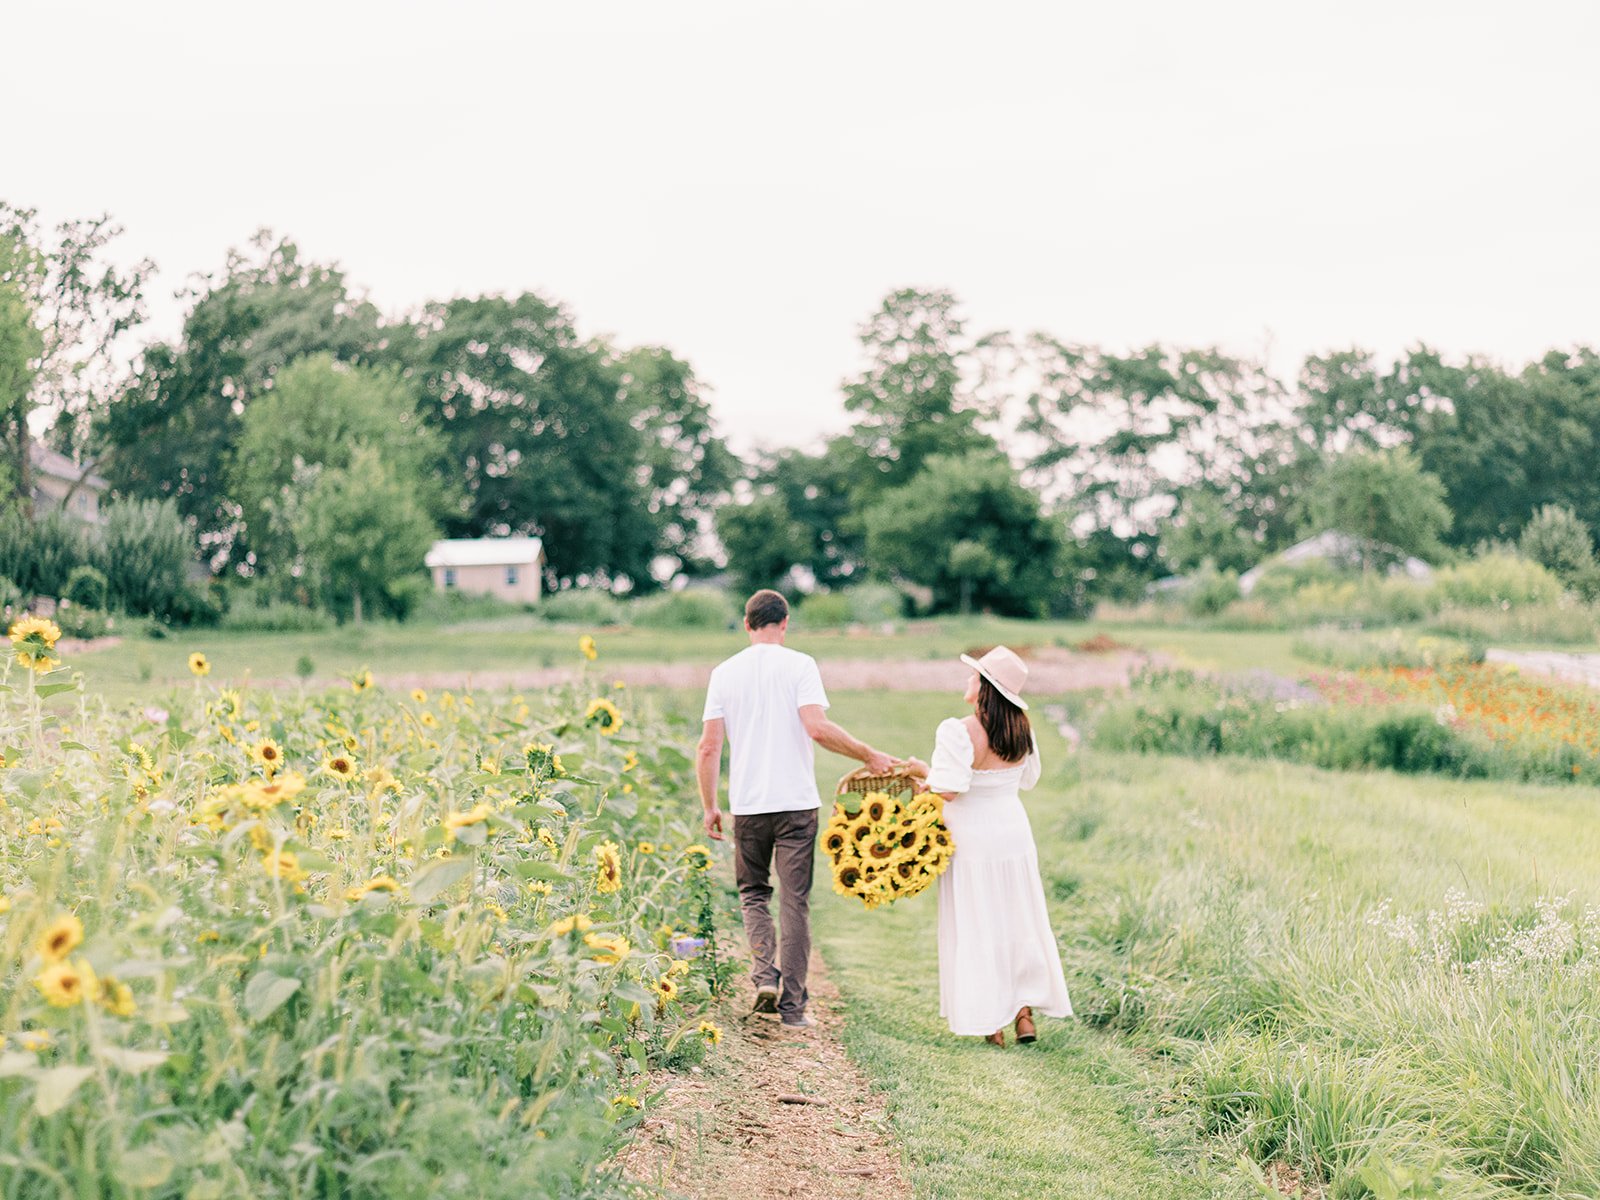
Starting a flower farm can be rewarding and fulfilling for those who love working with plants and flowers. We say it’s like living out our dream every day, no matter how hard it might be. However, before you begin your journey, we want to recognize that it’s important to do your research and plan out your path before diving in. In our recent book, Small Farm Big Dreams, we wrote about how to start a flower farm, but we want to follow up a give you a few more tips. Here are some steps we’d like to share to help you become a successful flower farmer in 2023!
Step #1 Research the market: Take some time to research the demand for flowers in your area and determine what types of flowers are most popular. You'll also want to consider what types of flowers grow well in your local climate and soil conditions. Is there a niche/gap in the market of something that’s not currently being offered where you could meet a customer need?
A Few Research Recommendations: Try to grow a few flowers of your own if you have not done so in the past. Scope out other local flower farmers and florists to see what their demand looks like, observe color combinations of flowers they put together. Buy a bouquet and attempt to do a price breakdown for each stem.

Step #2 Create a business plan: Once you have a pretty good feel on your local market, where your potential is for sales, etc., and what types of flowers you'll be growing, it's time to create a business plan. Your business plan should include details about your target audience, pricing, marketing strategies, and financial projections. Creating a business plan is NOT a bible, but it’s a great guide to help keep yourself on track during the start up process of your flower farming operation. It’s also a great tool to use for funding purposes, if you’re looking to secure money through a loan from a bank, small business loan, or other outside funding mechanisms.
Business Plan Tips: There are a lot of resources out there to help with this, including your local Small Business Administration. Tap into as many resources as you can. They are there to help! Here’s a quick link to US SBA, here. This link will help you get to local resources.

Step #3 Choose a flower bed location on your property and plan the layout: Selecting the right location for your flowers is crucial. Consider factors like access to water, sunlight, and infrastructure when choosing a site that would work best for growing flowers. We highly recommend taking a year to observe your property and see where possible locations for your flower garden/field might be. You'll also want to research any zoning regulations or permits that may be required to operate a flower farm in your area. These requirements vary for each state, city, and county.
Recommendation for selecting a growing area: our farm is not flat, but we use the slight slope to our benefit, because it does help with water drainage. It’s nice to find a nice flat spot for your flower fields, but it’s not a requirement. Almost always, you have to use what you have access to. If the area you’re looking at is too flat, we highly recommend hilling whenever possible to help with any potential water drainage issues that may arise with growing on a flat area, especially if you observe standing water during heavy rains.

Step #4 Purchase supplies and equipment: You'll need to invest in a variety of supplies and equipment to get your flower farm up and running. This list of items includes necessary items like seeds, pots, soil, landscape fabric (to grow flowers in) watering systems, and other tools (rakes, shovels, etc).
Pro-Tip: Start small with your up front investments. If you can getaway in year 1&2 with smaller investments, such as a tiller instead of a tractor, this will help make sure you can be scalable. Bottom line is that you don’t have to have all the fancy tools to be able to ‘make it’ as a flower farmer. There’s something to be said about bootstrapping and making what you have work for a temporary basis.

Step #5 Start growing: Once you have all the necessary supplies and equipment, it's time to start planting and caring for your flowers. This will require consistent watering, fertilizing, wedding, and deadheading to ensure that your flowers are healthy and productive.
Recommendations for growing flowers: Most of our flowers are planted in landscaping fabric with 9” between each plant. There are very few flowers we do not plant in fabric, but some that we sometimes think about not putting in fabric are: sunflowers and zinnias. Oftentimes we see that once our seedlings are established after translating, roughly 3 weeks in the ground, we are able to decrease our watering cycle depending on the weather.

Step #6 Sell your flowers: There are many different ways to sell the flowers you grow on your farm. We highly recommend having a place to sell your flowers before you grow them, which starts in step #1 and step #2 above. However, many new flower farmers we’ve had the opportunity to chat with have used their first years of growing flowers to simply give them away for others to enjoy, while they learn the ins and outs of growing and consistently having blooms. A few options for selling your flowers include: posting them in Facebook Marketplace, selling directly to florists. farmers markets, or setting up a retail space on your property where customers can purchase bouquets and arrangements directly from you.
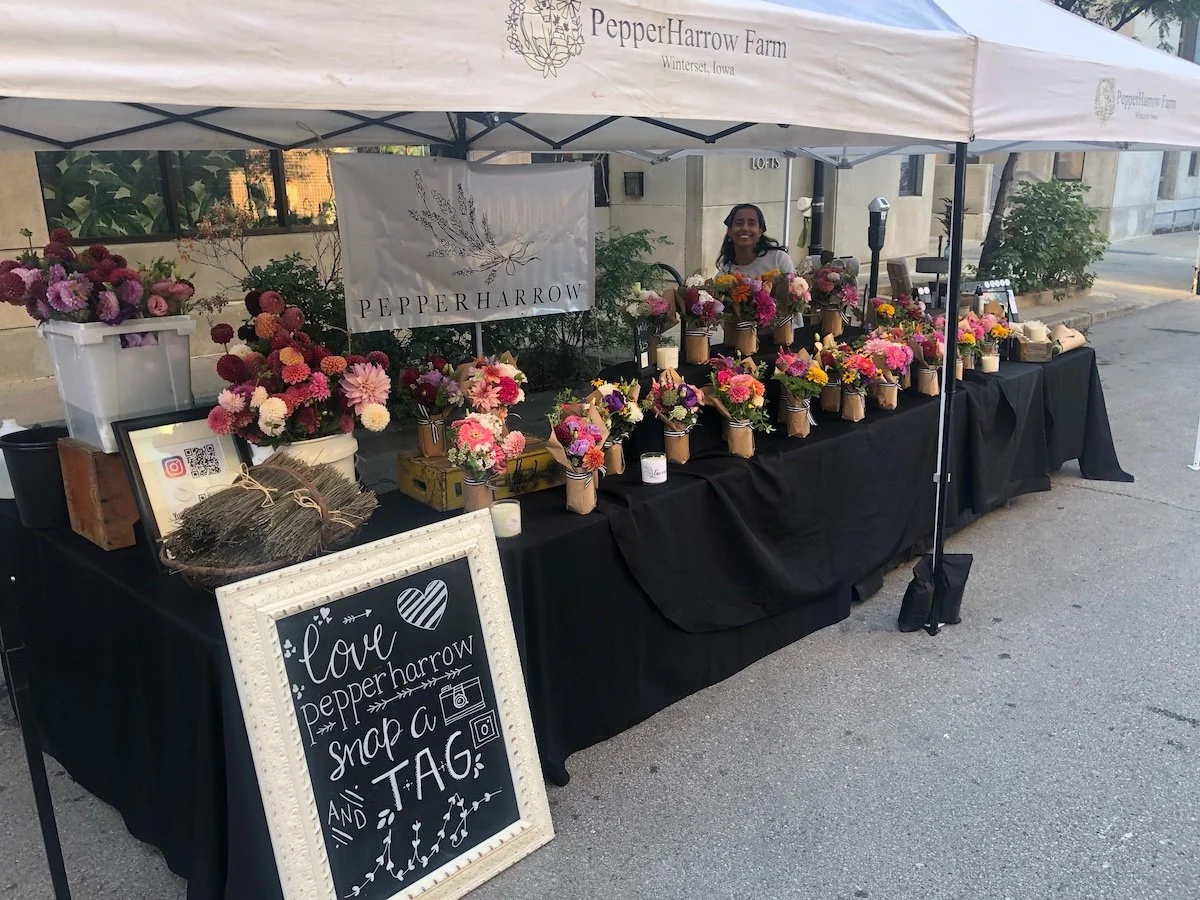
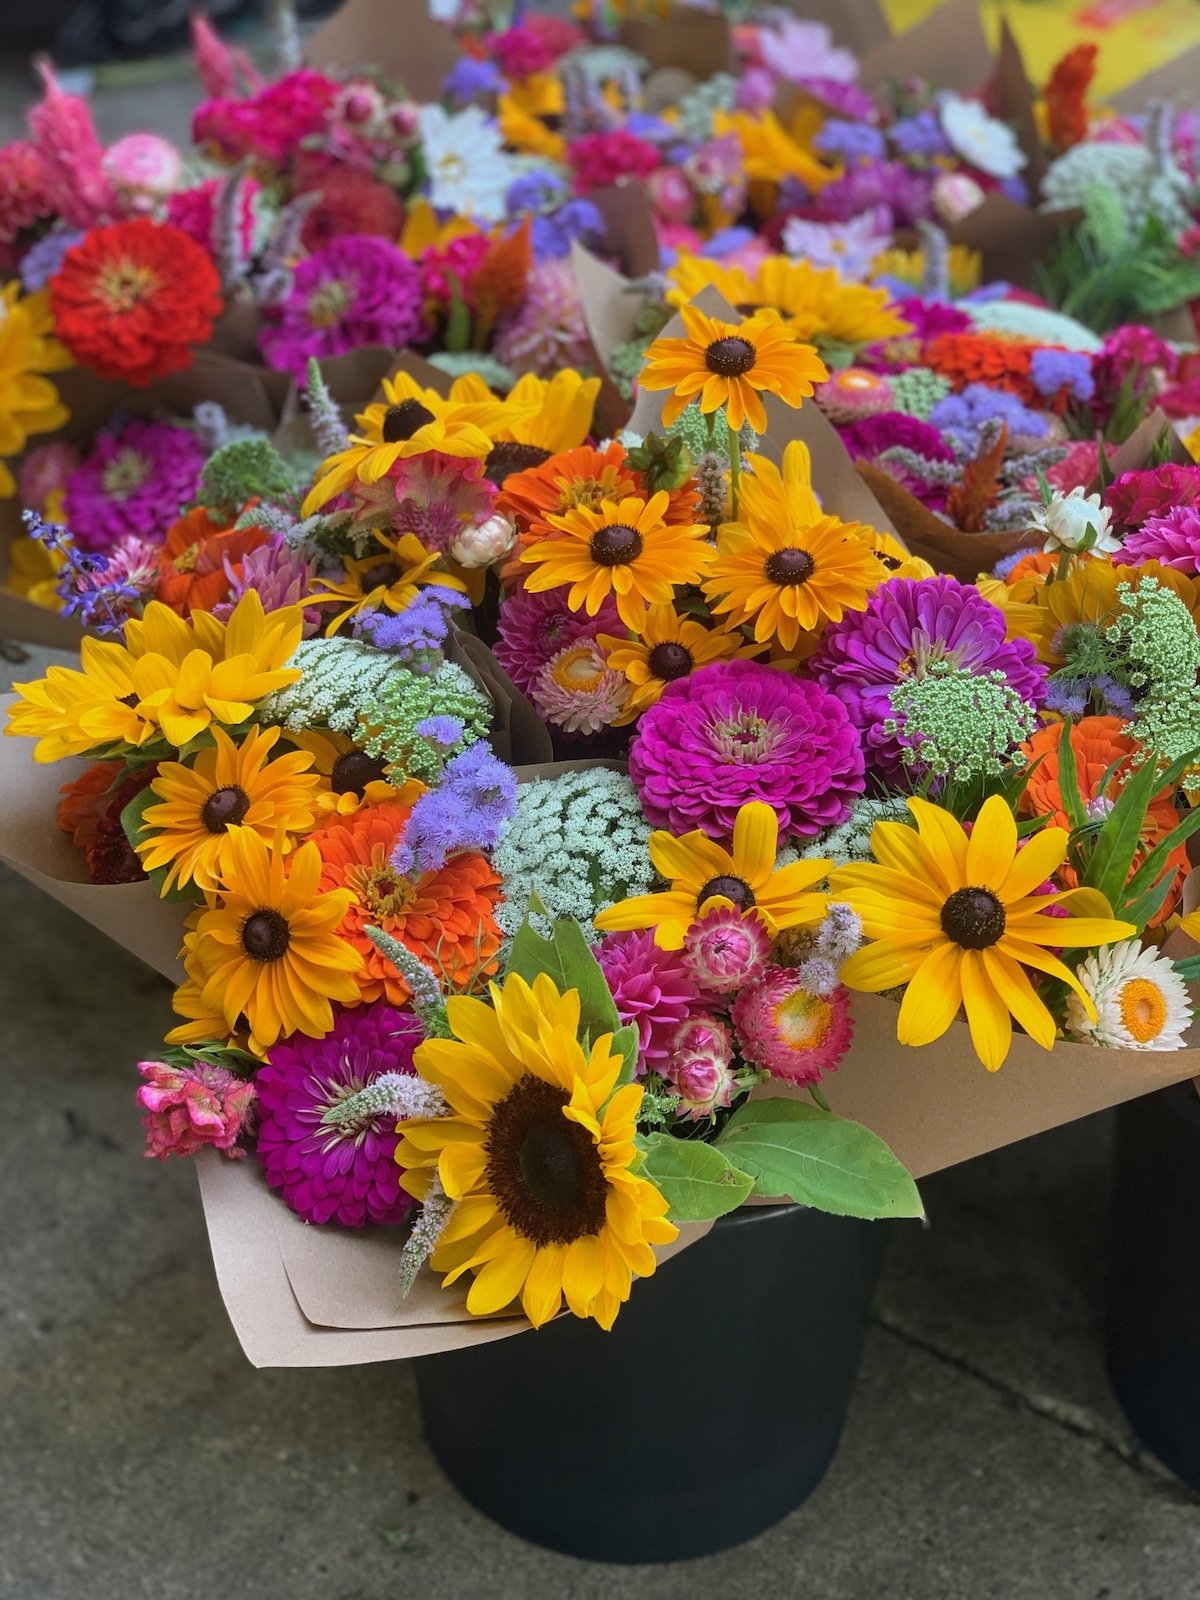
Recommendations: Try different ways out and see what works for you. Customers really nice presentation, so be sure to make the presentation to your flowers visually pleasing. Below is our Farmer’s Market stand. We like a white tent because it’s light and you can see the flowers without a tint. The black table cloths makes the flowers standout and we love how we present our bouquets in wrapped jars. You can access our e-course on how we do this wrapping process here.
Starting a flower farm can be a challenging but rewarding opportunity. We hope that by following these steps and taking note of some of our suggestions that you can turn your passion for growing flowers into a successful business in 2023!
XX Jenn and Adam
Bouquet Inspiration for Your Cutting Garden
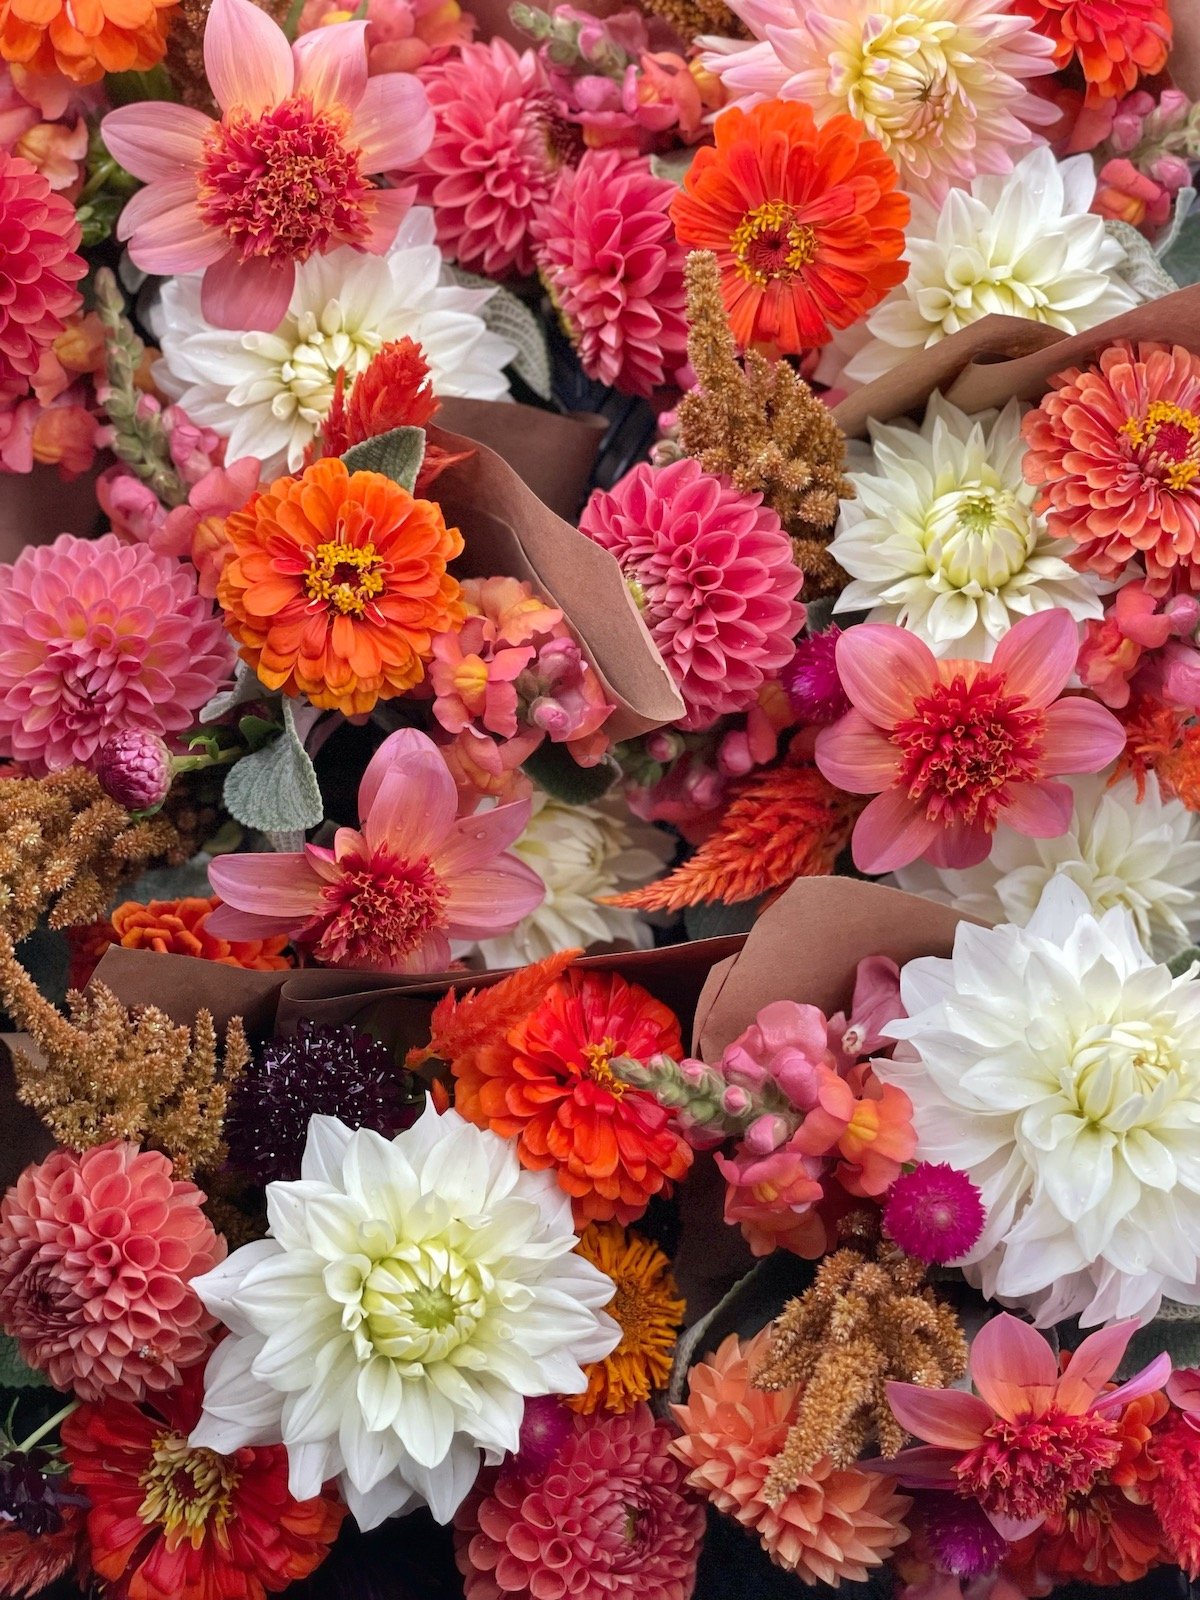
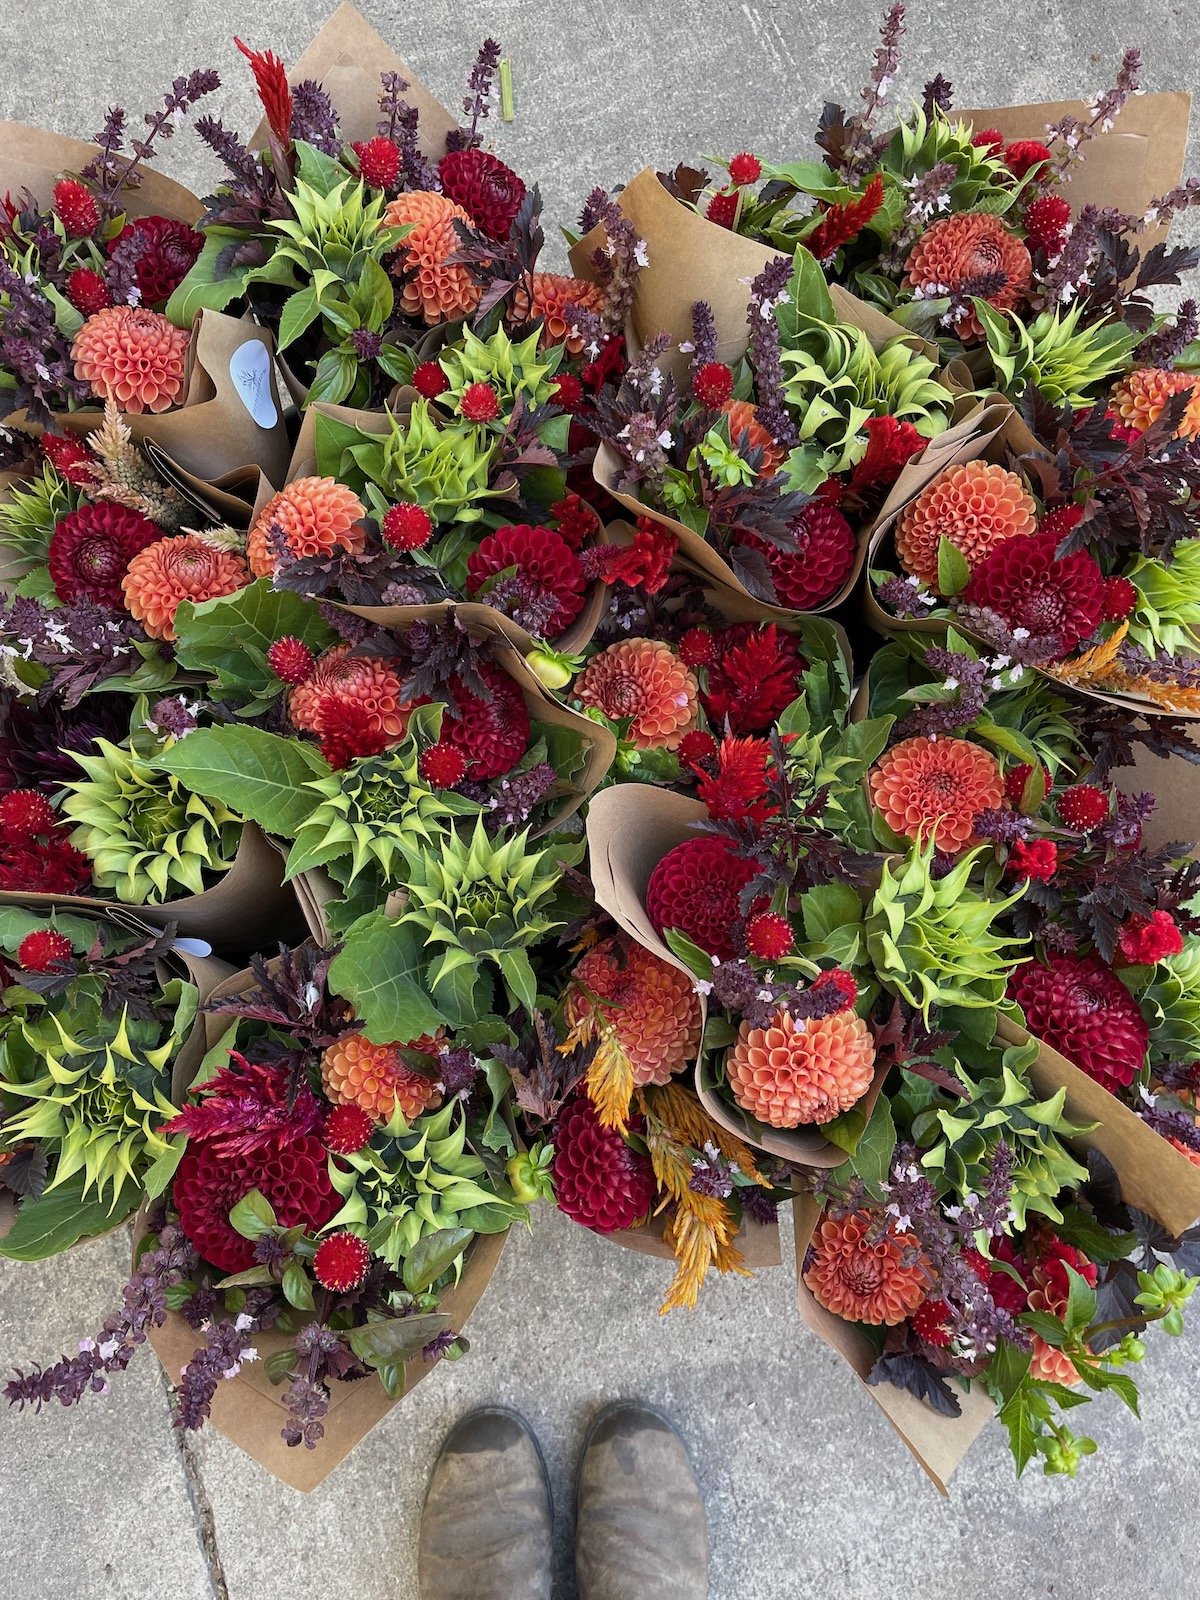
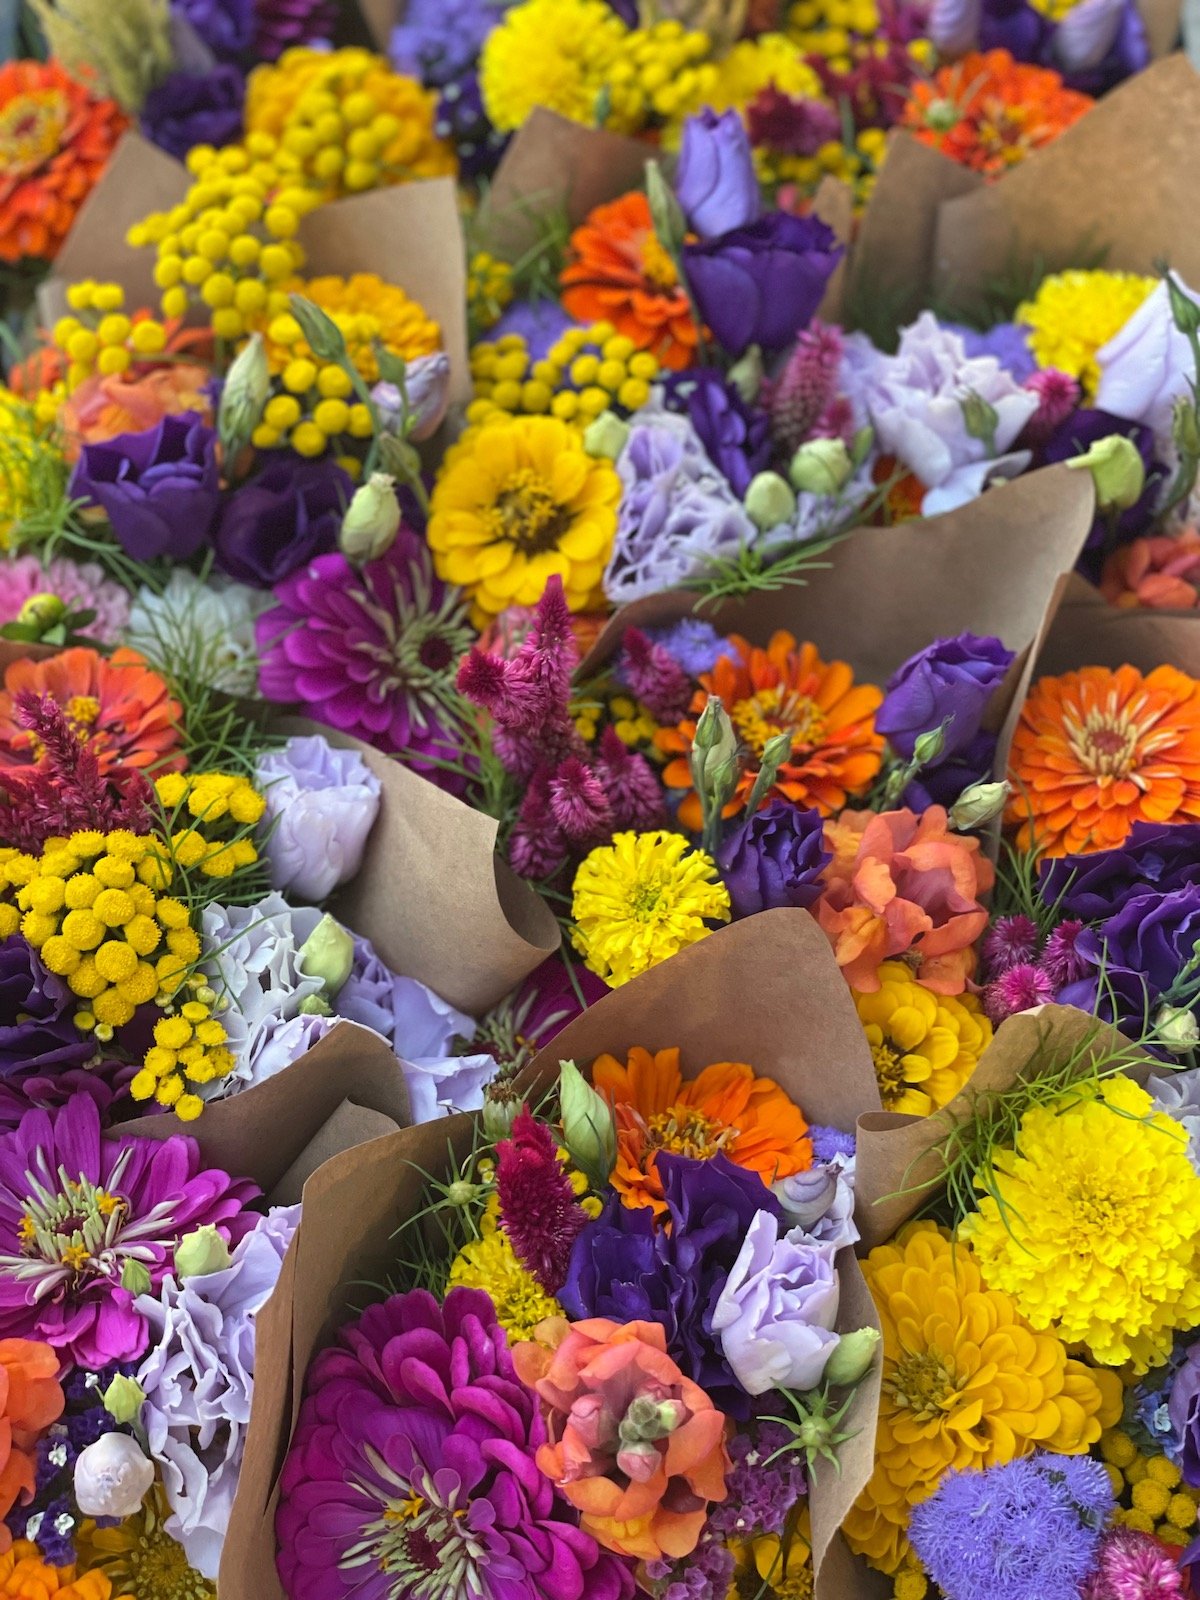
As we dive into the detailed planning of our cut flower beds for the upcoming 2023 growing season in Central Iowa (zone 5), we find immense value in reflecting on past bouquets. Looking back, we pinpoint our favorite flower combinations by season, helping us recreate the magic in the coming months. For those just starting, we're excited to share our cherished cut flower bouquet combinations, offering inspiration for beautiful floral pairings or sparking ideas for new blooms to cultivate. Let's plant the seeds of creativity together!
We’re in the midst of large-scale planning our cut flower beds for the 2023 growing season here in Central Iowa, zone 5 As we work on our plan, we always find it useful to look back at our bouquets by season to understand flower combinations we LOVED to make sure we can have those flowers all blooming around the same time to recreate the recipe we used. No need to recreate the wheel, right?!
For someone who might just be starting out, we thought it would be great to share our favorite cut flower bouquet combinations to help inspire possible combinations of flowers to use together, or to even ‘plant a seed’ for some new flowers you might want to try to grow.
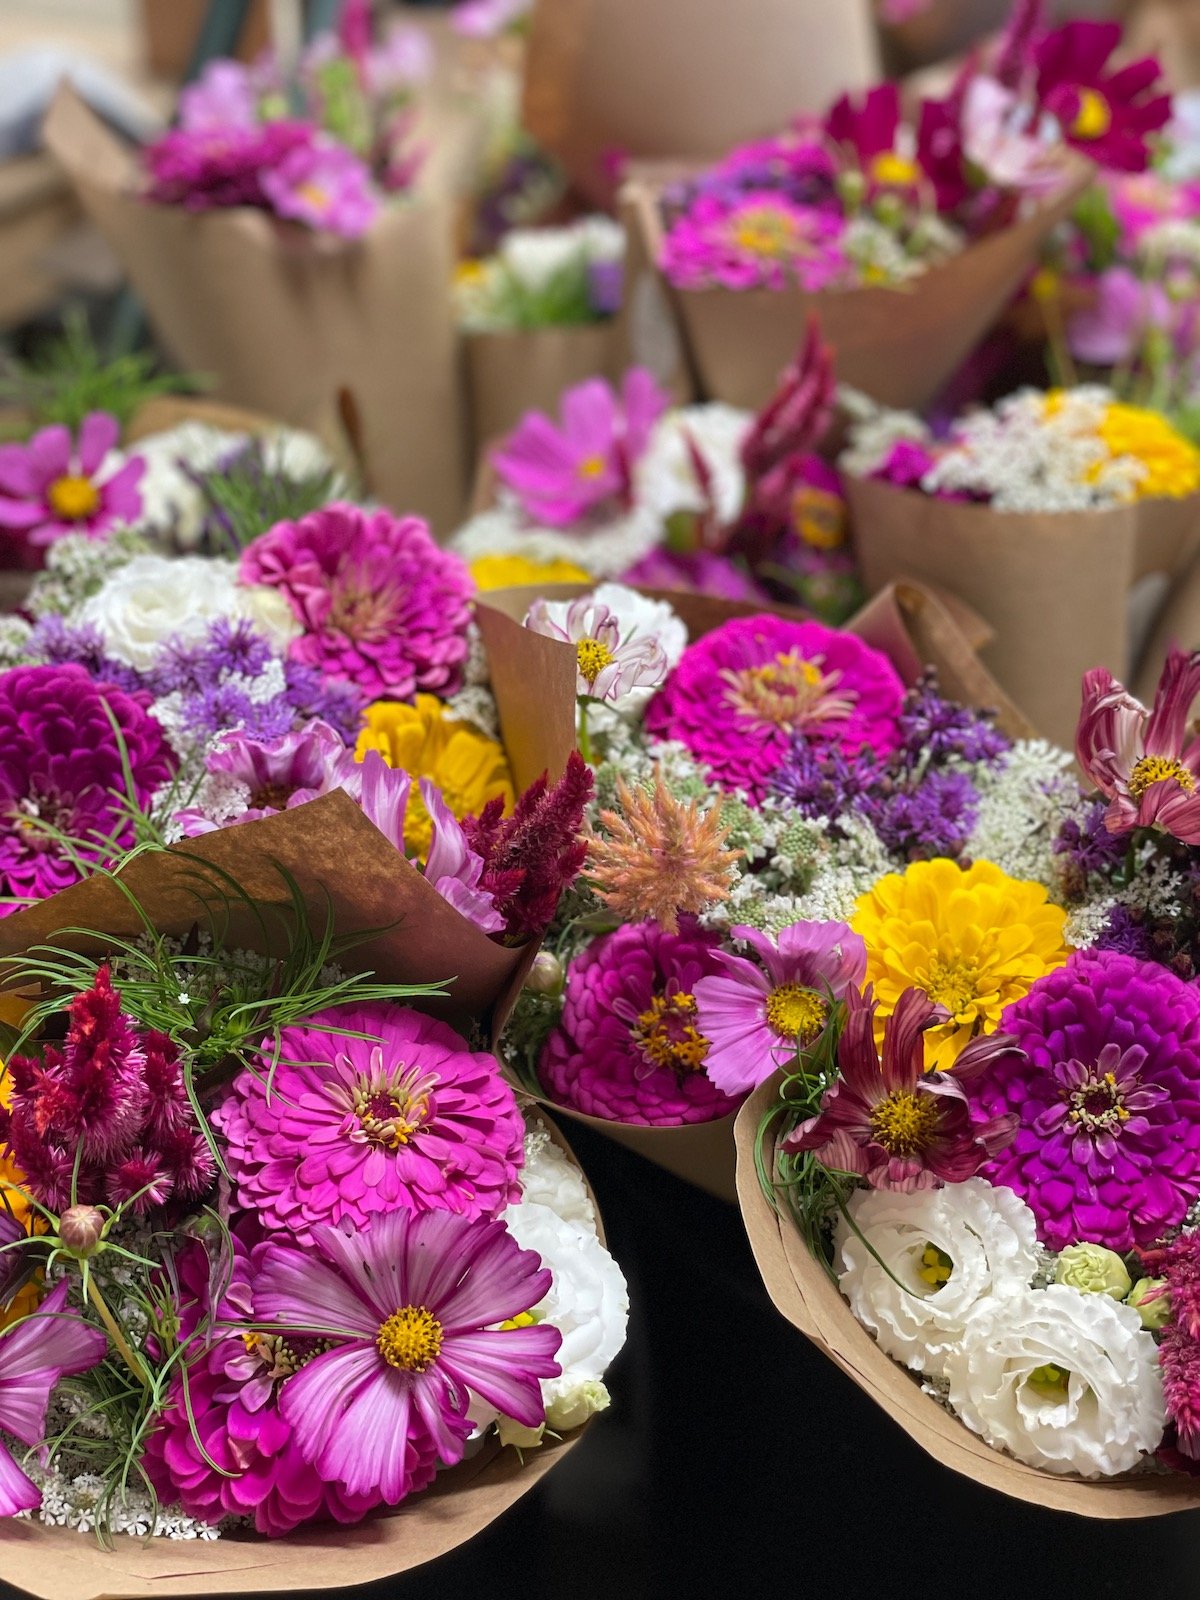
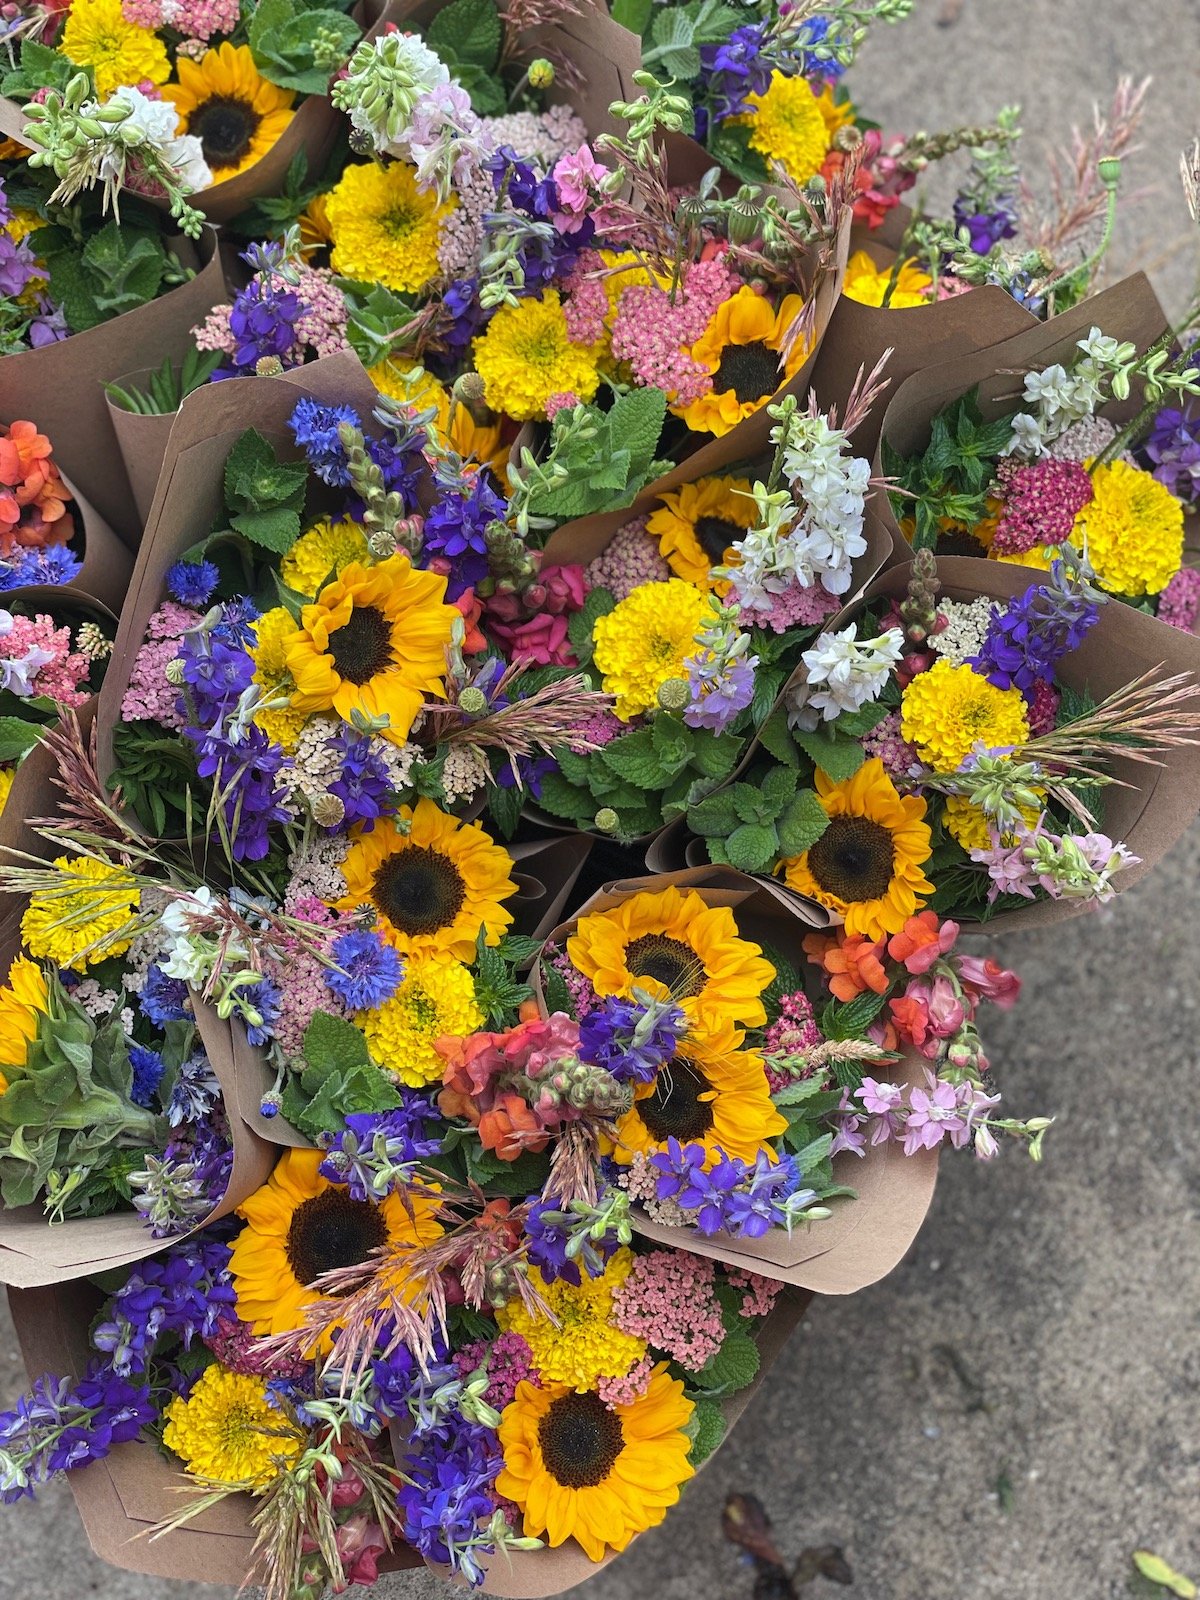
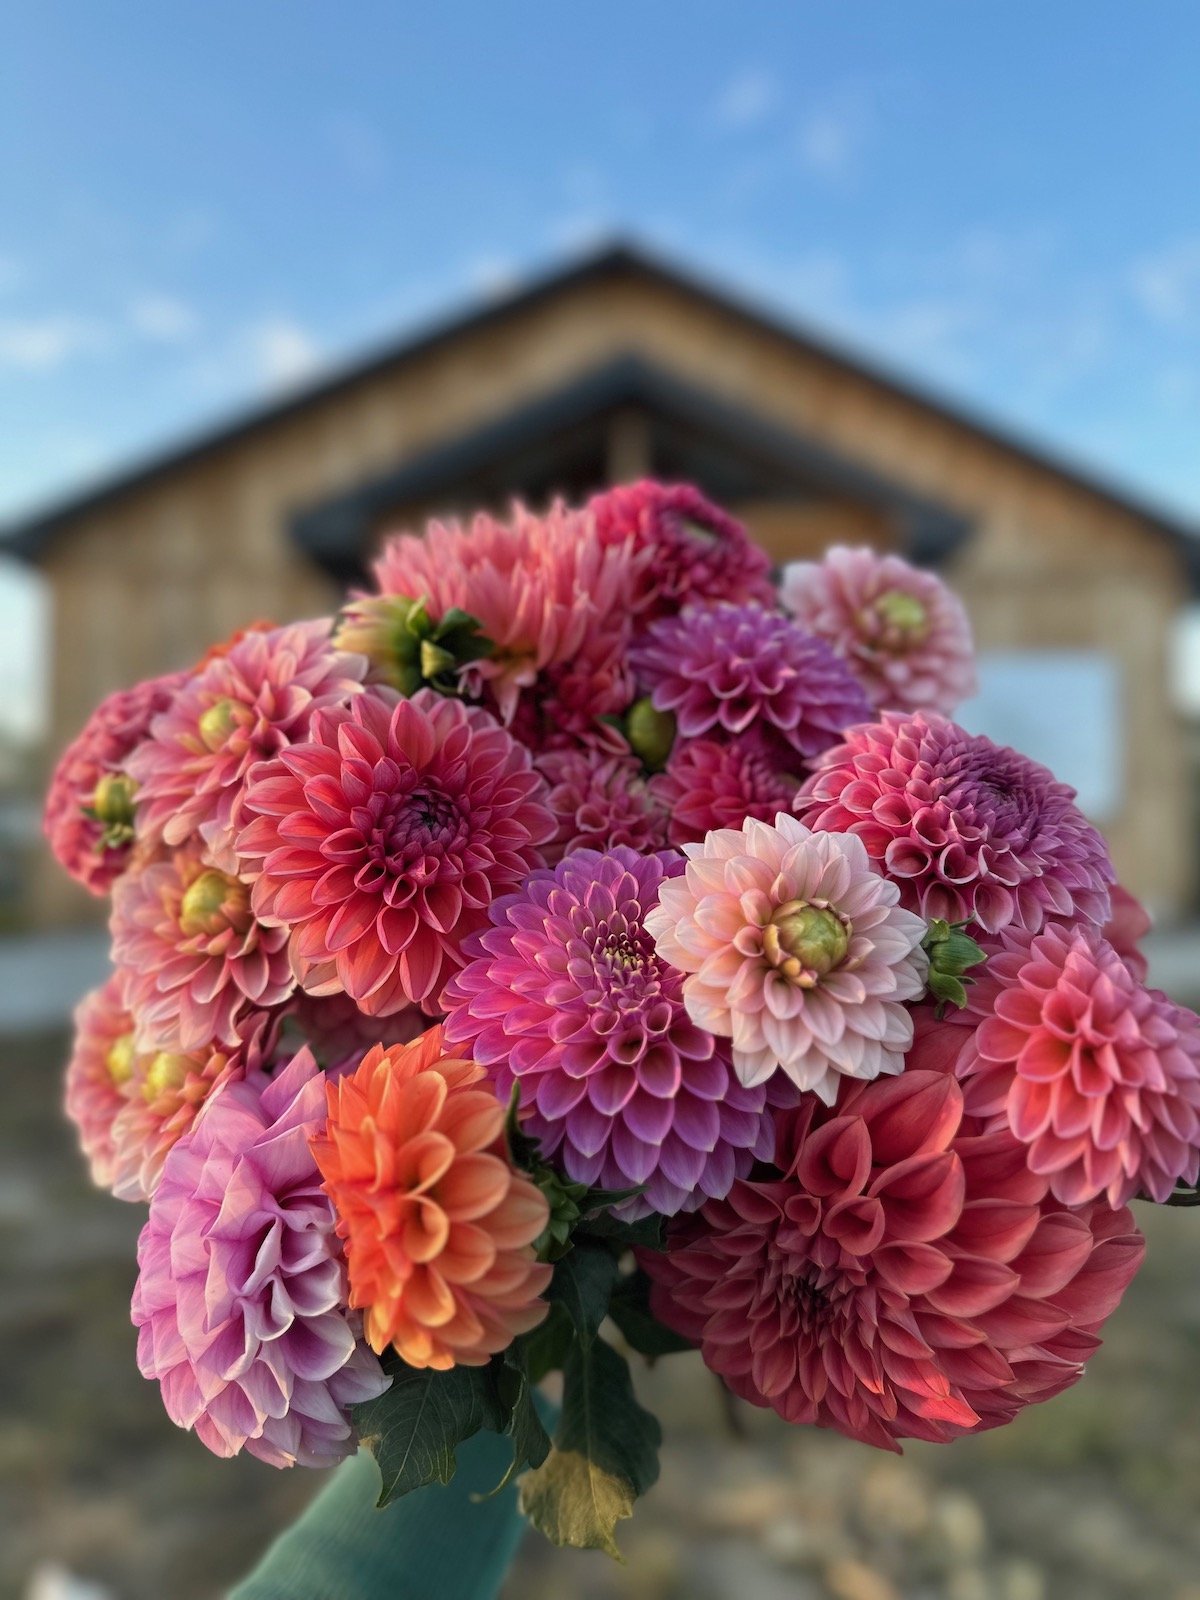
Here’s a few of the flower bouquet combinations we LOVE!


Creating a Dried Flower Wall
In 2022, we brought the beauty of dried flowers to life with a mesmerizing Gomphrena wall at PepperHarrow Farm in Central Iowa. Guests marveled at the unique Audray Bicolor Rose variety, capturing attention with its vivid color and distinctive globe blooms. From easy cultivation to efficient harvesting and drying, discover our step-by-step guide to recreate this enchanting installation using cost-effective jute rope. Join us in the world of Gomphrena, and let your creativity bloom! 🌸✨ #DriedFlowers #Gomphrena #FloralInspiration
Dried flowers have increased in popularity over the last several several years and the next few years promise to be no different.
Recognizing the growing trend of dried flowers across the globe, in 2022, we grew several flower varieties simply to set aside to dry in order to create several new dried floral installations on the farm, including a stunning dried flower wall in our new event barn.
The dried flower wall was an instant hit with guests visiting the farm. Guests would use the dried flower wall to take photos for a selfie opportunity, simply were inspired and enjoyed the beauty of it, and often asked and were inspired to attempt to dry flowers on their own. The wall was a conversation starter that grabbed the attention with anyone visiting!
So what flowers did we dry to create this beautiful installation? There are many different types of flowers that we LOVE for drying, which we’ll cover in a different post, but our most favorite flower for drying is Gomphrena (Globe Amaranth). These beautiful flowers are true to name and have little globe blooms on top of long, tall stems. Not only is their color extremely vivid, fresh or dried, but their unique shape and texture makes them a fun, tactile flower to dry. People cannot help themselves from reaching out to touch these beautiful blooms and often remark that they cannot believe they’re real. Fresh or dried, they look the same color either way. Just incredible!
The variety of Gomphrena we chose for our dried flower wall is called Audray Bicolor Rose. This unique shade of pink has a muted tone that isn’t too bright and bold for our muted space. The color looks perfect against our white board and batten wall in our event space. The perfect pop of color!

Growing, Bundling & Drying Gomphrena

In the garden
Growing Gomphrena is pretty easy to grow, starting from seed. It’s one of the easier annuals we grow each year at the farm.
To start, we plant 10 trays of 72 cells of plants, then we plant them out in a 100’ row. We planted this amount to really make the huge visual impact we were looking for with our dried flower wall.
Planting in rows is an efficient way to help plant, manage, maintain, and harvest these flowers for our production purposes.

Harvest
Gomphrena is harvested out of the cut flower garden at the peak of the bloom, meaning that we wait until the bloom has reached a mature stage in the bloom cycle, but not too far gone where it would begin to drop their seed.
Once the Gomphrena is harvested from the garden, we remove all of the foliage from the blooms and make bundles of about 40 stems of these flowers, keeping all of the blooms at the same length. Once they are in the bundle together, we use a stem chopper to cut the bottom of the stems to make them the same length for a clean look. From there, we take a rubber band and put it around the bundle to keep them in place and use a paperclip to hang the bundle from the waxed jute on the wall.
The bundles of Gomphrena take about 2 weeks to dry, but this will be dependent on the temperature of the space you have them drying. It’s important to have good airflow (we ran a fan in front of them), and to keep your flowers out of direct sunlight. The direct sun can fade the color on your flowers quite quickly. Typically the warmer and drier your space is, the quicker your flowers will dry. Cool and moist conditions will take a bit longer to dry your flowers.
How to Make a Dried Flower Wall
The flower wall was started initially with thin metal chain link, but after we finished out two of the rows we were planning on, we ran out, and it was pretty expensive to buy more material. Adam found a great substitute and changed to a nice, light weight jute rope that ended up looking great and worked perfectly. You can find the jute roping here.
We hung the jute rope from screws that we put on either end, the length of the flower wall. The jute was knotted on each screw, pulled taut. As you start hanging the Gomphrena bundles, they will dip down in the middle due to the weight. Pulling taut will make sure that each row doesn’t bow too much.
The flower wall started first with just 3 rows of roping with 40 bundles on each row. Once we started adding the bundles, we ended up adding a 4th row, because of the sheer volume of dried flower bundles we had to work with and because the wall ended up looking a even better with another row of Gomphrena.
From there, we hung the bundles off of the jute with the paperclips, which was a cost effective and easy way to manage the process. For the most part, the paperclip blended into the whole scene and you really couldn’t see it, because of the impact of the entire scene.
We hope we’ve inspired you to try something new next season at your home. Whether that’s simply trying to grow Gomphrena as a new flower in your garden, trying to dry a few flowers to keep and enjoy, or creating your own dried flower wall installation for a little bit larger project!
XX Jenn and Adam
Dahlia Tuber Storage Tips
Dahlias are a rising favorite for flower enthusiasts, and proper tuber storage is key for their annual revival. After the first frost, cut stems, clean, and air-dry tubers. Divide and let them sit for 24 hours before storing in peat moss in a well-ventilated box. Maintain 40-50°F, 80% humidity, and check regularly for pests or rot. By following these steps, ensure your dahlia tubers are primed for a vibrant spring garden display. 🌸✨ #DahliaCare #GardeningTips #SpringBlooms
Dahlias are becoming an increasingly popular cut flower for flowers farmers and home gardeners alike. With many different colors, sizes and shapes, it’s easy to see why they’re a fan favorite! Dahlia flowers start from a tuber, which means that they have a swollen underground stem that stores energy for the plant to grow. While dahlias are not winter hardy in growing zones that have temperatures that dip consistently below 32 degrees Fahrenheit, their tubers can be dug up and stored over the winter months to be replanted in the spring. Proper dahlia tuber storage is essential to ensure that the tubers are healthy and ready to grow when the time comes to plant them again the following growing season. Today, we wanted to share some of our tips with y’all. Below are some tips for storing dahlia tubers throughout the winter

DAHLIA STORAGE TIPS
The best time to dig up dahlia tubers is after the first frost, when the plant has died back and the foliage has turned yellow. This usually occurs in mid October or early November.
Cut off the stems/greenery: Cut off the stems of the plants about 6 inches above the tubers, leaving a small stem attached to each tuber.
Clean and dry the tubers: Before storing the tubers, gently brush off any excess dirt, wash and allow them to air dry for a couple days in a well-ventilated area.
Once dry, divide dahlias and let sit out for another 24 hours.
Storage: Place tubers into peat moss as a storage medium in a ventilated box. We use bulb crates with craft paper liner on the bottom. A temperature of around 40-50°F is ideal, with the humidity kept around 80%, and plenty of airflow (we keep a fan running).
Protect from pests: It is important to check the tubers regularly for any signs of pests or rot. If you notice any issues, remove the affected tubers and dispose of them to prevent the problem from spreading. Common pests we see are roly-poly bugs. They will make a little village and eat your tubers. If you find them, take the entire crate out and rewash the tubers.
Check your tubers daily to make sure the temperature is within the range noted above, the humidity levels are correct and pull a few out to take a look at them from the peat moss (placing them back into and well under the peat moss aftterwards).
By following these simple steps, you can ensure that your dahlia tubers are properly stored and ready to be replanted in the spring. With a little bit of care and attention, you can enjoy these beautiful flowers in your garden for years to come.
XX Jenn and Adam

Rainbow Wreath Making
Our beloved rainbow wreaths, adorned with dried flowers in every color, have become a holiday sensation. Inspired by a guest at a wreath-making workshop, these vibrant creations infuse cheer into the season. The process starts in summer, with carefully dried flowers representing each color of the rainbow. From yellow statice to blue saliva, each wreath is a masterpiece, adding a modern and festive touch to your holiday decor. Will you join the colorful tradition? 🌈✨ #RainbowWreaths #HolidayDecor #FloralMagic
Our signature rainbow wreaths have been increasingly popular year over year.
Dried flowers in every color of the rainbow laid upon a nest of fresh evergreens, it really makes those beautiful rainbow colors pop and it smells sooo good! Where did the idea for the rainbow wreath come from? The original idea came from a guest at a wreath making workshop three years ago. She started using dried flowers in various, more random colors in her wreath. They were clustered together, which made the colors pop even more. I took one look at it and it instantly dawned on me that I could use my dried flowers to make an extraordinary rainbow colored wreath. A day or two after the class, I raced to the shop to try and see if I could make my own creation. Sure enough, the rainbow wreath idea turned out perfectly and looked absolutely stunning!

Jenn holds a rainbow wreath in the lavender field with her dog chewy
How do we make the rainbow wreaths? Well, the process starts in the summer when we set aside time to cut fresh flowers for drying, specifically to make the rainbow wreaths. We take an hour each week, usually at the end of the day to go out and cut flowers in bunches of 10 to bring back to hang in our shop.
The flowers usually take around 10 days to dry in our shop area, but they’re stored in there for a few months before we end up using them in the wreaths. Any extra dried flowers are sold at farmer’s market, at specialty shops or in our own farm store.
As you can see, we use the colors of the rainbow. The flowers and citrus included in the wreath are as follows: yellow statice, yellow marigolds, yellow yarrow, orange slices, orange marigolds, red gomphrena, winterberry, dark purple/wine celosia, burgundy Chester Copperpot celosia, purple statice, dark blue larkspur, blue saliva, ruscus, and seeded eucalyptus.
Sometimes these ingredients vary and I’ll use other things to sub in for color, or I’ll only use 1 red item for example, so you can be flexible with what you use for your recipe and how you do your bunches. There’s lots of creative liberties you can take when putting one together.

Rainbow Wreath
What do you think about the rainbow wreath? Worth the hype? Are you encouraged to try to make one of your own? They’re sure to add a modern, cheery touch to the holiday season!
XX Jenn